Disclaimer: I merely dabbled in cyanotype. In case expert advice contradicts what I’m saying here: they’re right, I’m wrong.
This year, I was given a most wonderful Father’s Day gift, a draft, technical pen on tracing paper, that my father made in 1960 as part of his graduation as a “technisch ingenieur”, industrial engineer.

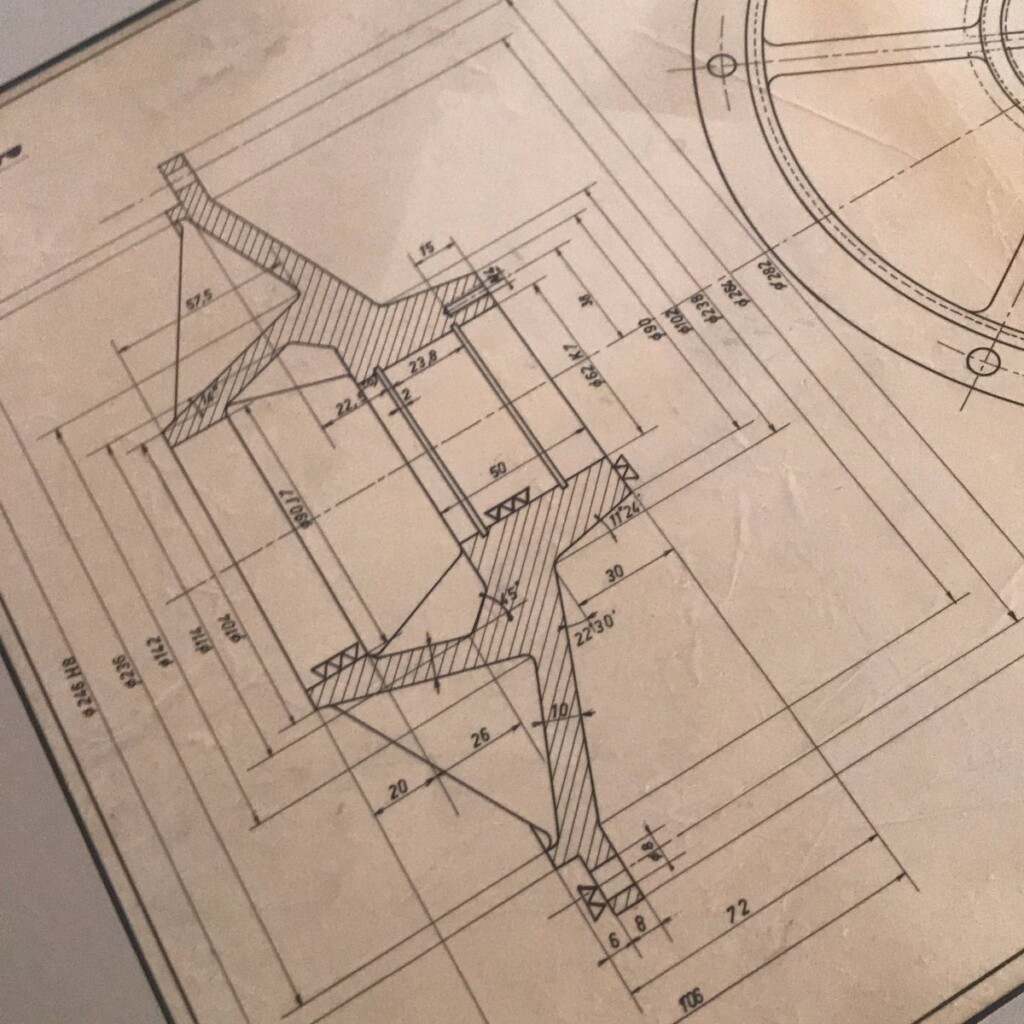

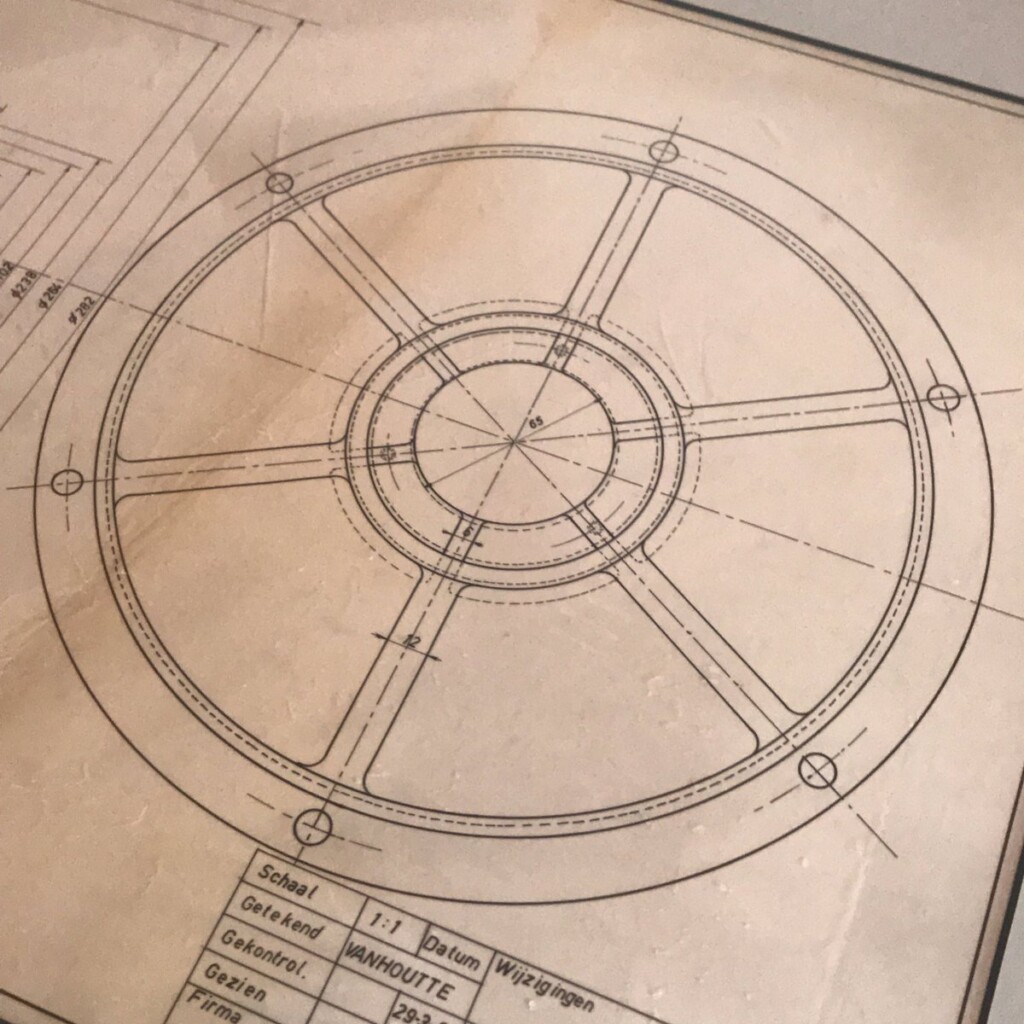
Coincidentally, after a long winding path, I ended up using the same type of technical pens for my plots. They excel at giving a constant width, deep black lines on smooth paper.
I never made a connection between what I do and what my dad did, until that gift. With upcoming minor surgery and recovery time, and holidays, I had a few weeks to try some things out, to connect.
Blueprint
Although long obsolete, the blueprint is an immediately recognizable aesthetic. I’ve toyed with the look for prints, but discarded it as it felt too tacky, too cliché.

But with some time on our hands, maybe we can do it properly.
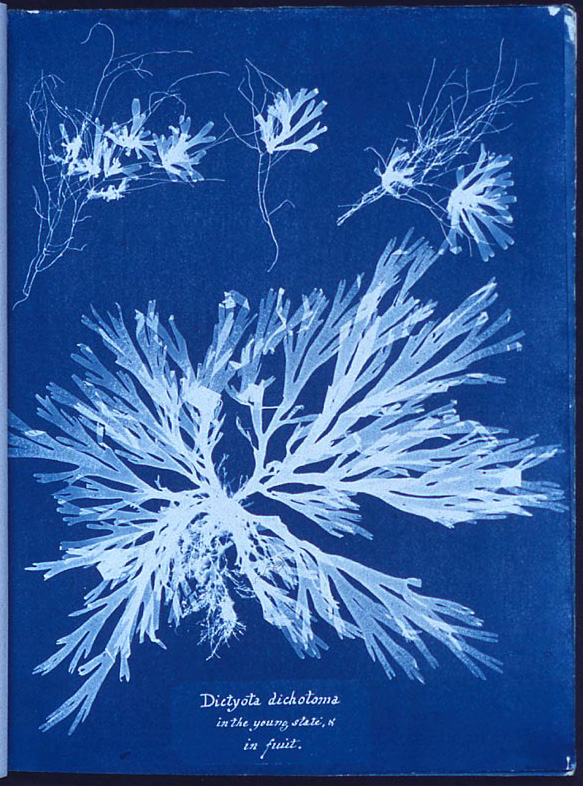
Blueprinting is a contact print process on light-sensitive paper, its origins tracing back to 1842 when English scientist and astronomer Sir John Herschel discovered the procedure. He believed it to be useful for copying notes and diagrams, but good friend of the family Anna Atkins showed its real potential in her groundbreaking, self-published Photographs of British Algae: Cyanotype Impressions (1843).
Cyanotype, its name referring to its particularly vibrant blue, is essentially a form of photography, iron-based instead of the more usual silver. And it turns out it’s a relatively cheap, non-toxic, robust activity we can do at home. This is pretty much all we need:

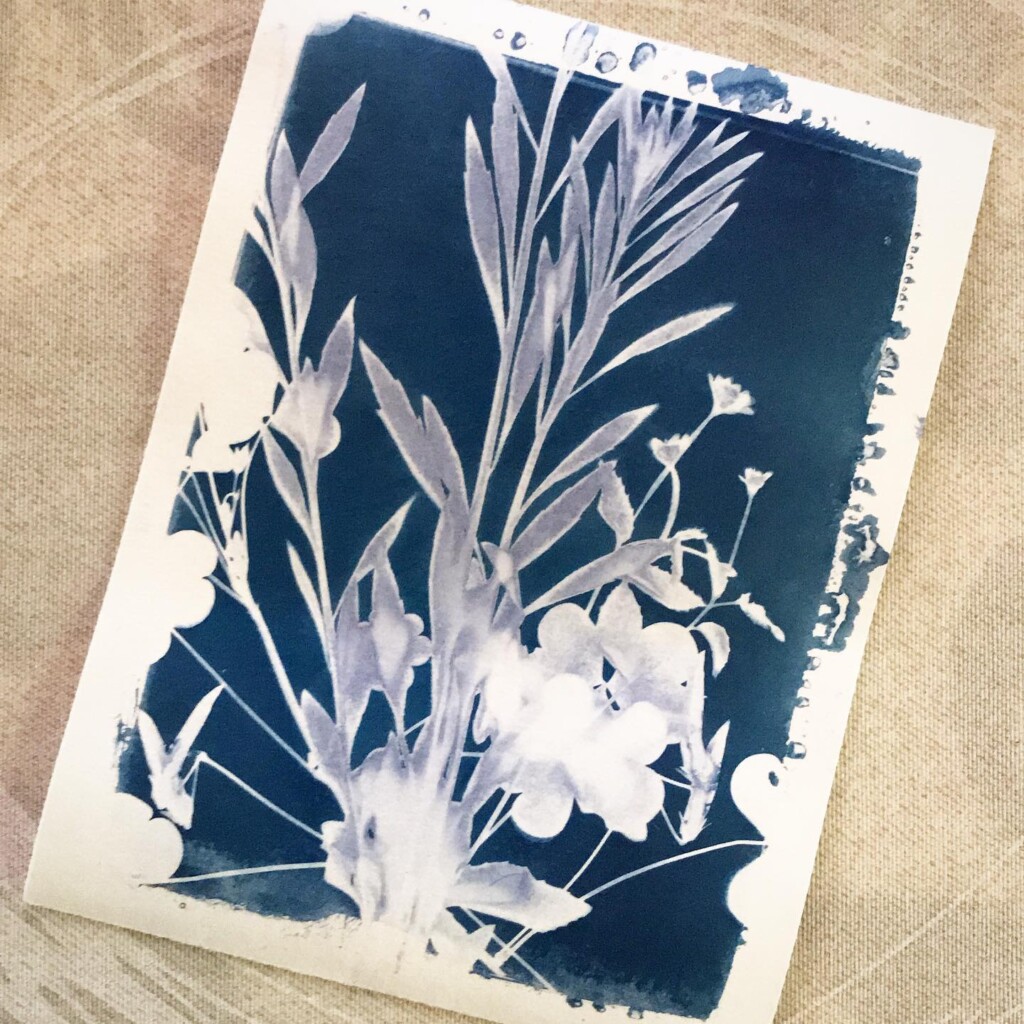
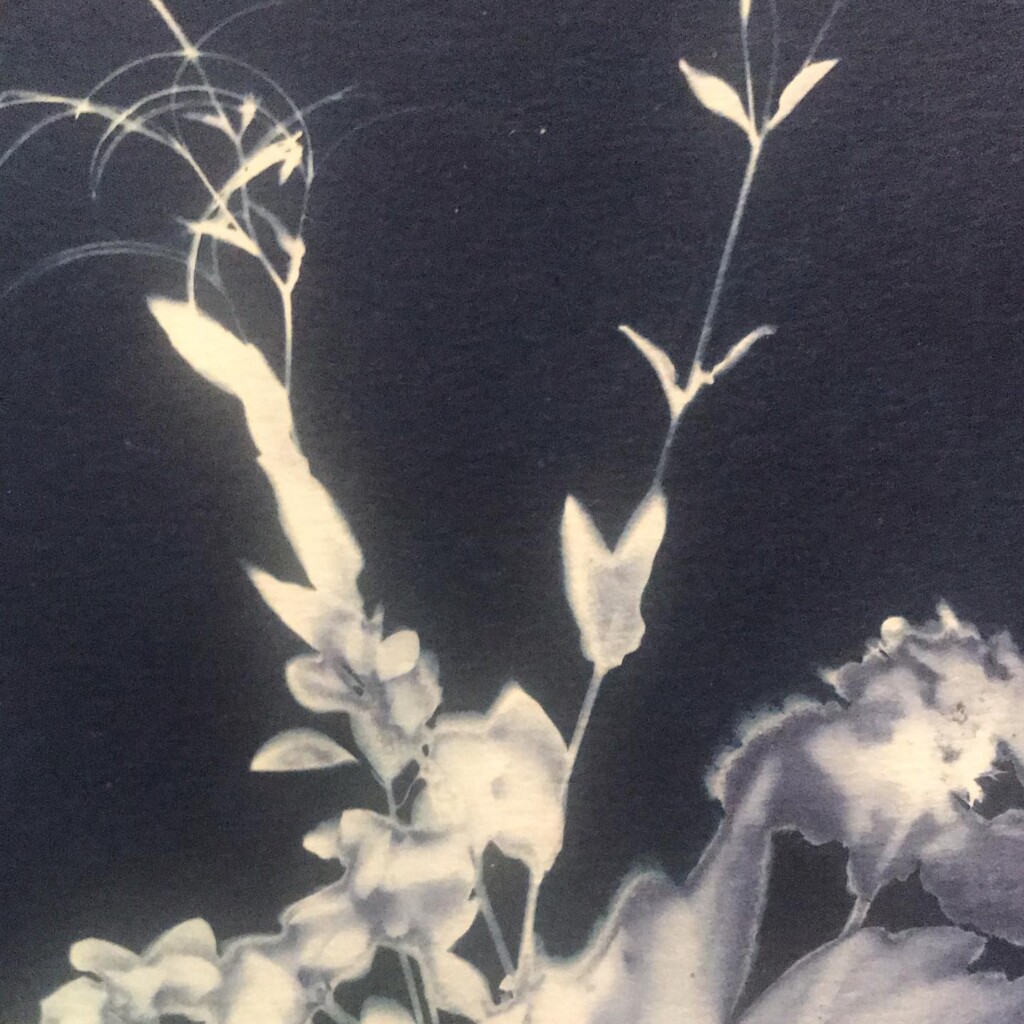
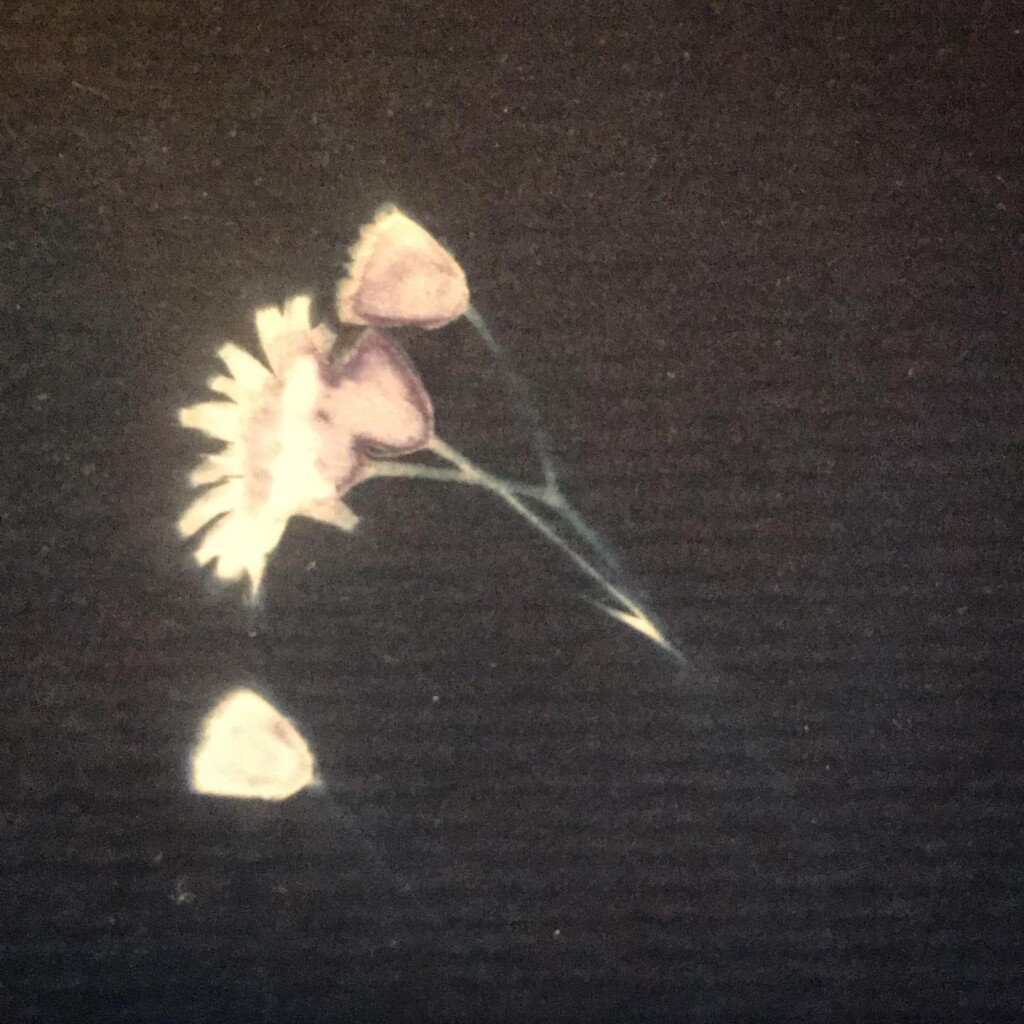
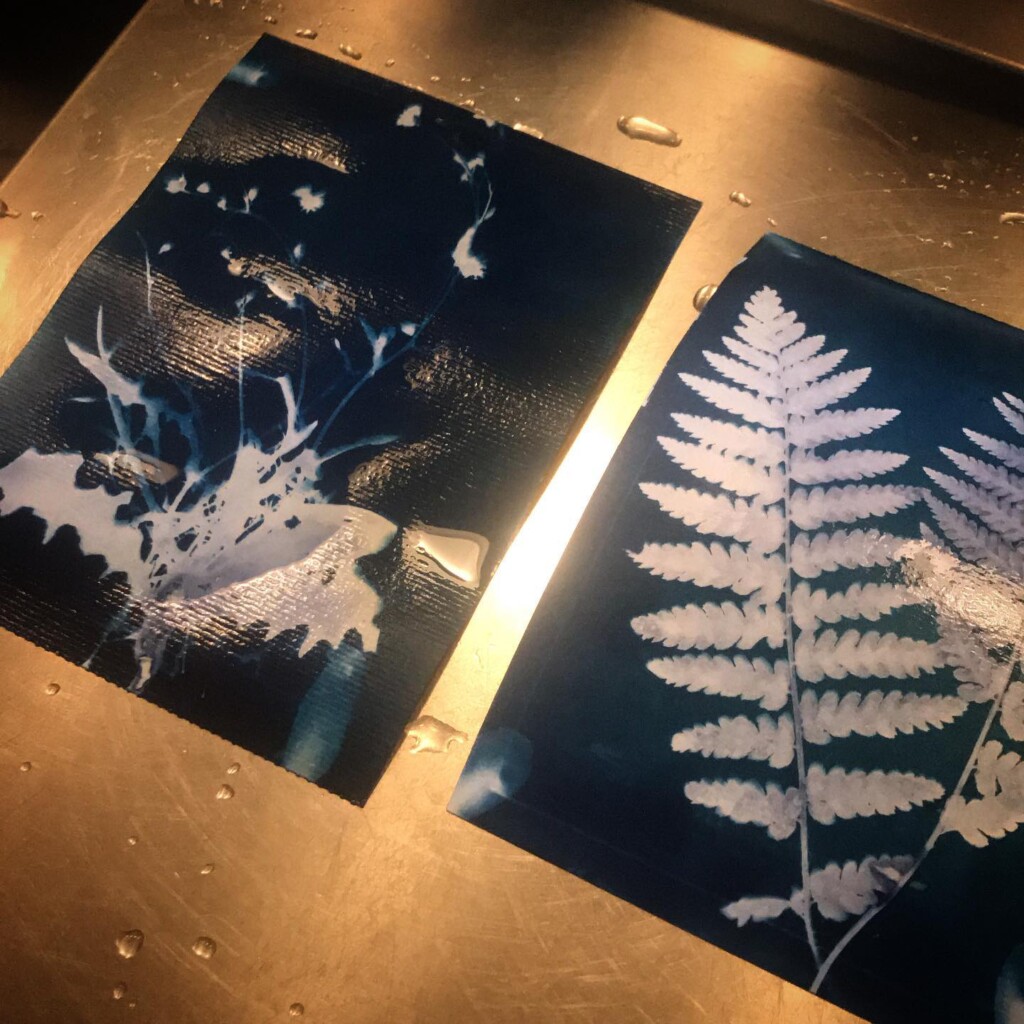
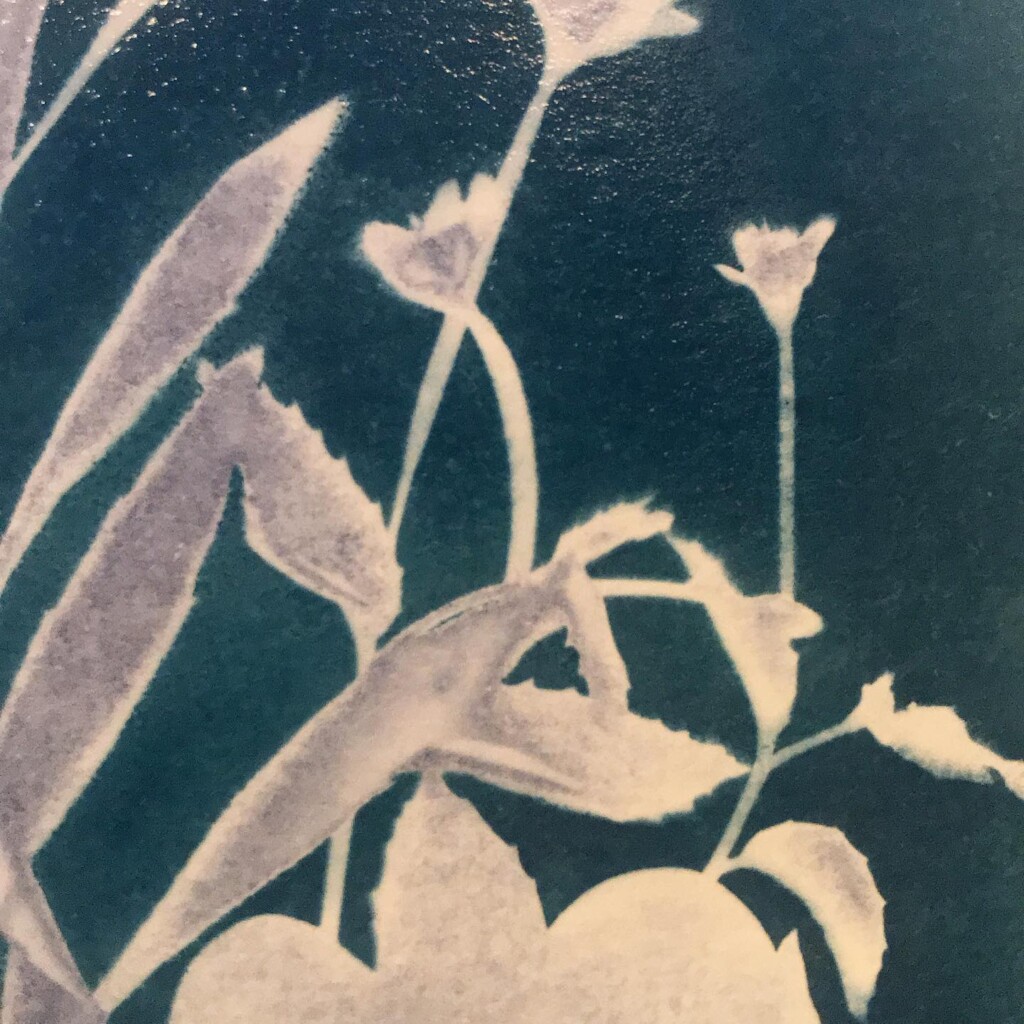
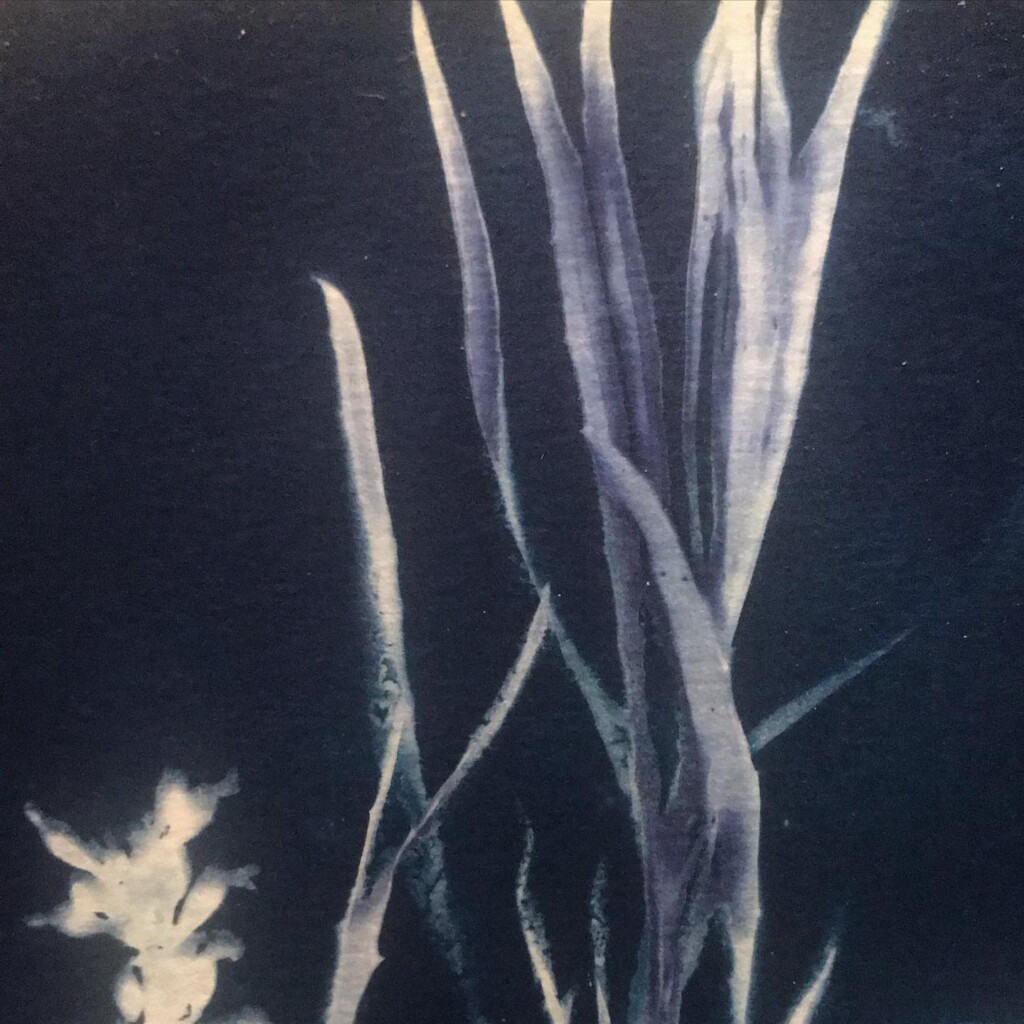
The principle behind it is that photosensitized paper, or cloth, is covered with an object, or a photo negative, and is exposed to the sun. UV light causes a chemical reaction in the exposed areas and a Prussian blue dye is created, permeating those areas. To end the exposure, the paper is rinsed with water until all traces of unexposed chemical are washed away. What remains is the blue color.
It looks like we need 3 things:
- sensitized paper strong enough to survive being soaked,
- a source of UV light,
- something to image.
Kitchen chemistry
The sensitized paper can be bought directly: ask around for a local specialty photography shop, look up “cyanotype” online in a place like http://stores.photoformulary.com/, or if all other possibilities are exhausted, on Amazon. Another option is to buy the required solutions and use our own paper, soaked with the prepared mixture. And finally, my preference, we can buy the dry chemicals, prepare our own solutions and use these. As these things go, the more ready-for-use we buy, the higher the cost. But even then, the cost of playing around with cyanotype is quite low.
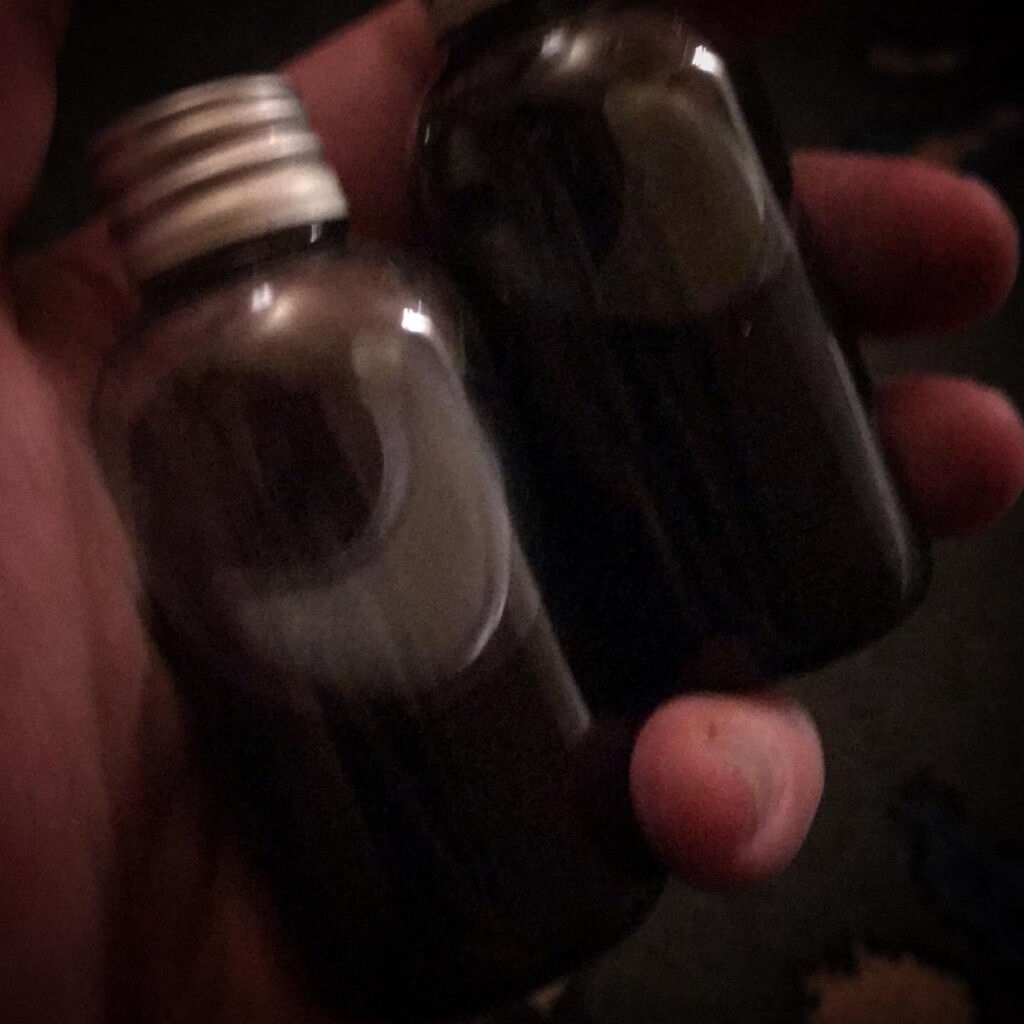
In its most basic form, the form I use, two chemicals are needed: ferric ammonium citrate and potassium ferricyanide. About 20$ gets us 100g of each. With a classical formula we end up with a total of 800ml photosensitive solution, enough to expose 200 to 400 A4 sized sheets!
Starting from the two compounds, we need some kitchen chemistry, preferably a day before the actual exposures. And “kitchen” is fine, both substances are harmless as long as we don’t do anything crazy with their solutions like boiling them or mixing them with strong acids. In fact, unlike photography the entire process is odorless and its potential to permanently stain is mercifully low.
We’ll need to prepare two solutions. Plenty of sites on the internet give us the instructions, and the classical formula vary somewhat. But unlike cake, the process is robust and the actual concentrations are flexible. One solution is 20-36 grams of ferric ammonium citrate in 100 ml of water, preferably demineralized. High concentrations can lead to bleeding of the color into thin unexposed areas. Lower concentrations can give sharper lines, but require longer exposure. But too low, and the color will not keep. I’ve gone down to 10 grams per 100 ml.
The second solution is 10-20 grams of potassium ferricyanide and again 100 ml of water. If the relative concentration of the ferricyanide in the final mix is too high, exposure times increase. But all in all, if we’re a gram, or a few grams, off, it will still work.
Both solutions keep well if stored dark and its best to let them “ripe” for 24h. The citrate has a tendency to grow a bit moldy over time (yumm, citrate!) but the mold can be scooped out with no ill-effect to the efficacy. I make batches of 50 ml each, and store them in small bottles covered in tin foil. Any lower and my scales aren’t precise enough. Any more, and I can’t use it up in a reasonable time, happy mold time!
Paper
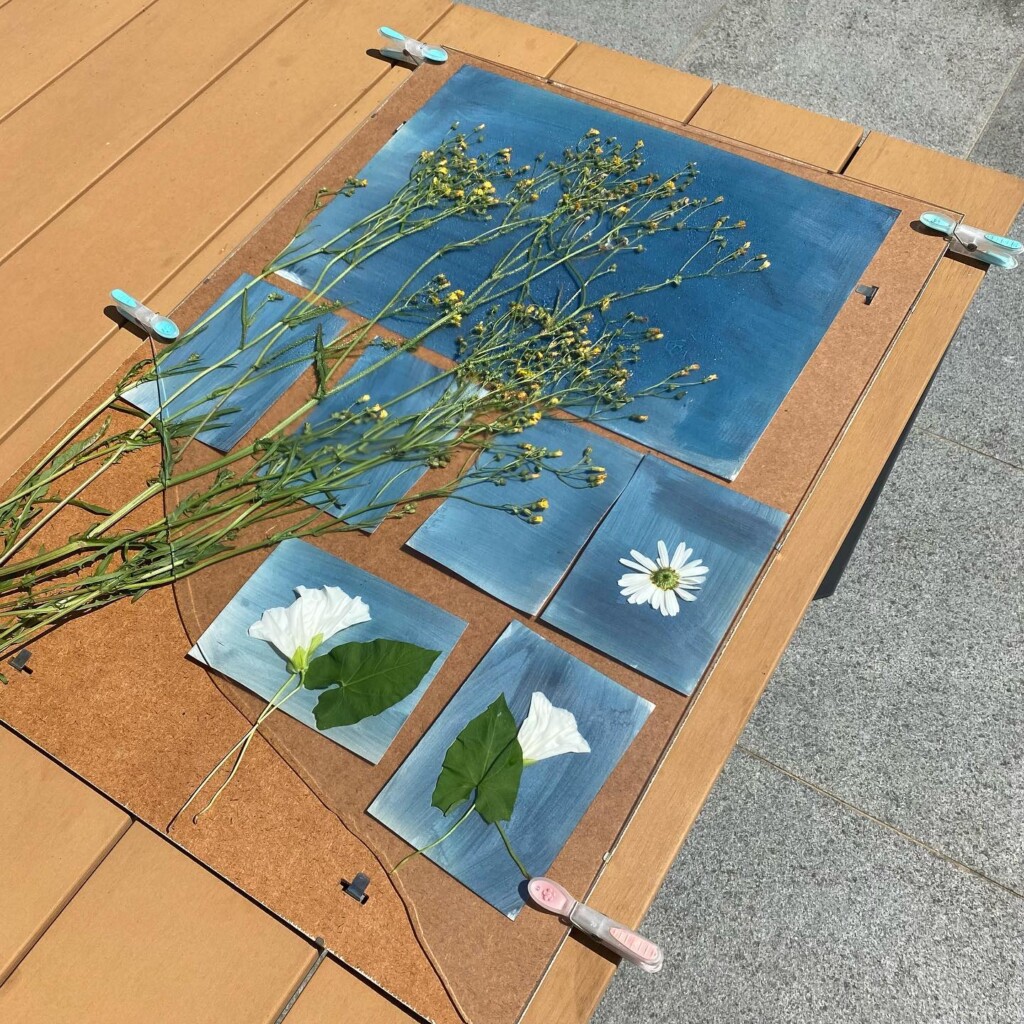
We have to keep in mind that we’ll be soaking the paper twice. Once when painting on the photosensitive mixture, and a second time to stop the exposure. In my experience, any 200+ g/m² paper will work, with mixed media and aquarelle type paper being the most suited.
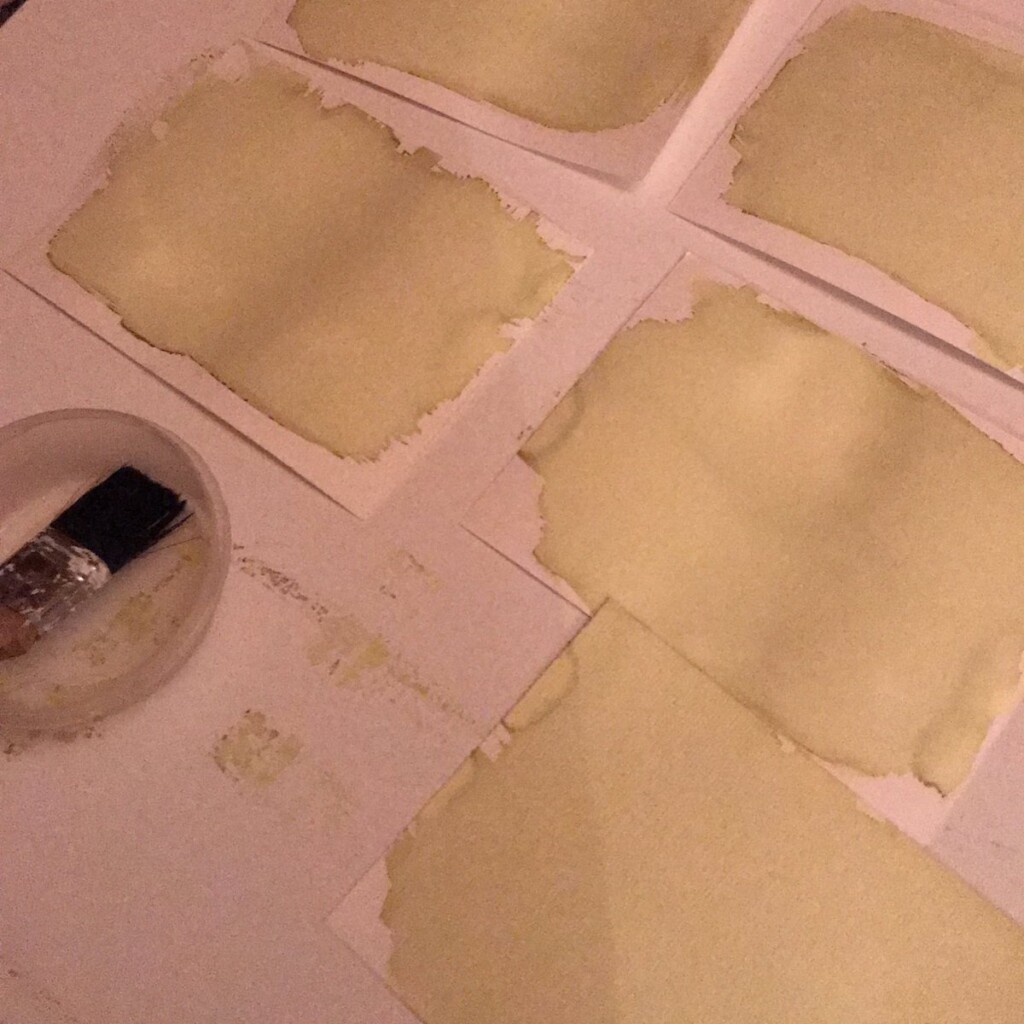
For my first experiments, I used an ordinary flat painting brush, but it was hard to cover the paper evenly. I settled on using the type of foam applicator brushes that craft stores sell.

With these, I found it easy to homogeneously coat even larger surfaces and I needed less solution per page, about 1 ml for an A5 page, 2 ml for A4 and 4 ml per A3.
Before coating the paper, we first need to mix the solutions evenly. I use small 5 ml needleless syringes and add about 10 ml of each solution in a third container. Take care not to cross-contaminate the two bottles, use separate syringes for the two solutions.
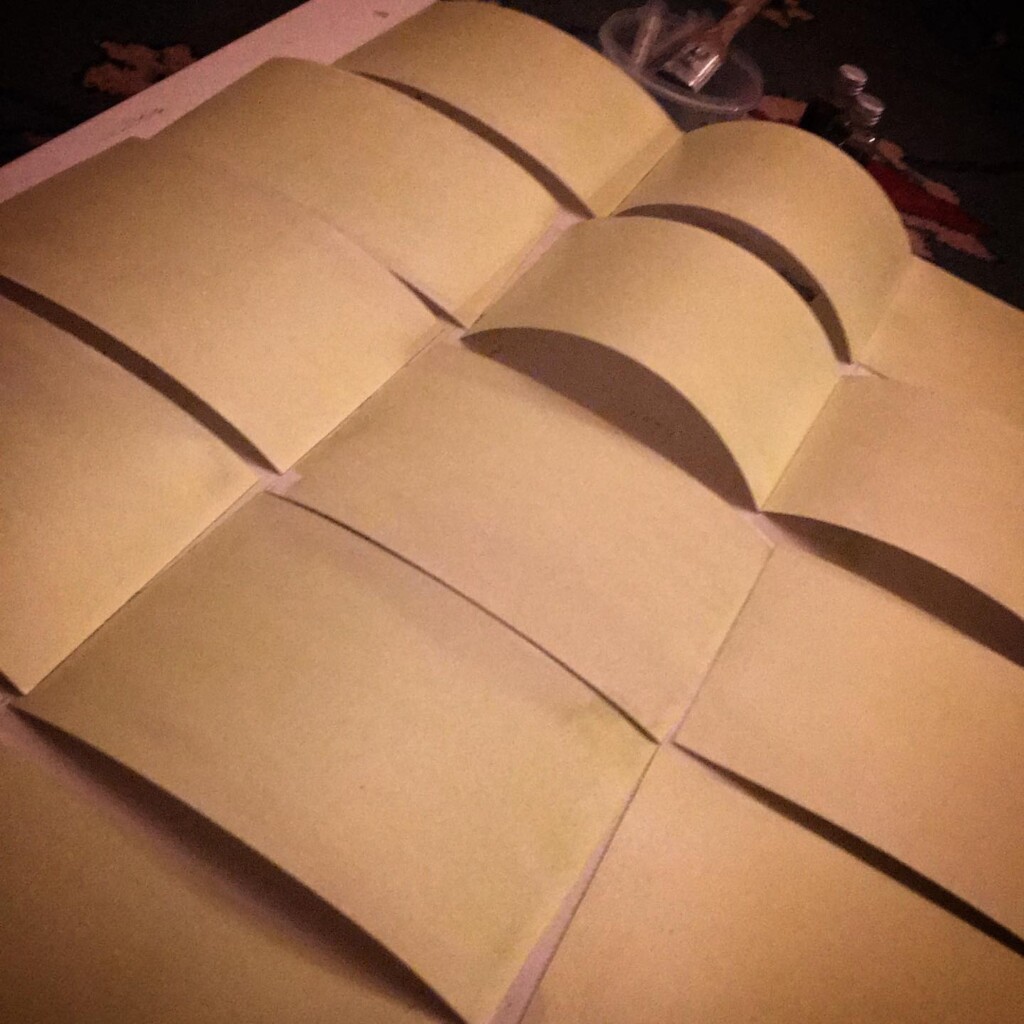
The mixture *is* light-sensitive. an indoor room without sunlight is fine, it doesn’t need to be a dark room. Use enough light to be safe. Incandescent or LED lights are ok. Avoid fluorescent bulbs, they could have just enough UV to be a nuisance. We can coat as much paper as we want, as long as we store it dark and dry. The coating will start as a nice lime yellow. Depending on impurities in the chemical stock, in the brushes, in the paper, it might evolve into a somewhat less appealing moss-brackish green during drying or after storing it for some time. This has almost no effect on the prints. Apparently, if any blue turns up, moisture has affected the paper and that will definitely show up as stains in the final prints.
Let the paper thoroughly dry before storing it in a dark envelope or container away from light.
Exposure
Suppose we have something to image, more on that later, we need a source of UV light. So far, I only used the sun, for me it’s part of the charm that weather conditions play a part. Others have had success with filtered UV, or blacklight, bulbs or even unfiltered UV lights, although I haven’t been able to track an affordable one down myself.
Contrary to popular belief, uncoated glass does not block UV light, or at least not that part of the UV spectrum we need here. So when we look up cyanotype on the internet, we find that the most common way of making an exposure is by layering a solid backing, the paper, the subject and a plate of glass and firmly clamping those together. Often a hinged contact print frame is used, but some clothing pins work for me. Since it’s a contact technique, the sharpest image is obtained if the subject is in close, even contact with the paper and doesn’t move during the exposure.
Since the paper is light sensitive, the “plate” should be prepared away from daylight. Exposure starts the moment sunlight hits the paper. Exposure time depends on the light, how high the sun is, how cloudy it is, the concentrations used, the transparency of any overlays, all in all a bit of trial and error. Luckily, it is very hard to overexpose. So we can always err on the long side.
At full, bright noon, I made successful exposures of 5 minutes, later in the day with overcast skies I’ve had exposures of 40 minutes. One useful trick is to keep some strips of sensitive paper from the same batch separate and expose such a strip next to the real deal to check how it’s coming along. We can always take a part of the test strip, rinse it off and see if we’re done yet. Personally I haven’t used this trick yet. Blueprints are more forgiving than photographs when it’s about dynamic range and contrast.
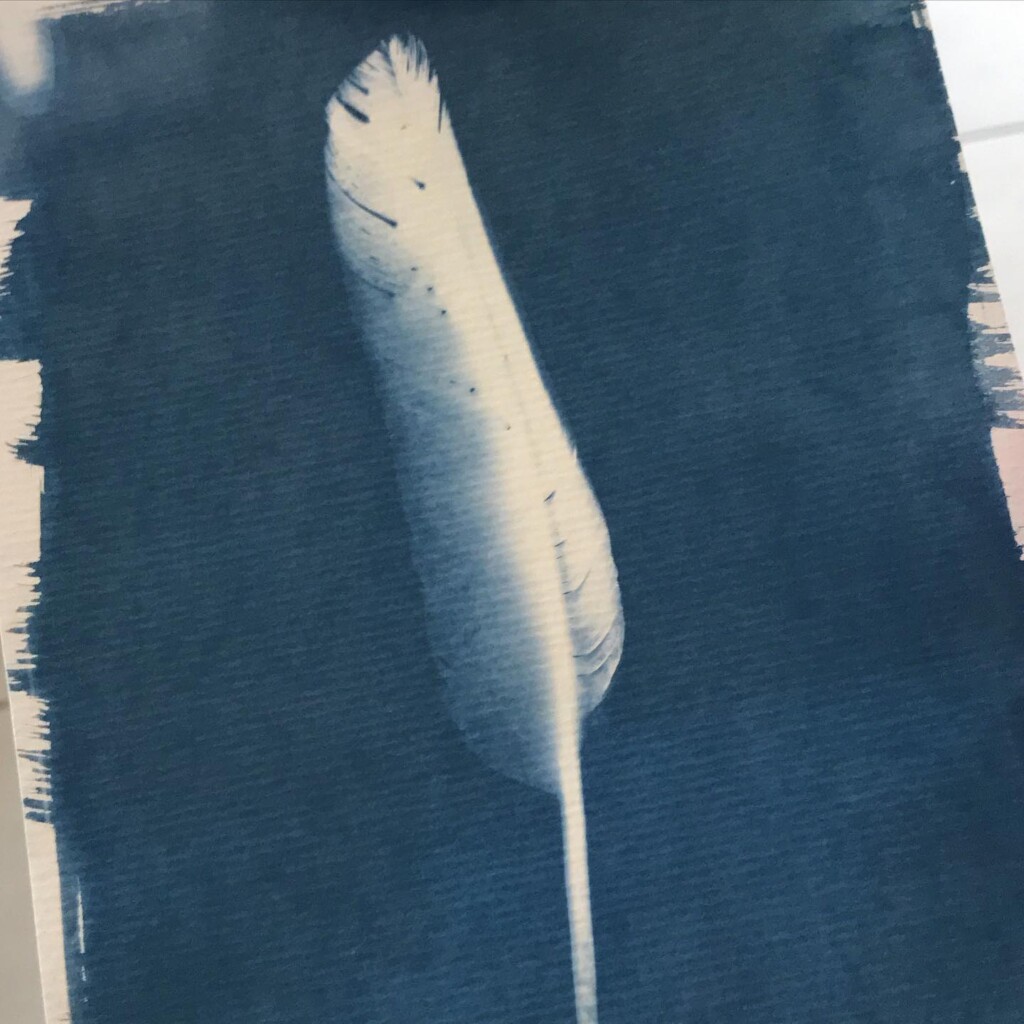
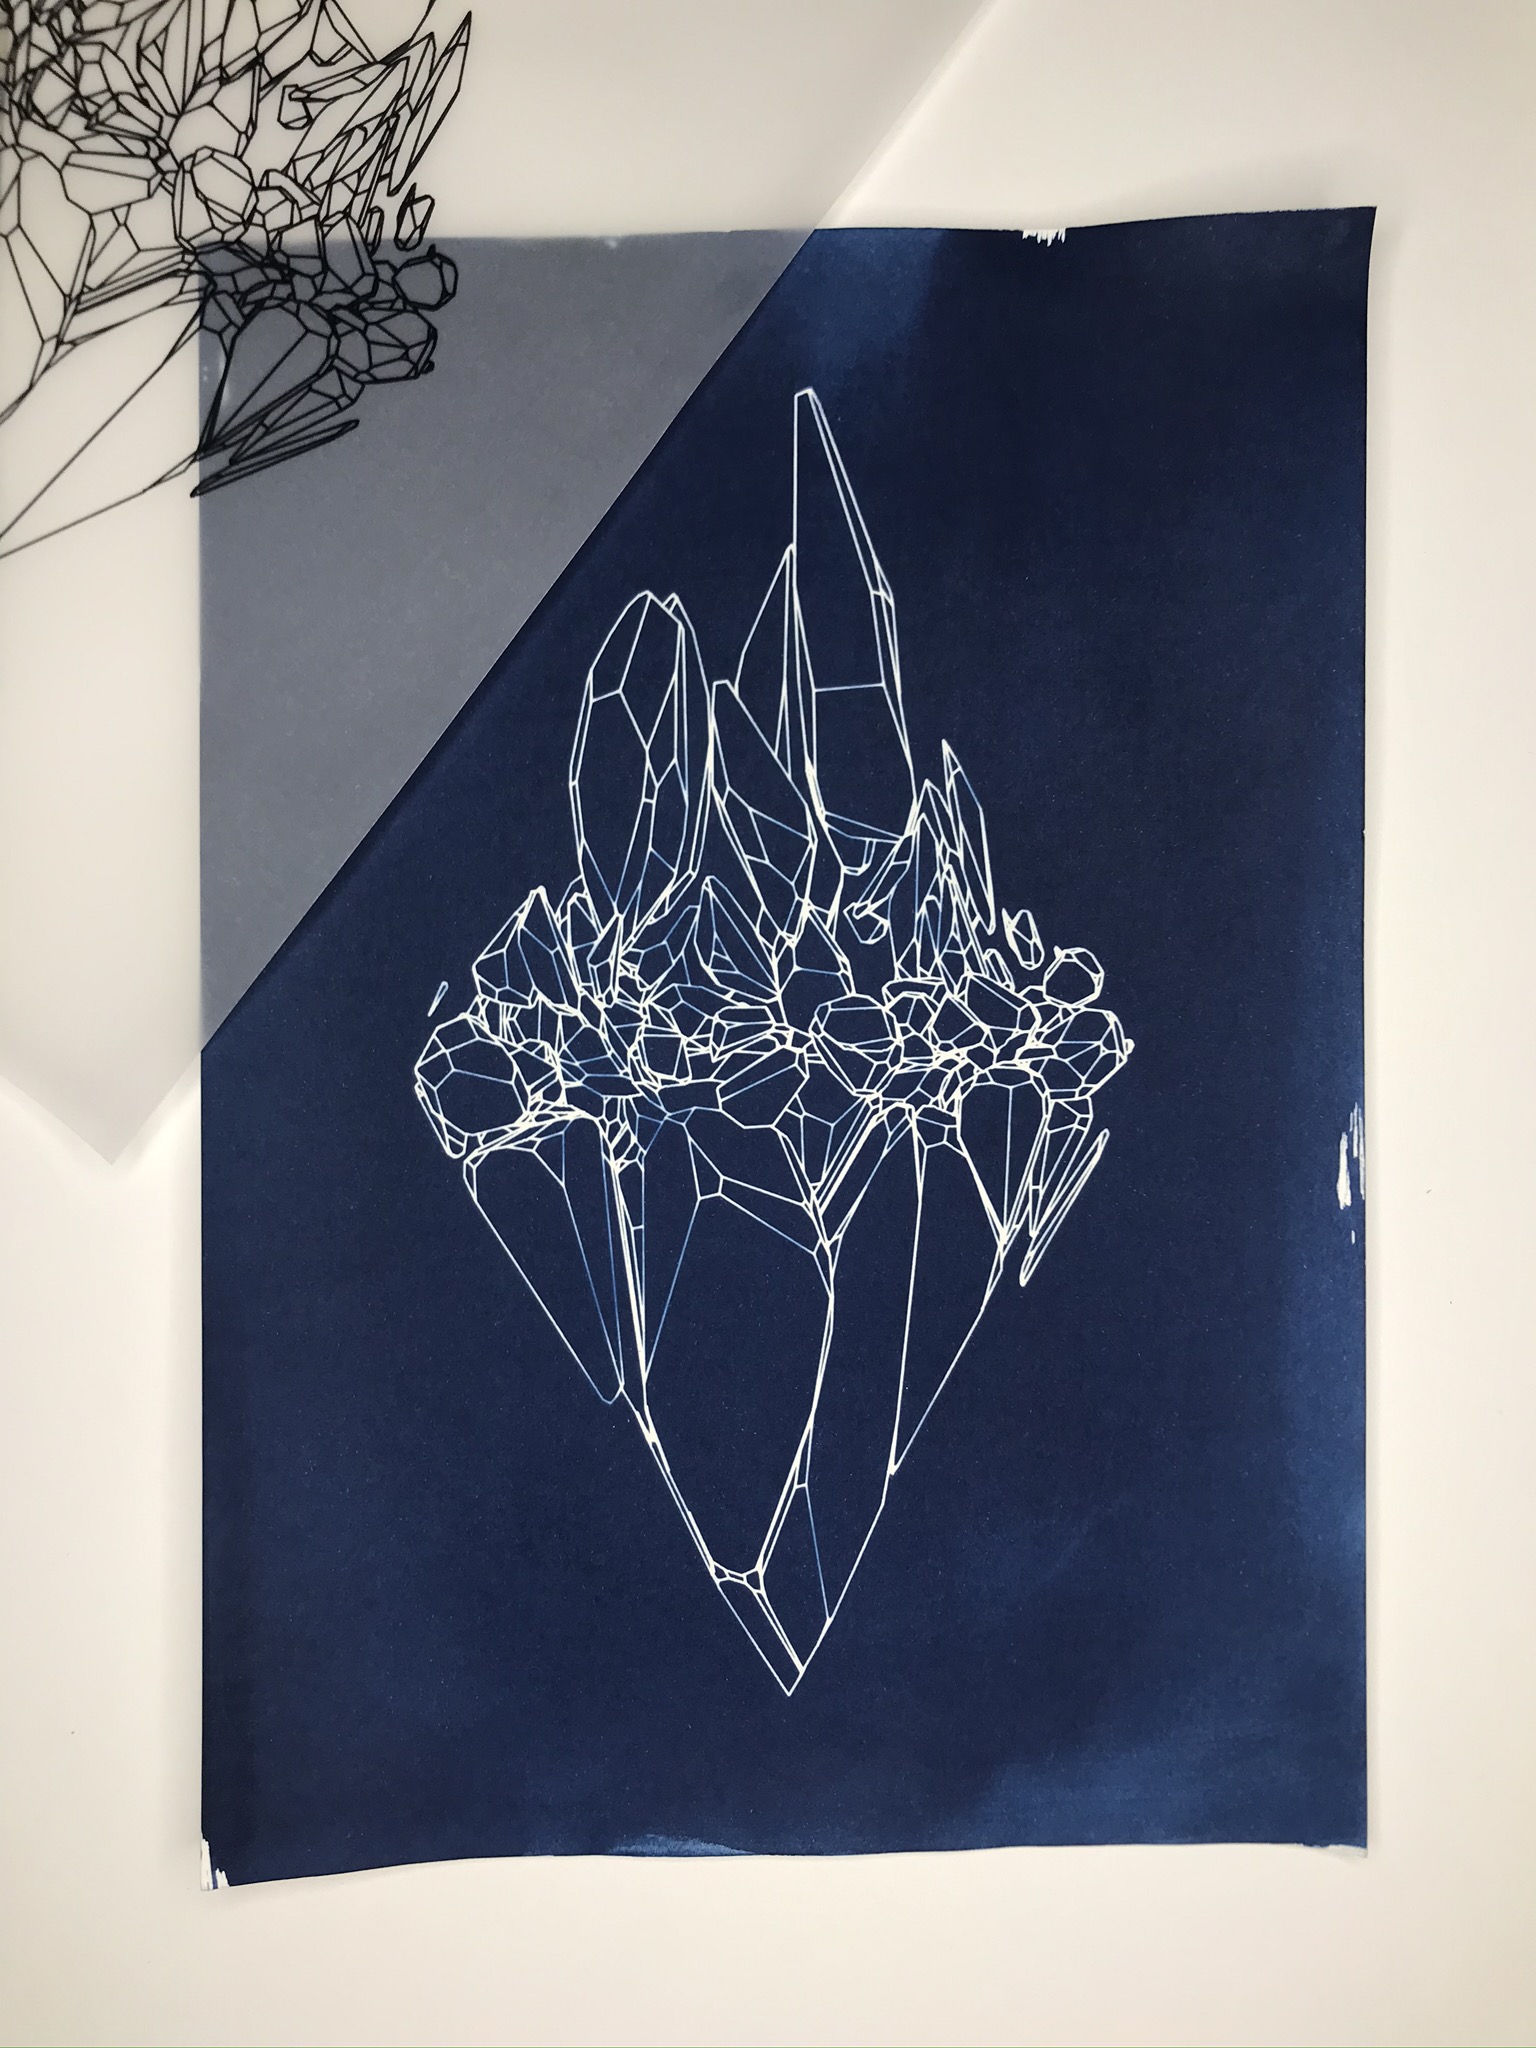
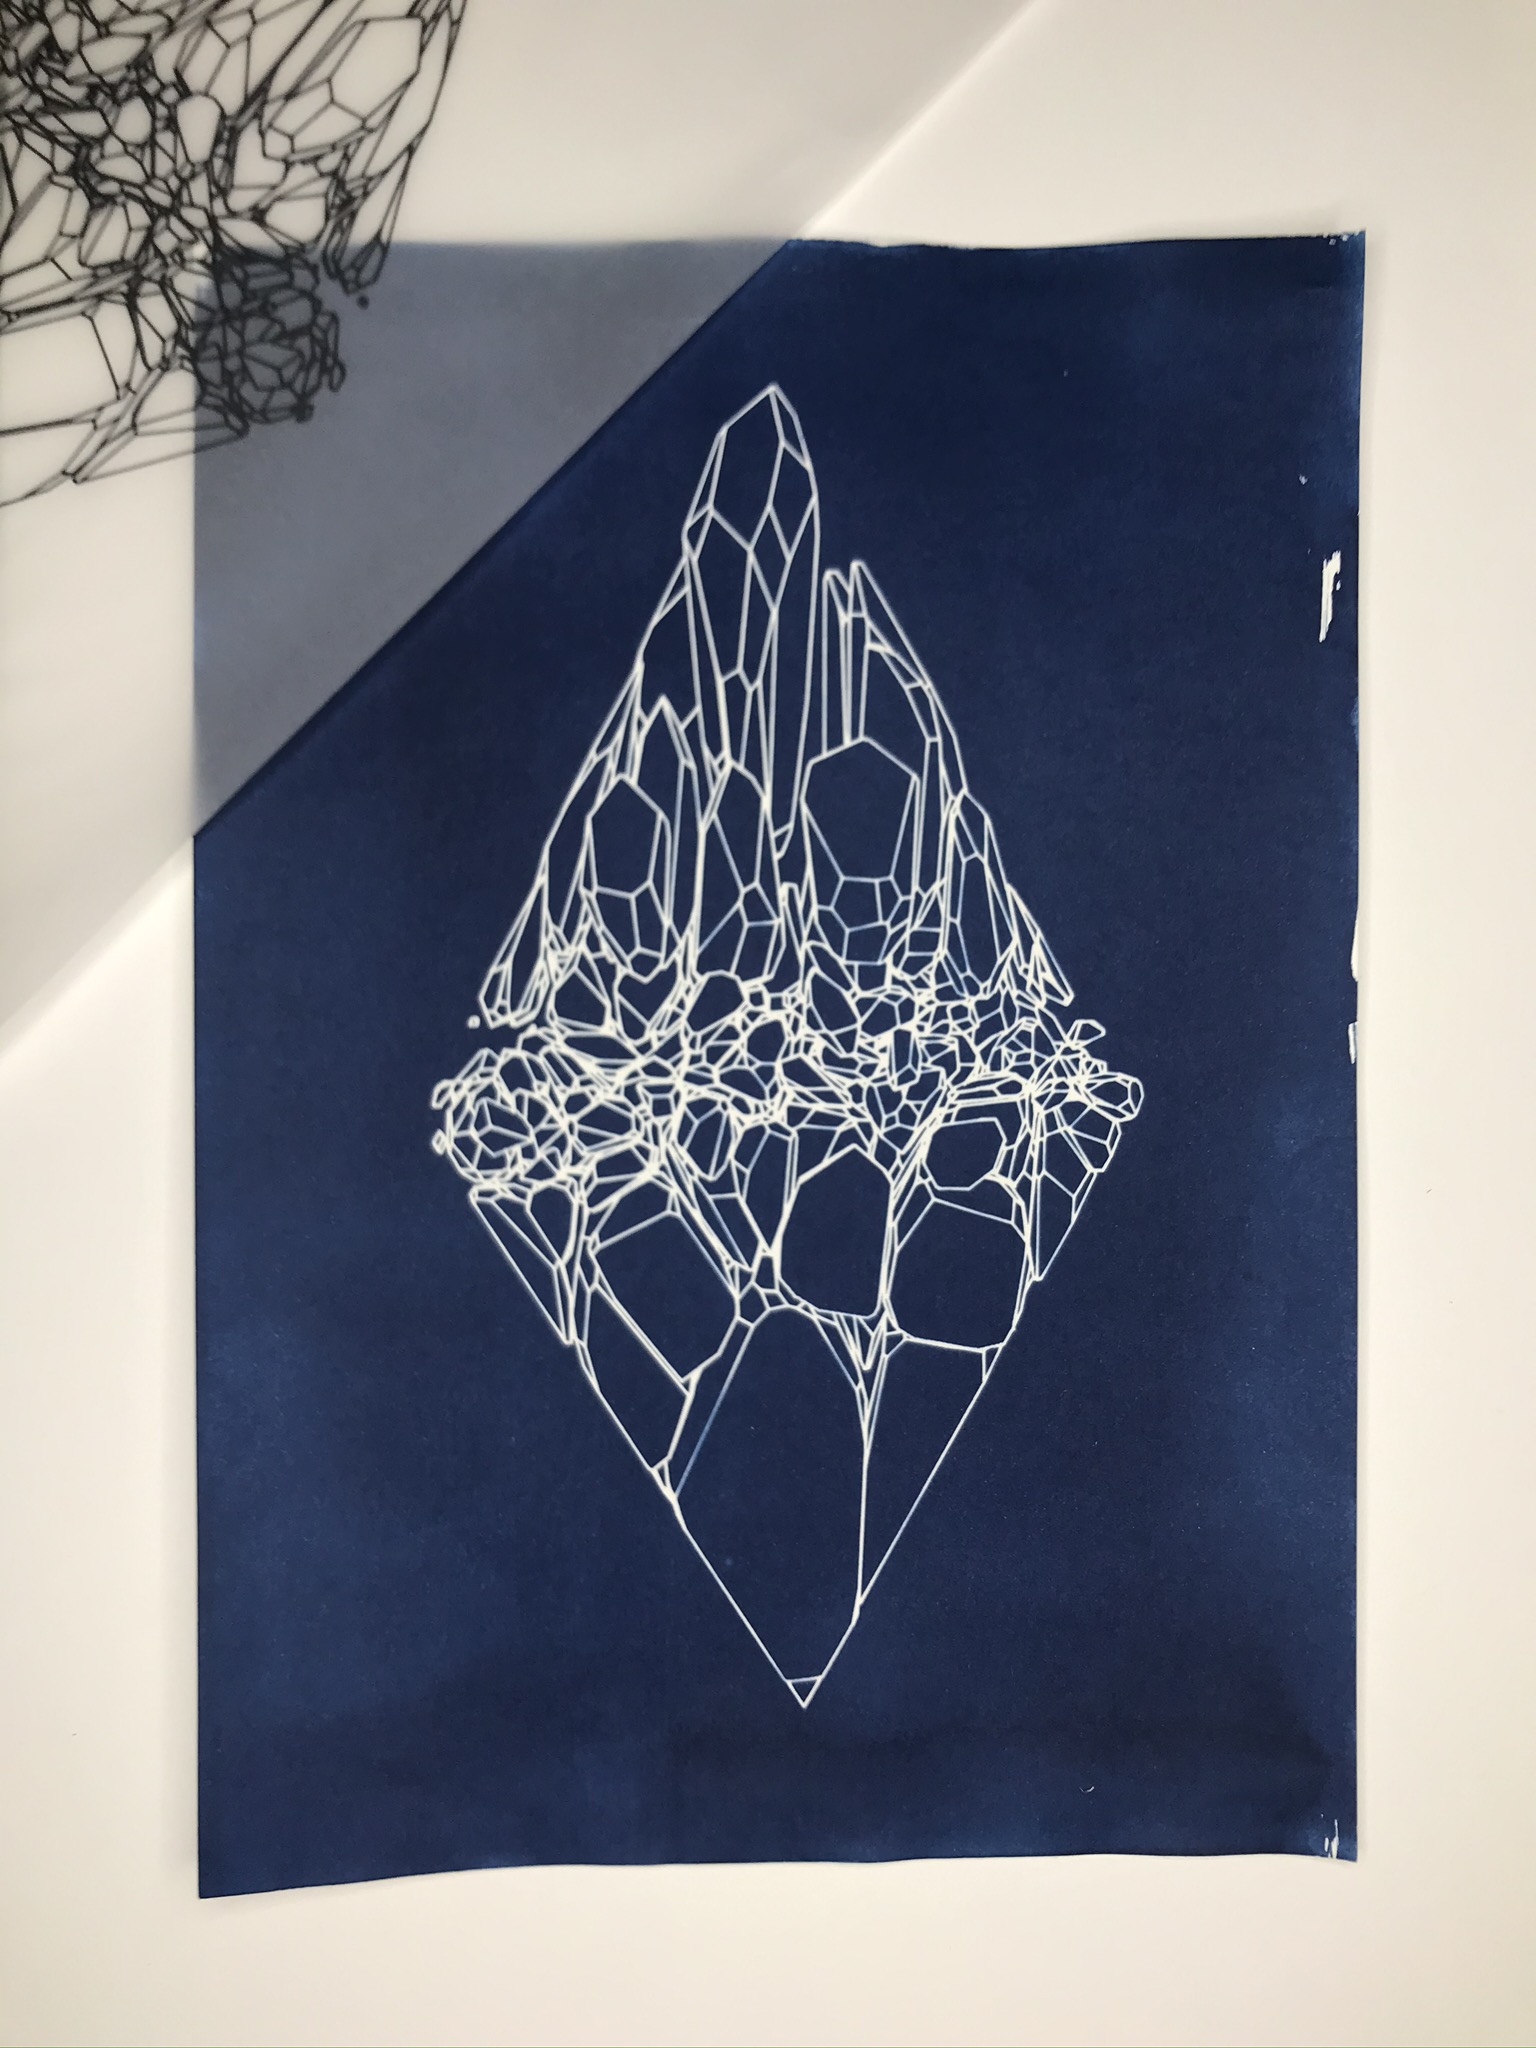
The yellow-green paper will darken to a dark grey, or when exposed for a longer time can even invert into a lighter gray.
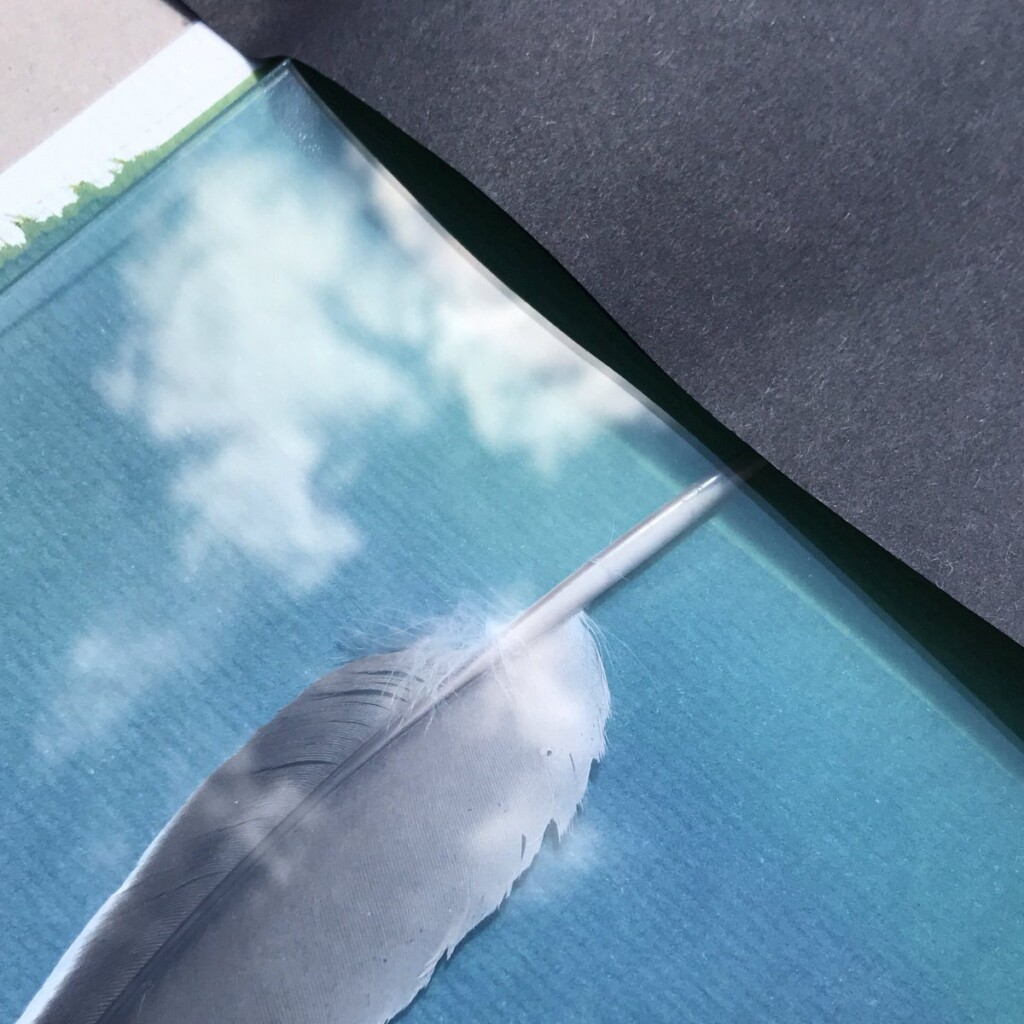
The UV light causes a chemical reactions that will stain the exposed paper permanently blue. To fix the image it is necessary to rinse off the rest of the photosensitive mixture, otherwise the image will further darken. Holding it under a tap does the trick, although if we’re doing several exposures a bath of water is ecologically more sound. We should rinse until the runoff from the page is no longer tinted yellowish-green.
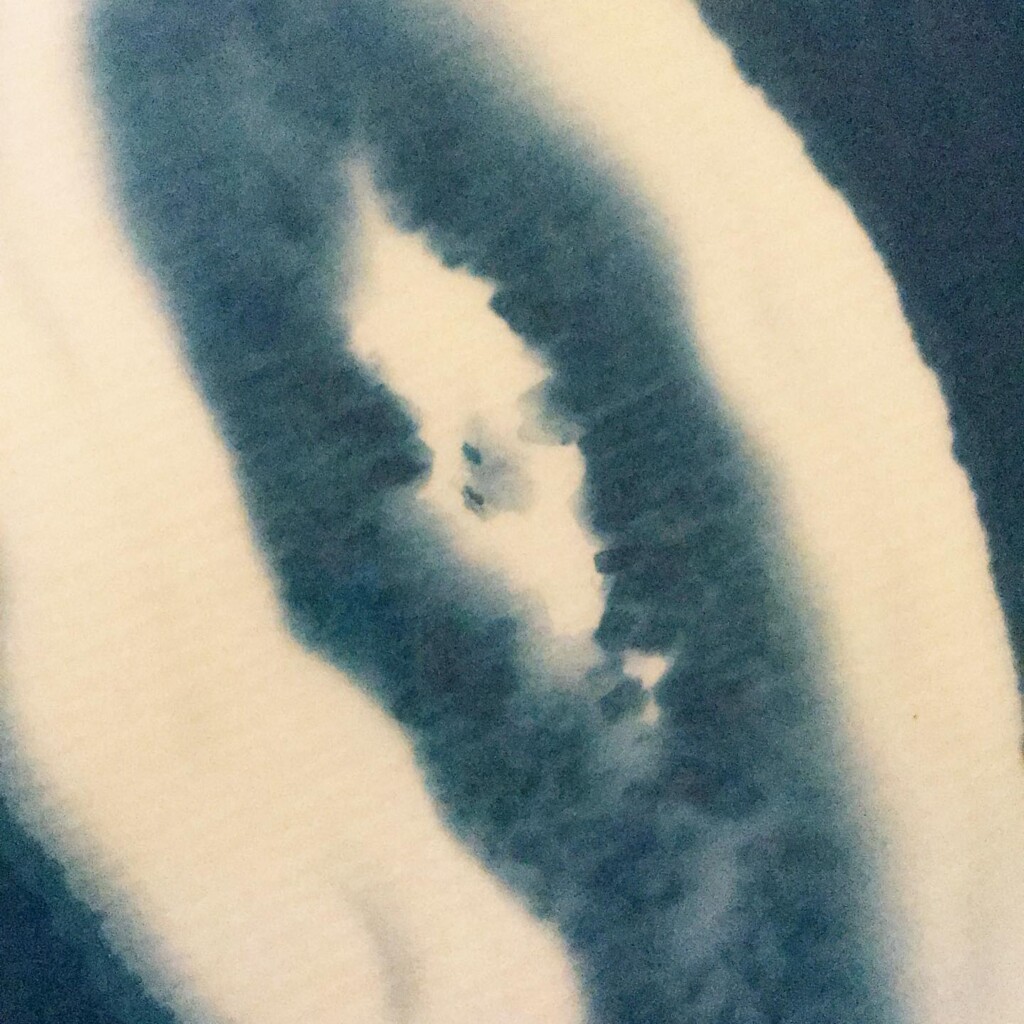
Seeing the lines appear under the washing water is a sight for sore eyes. At the same time, we will also lose some lovely small details, small patches of blue that aren’t fixed in the paper. An inherent aspect of cyanotype.
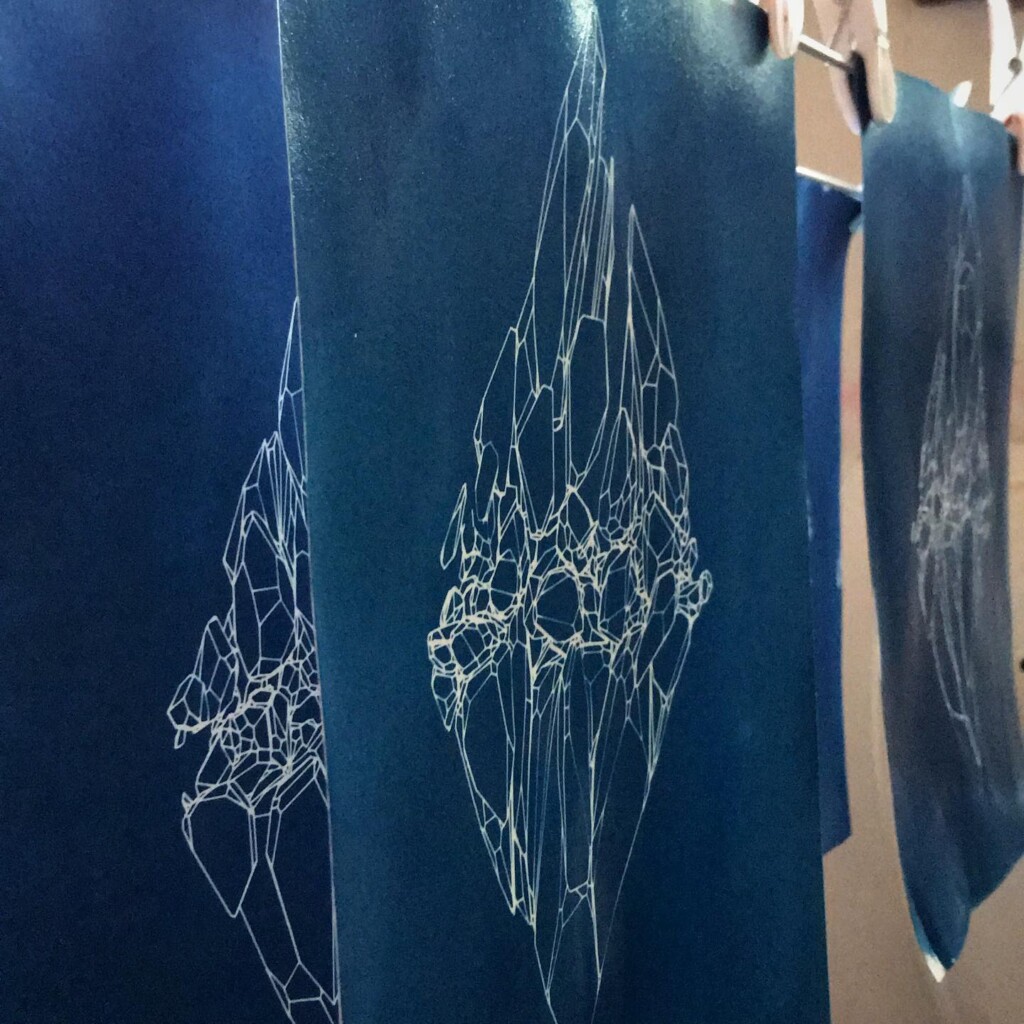
A clothing line and some pegs for the drying and we’re done. During the drying the cyanotype will fully develop its deep blue color.

Matter
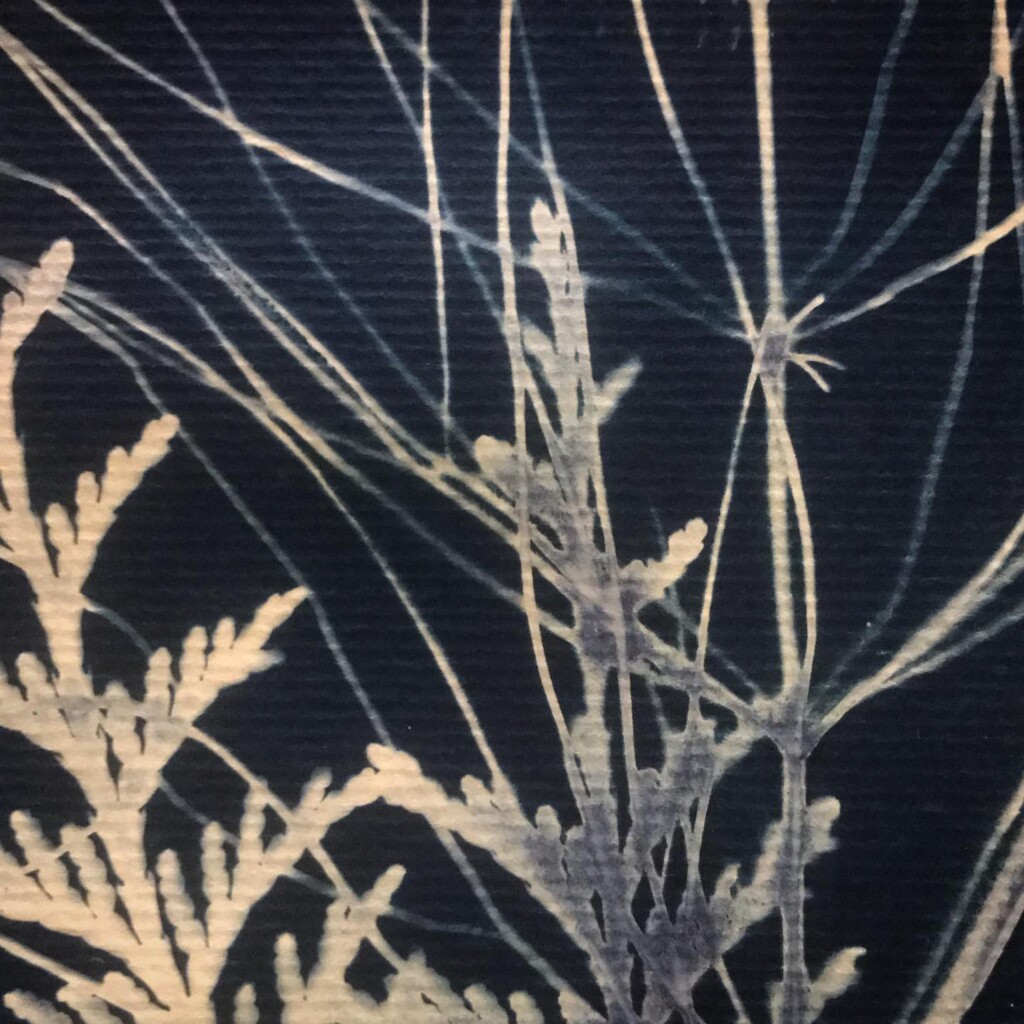
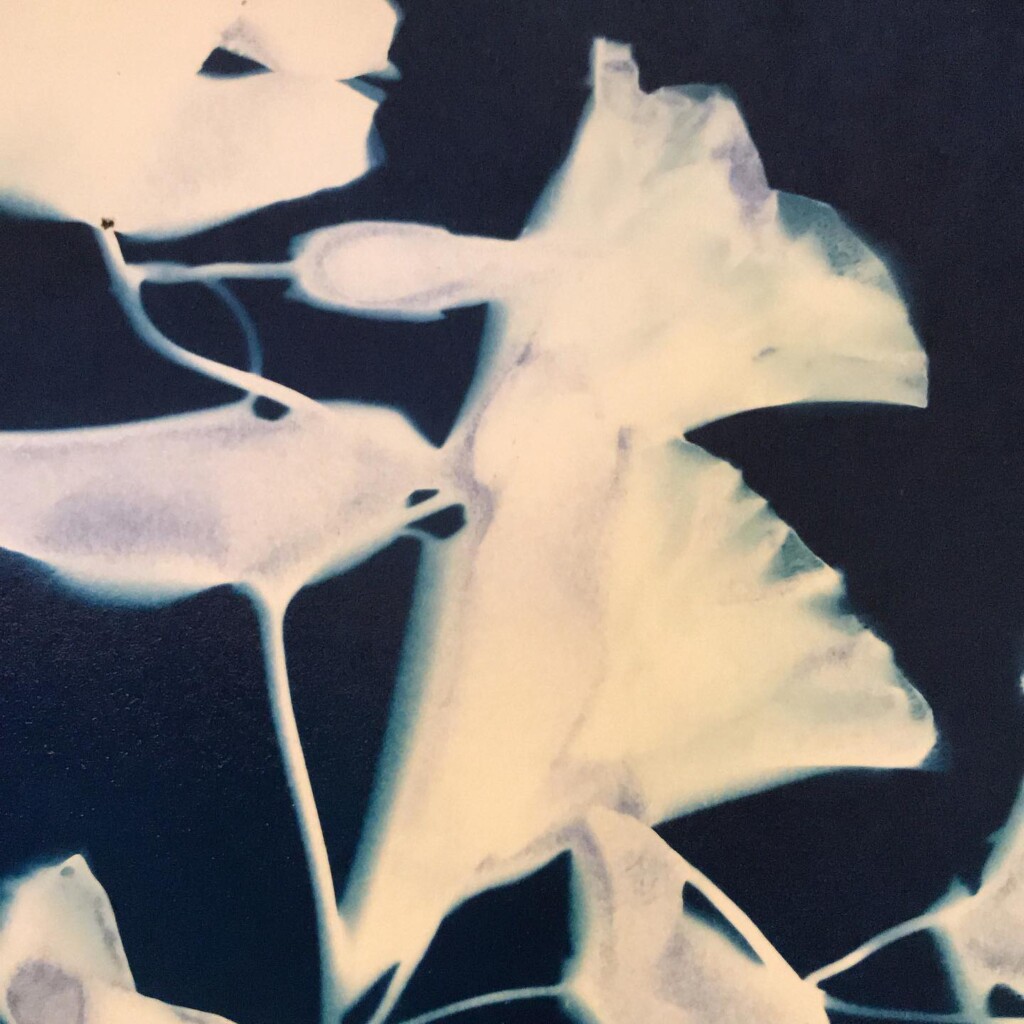
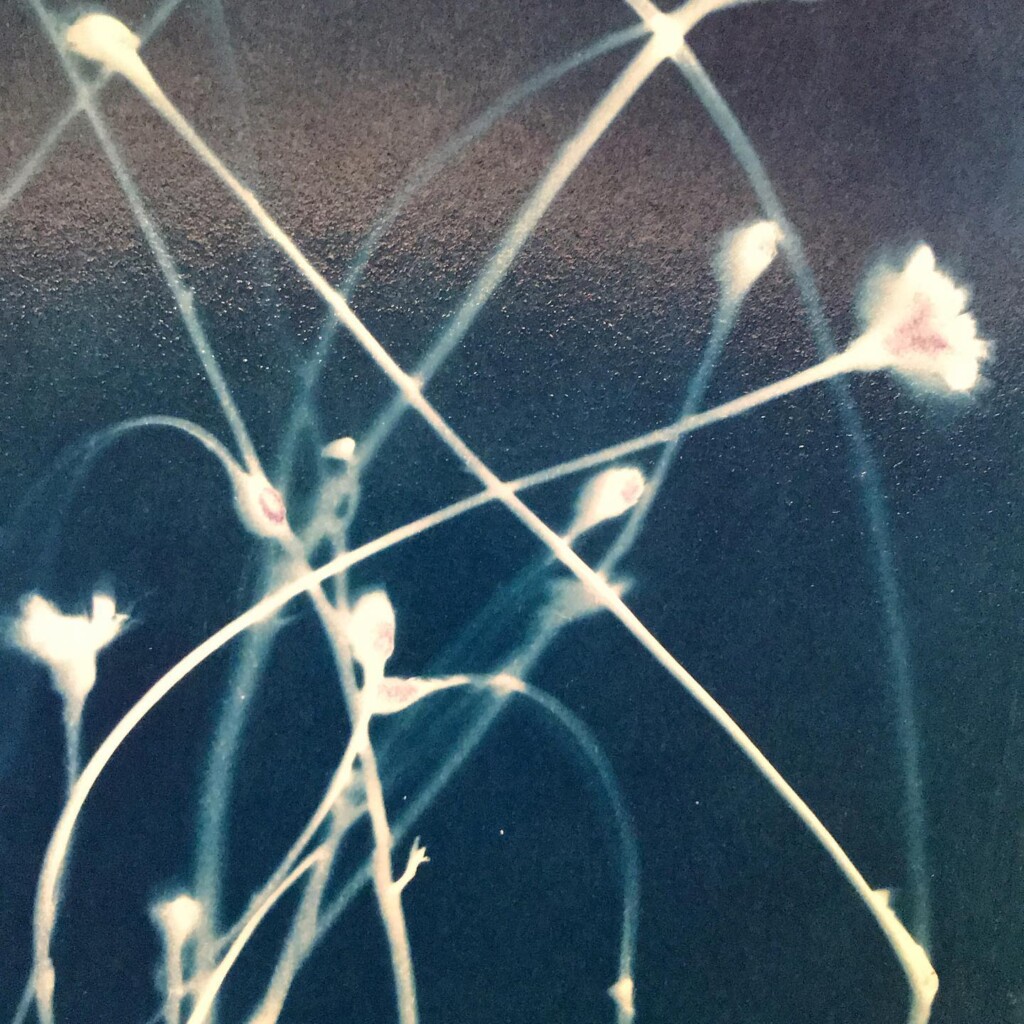
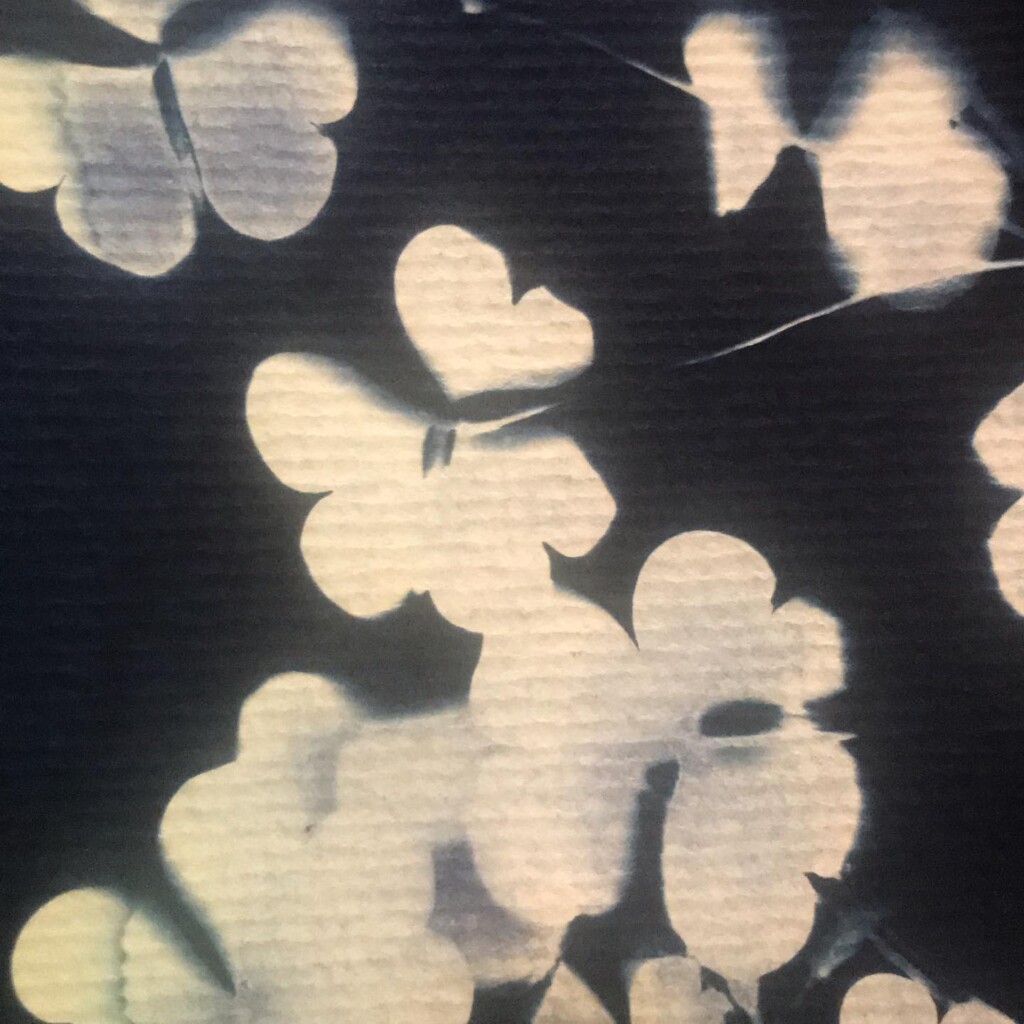
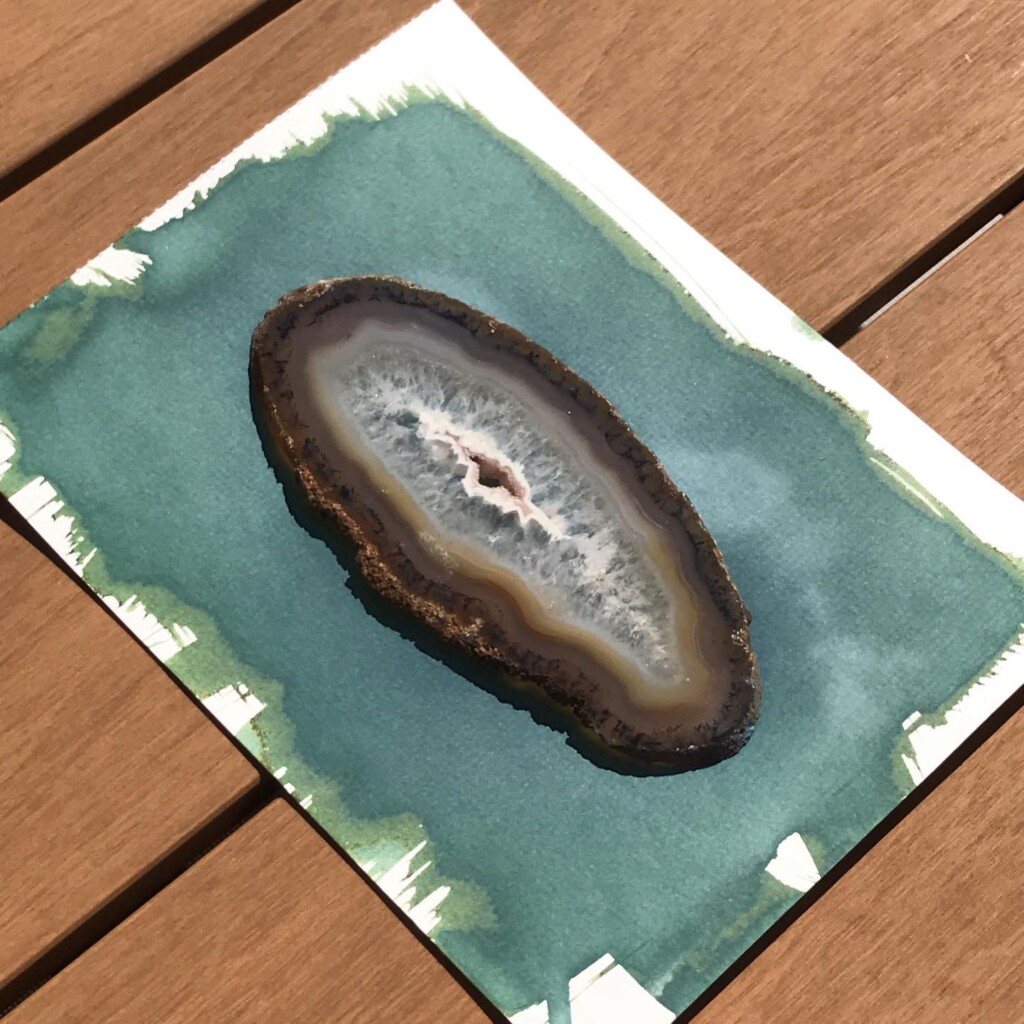
Contact printing works best with flat matter that has a range of opacities. So, the history of cyanotype is one of plants and photographic negatives. The latter is probably reserved to the ones among us that have a broader interest in analog photography. But the former are abundantly available. If, like me, you have a garden full of impolite weeds, there’s plenty of organic material to sacrifice.
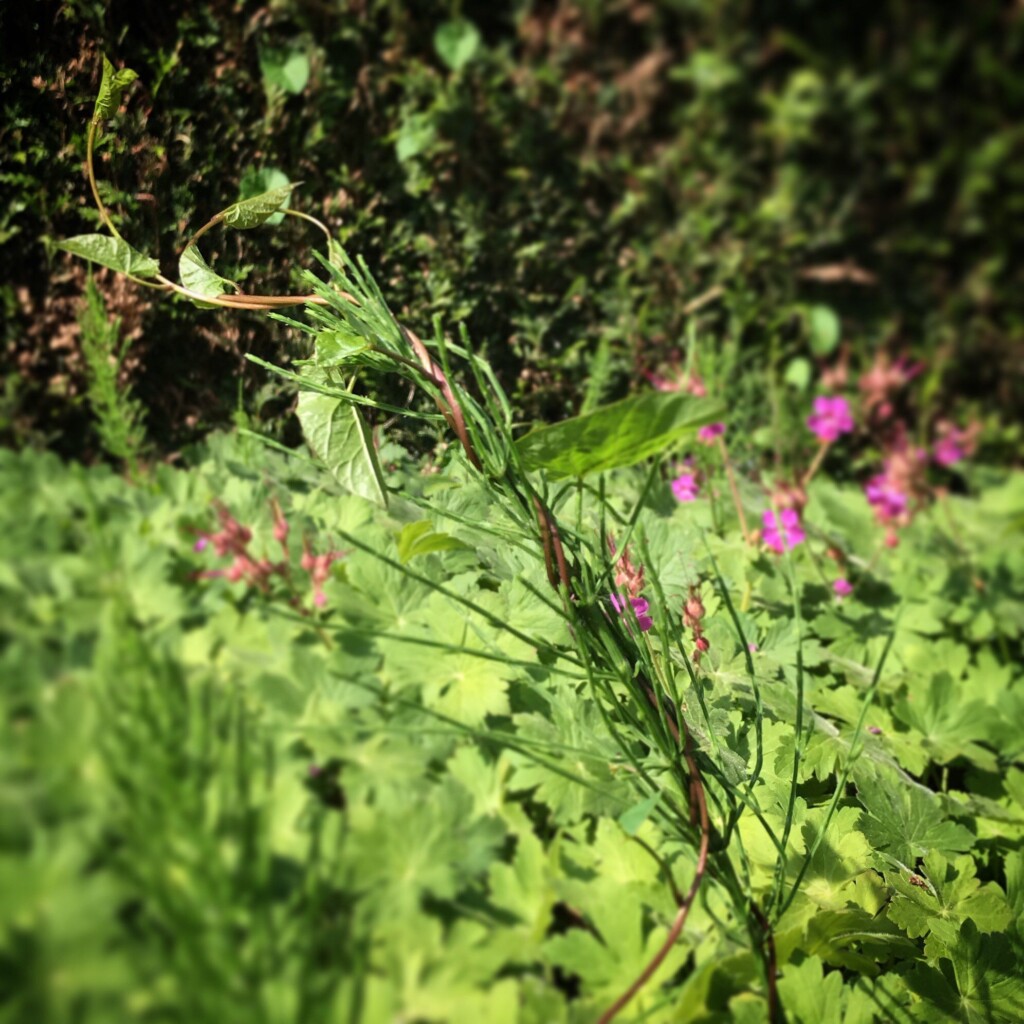
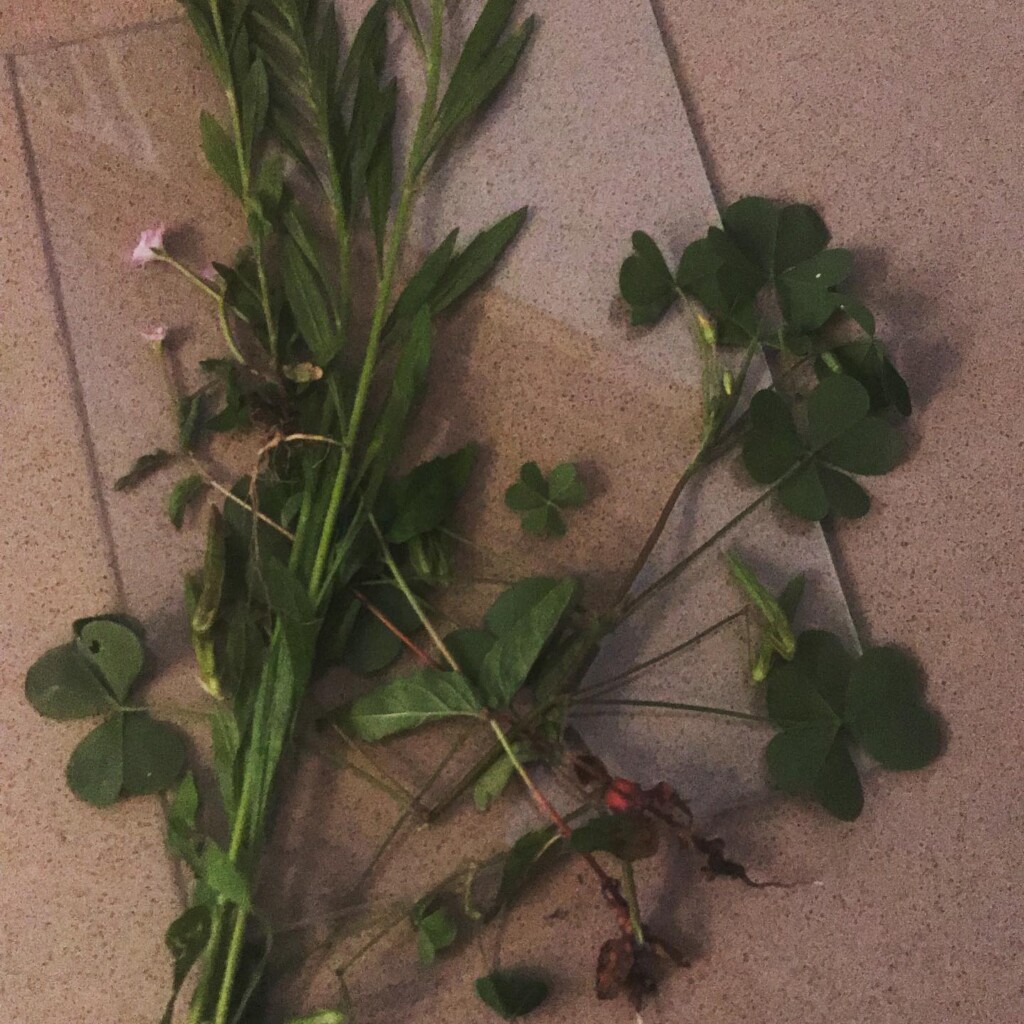
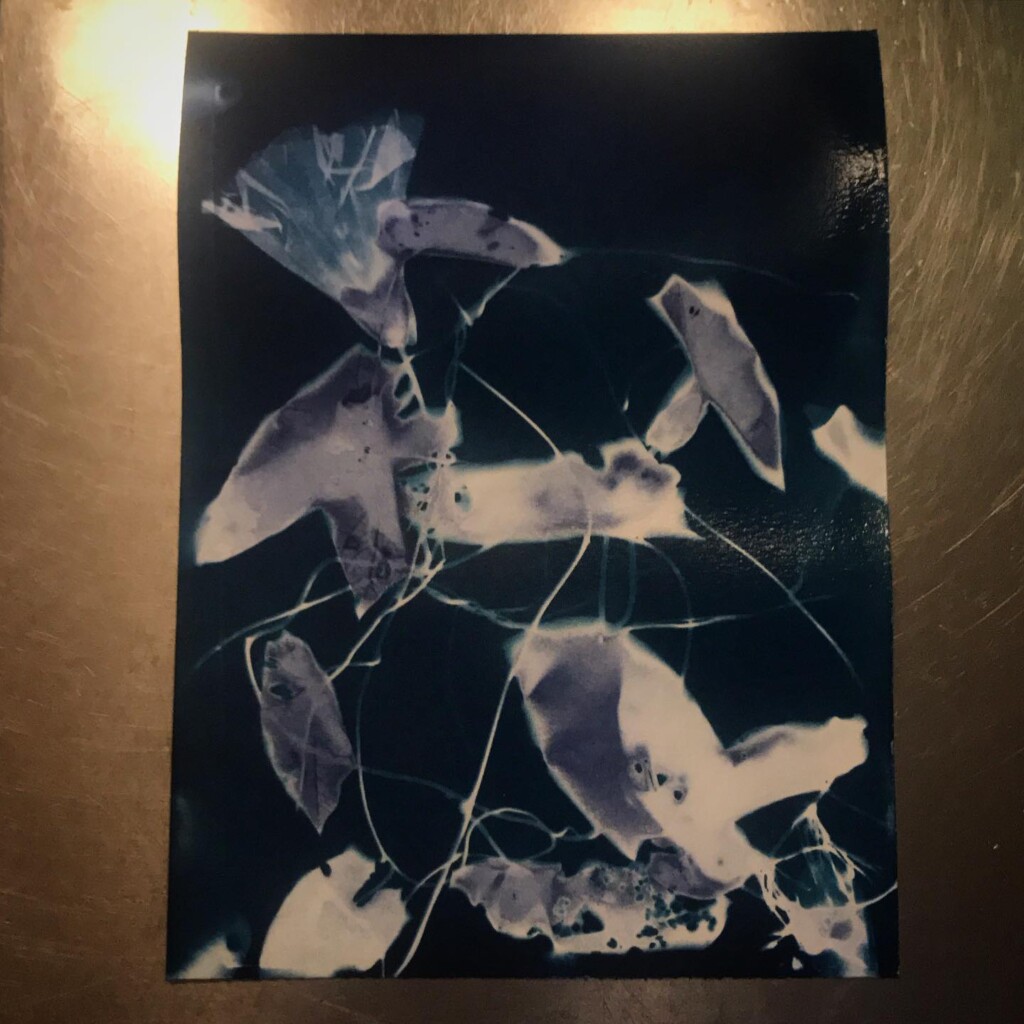
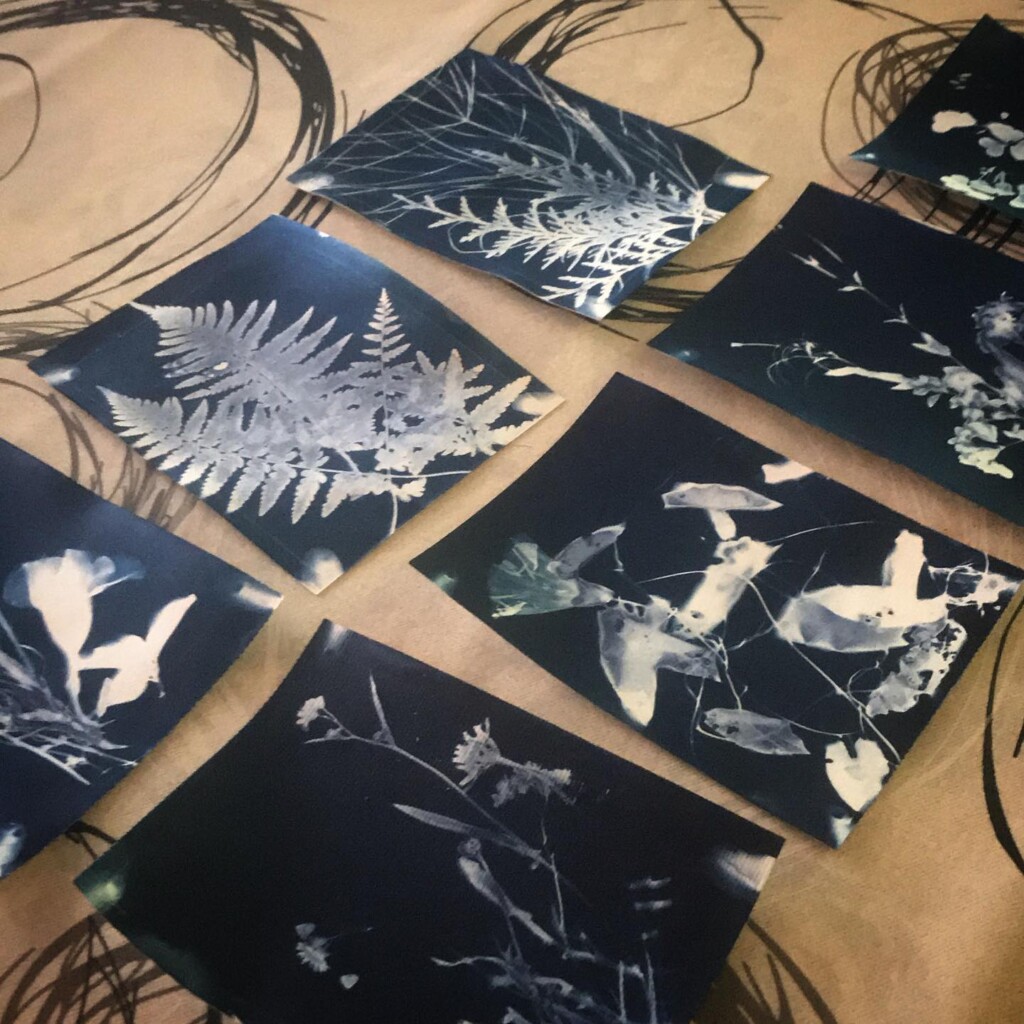

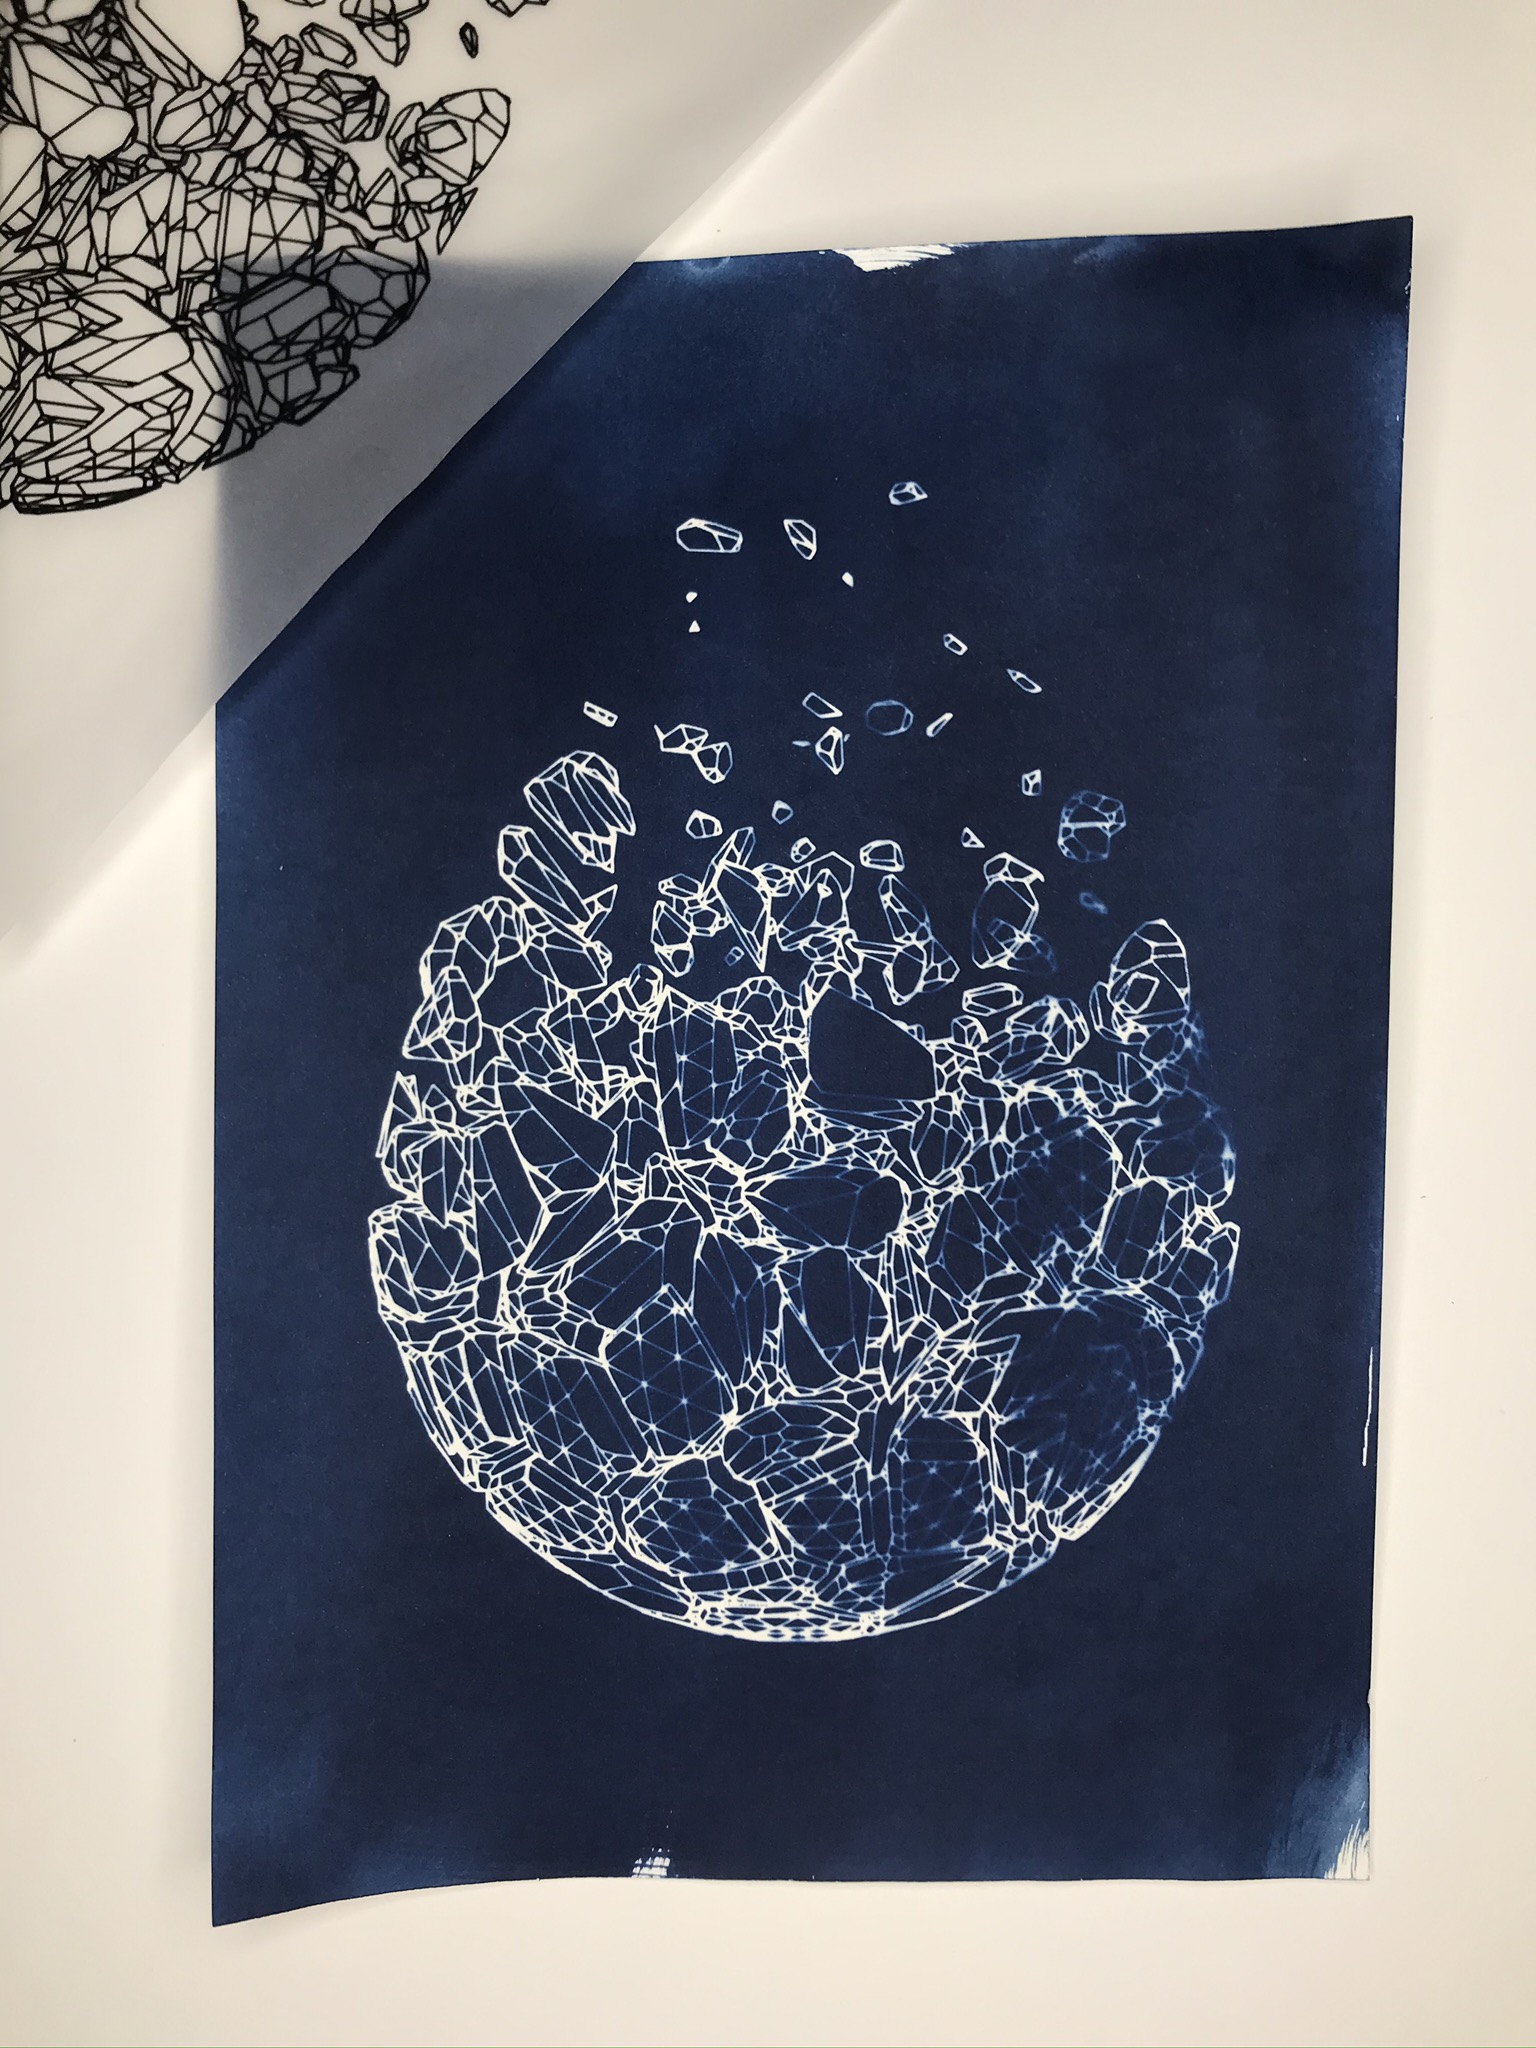
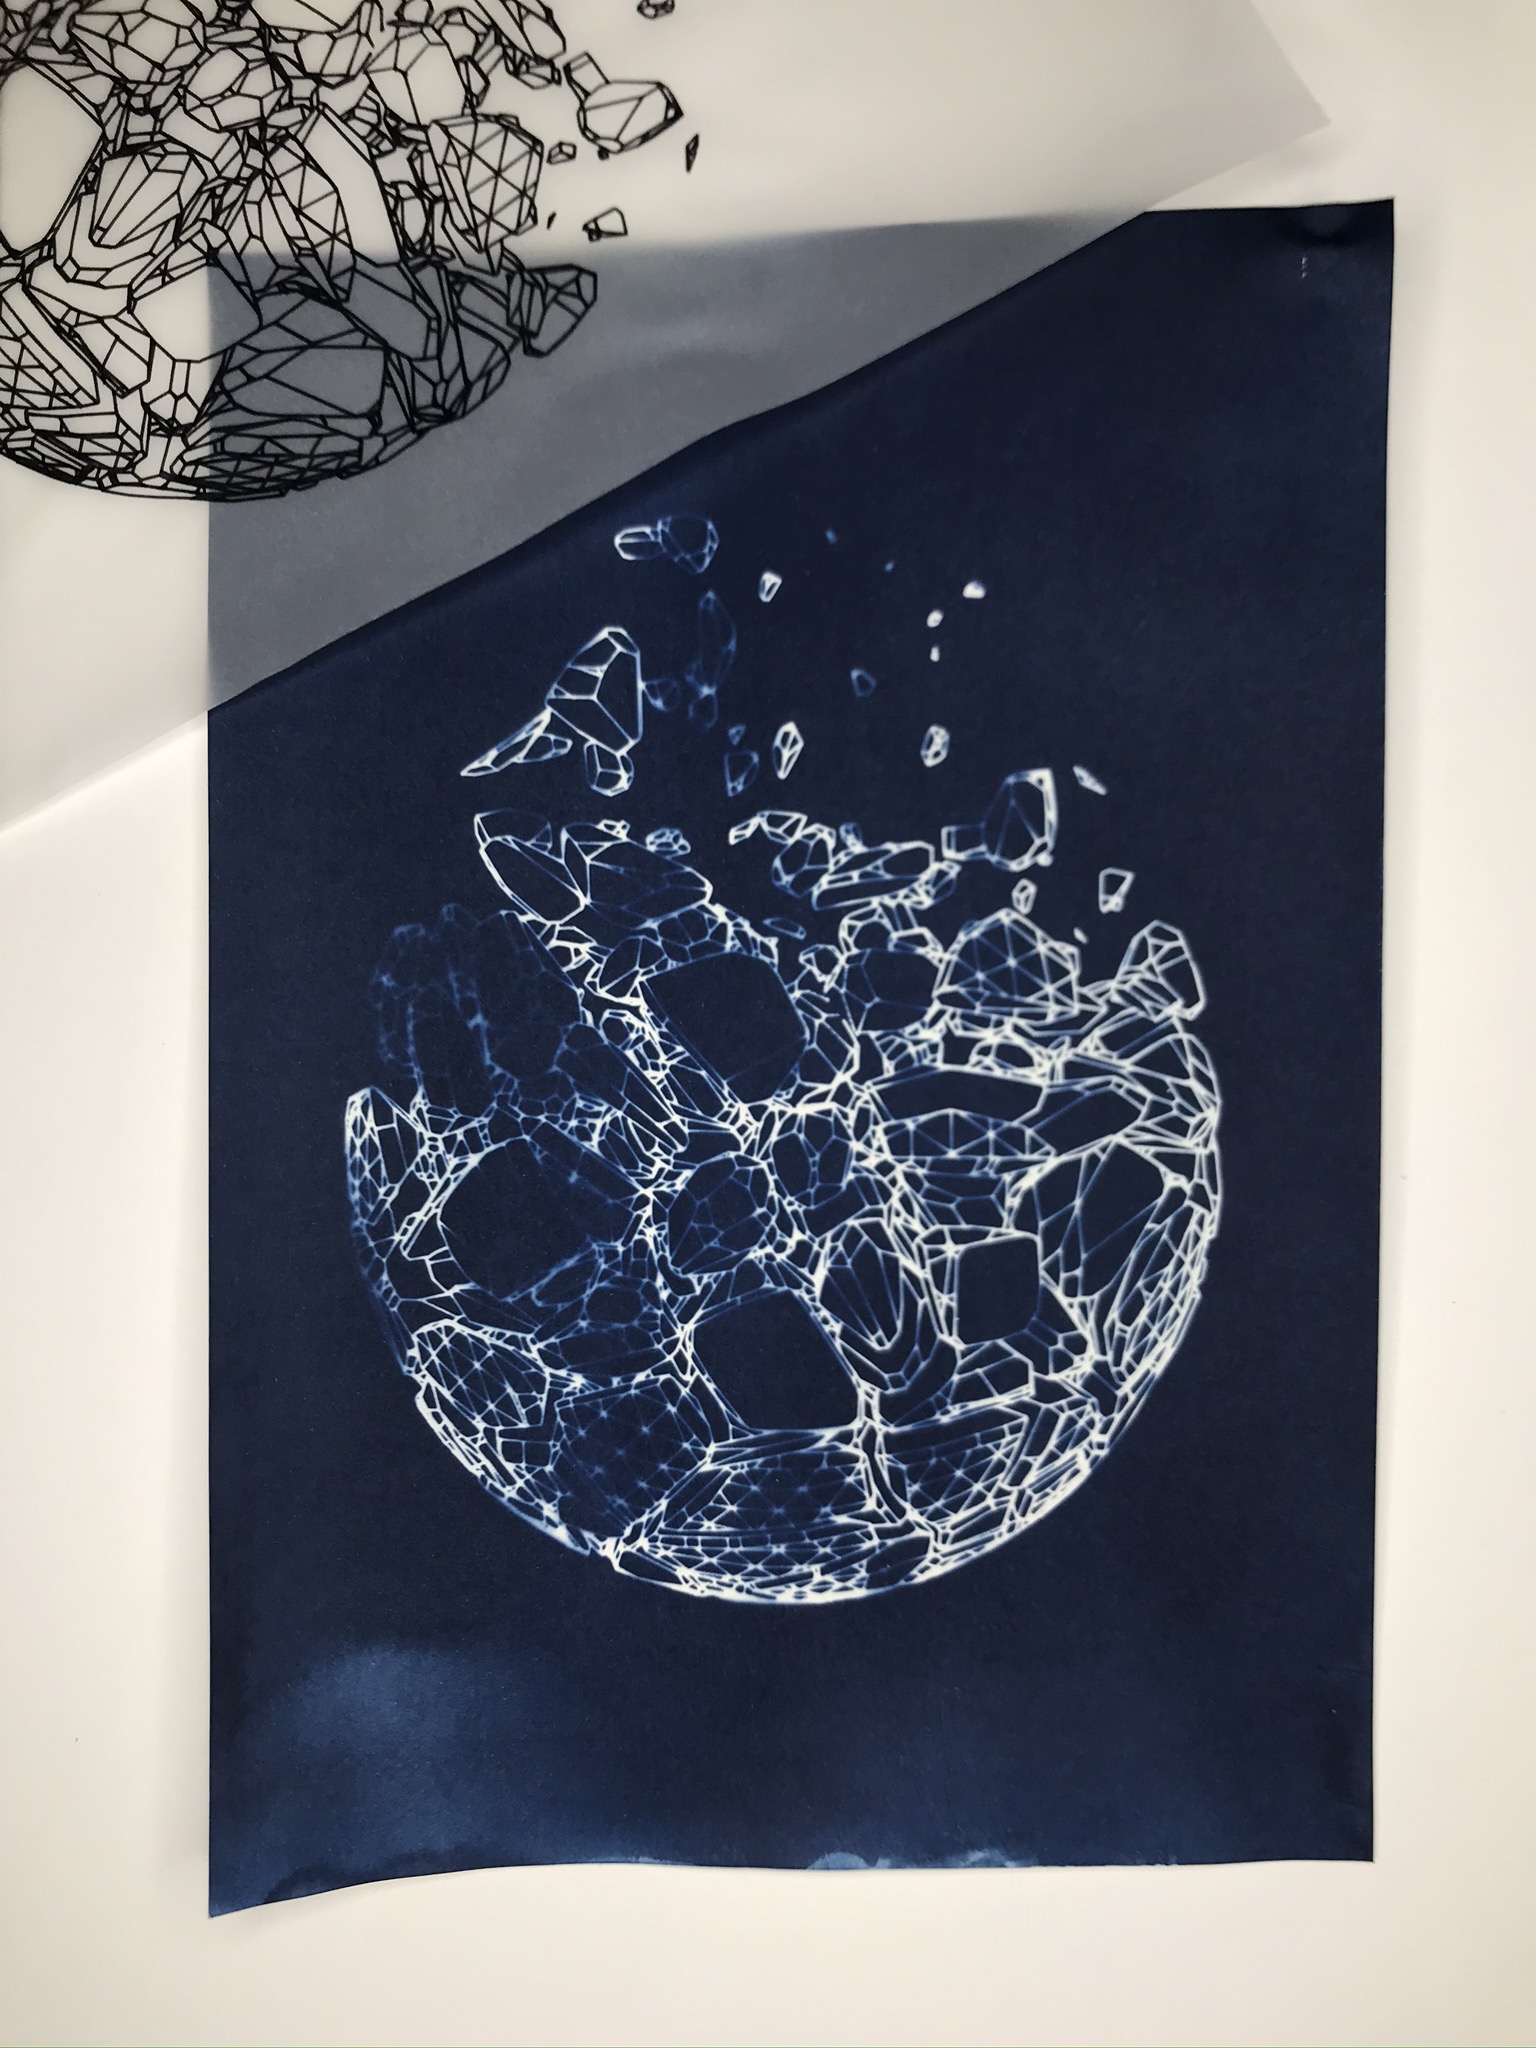
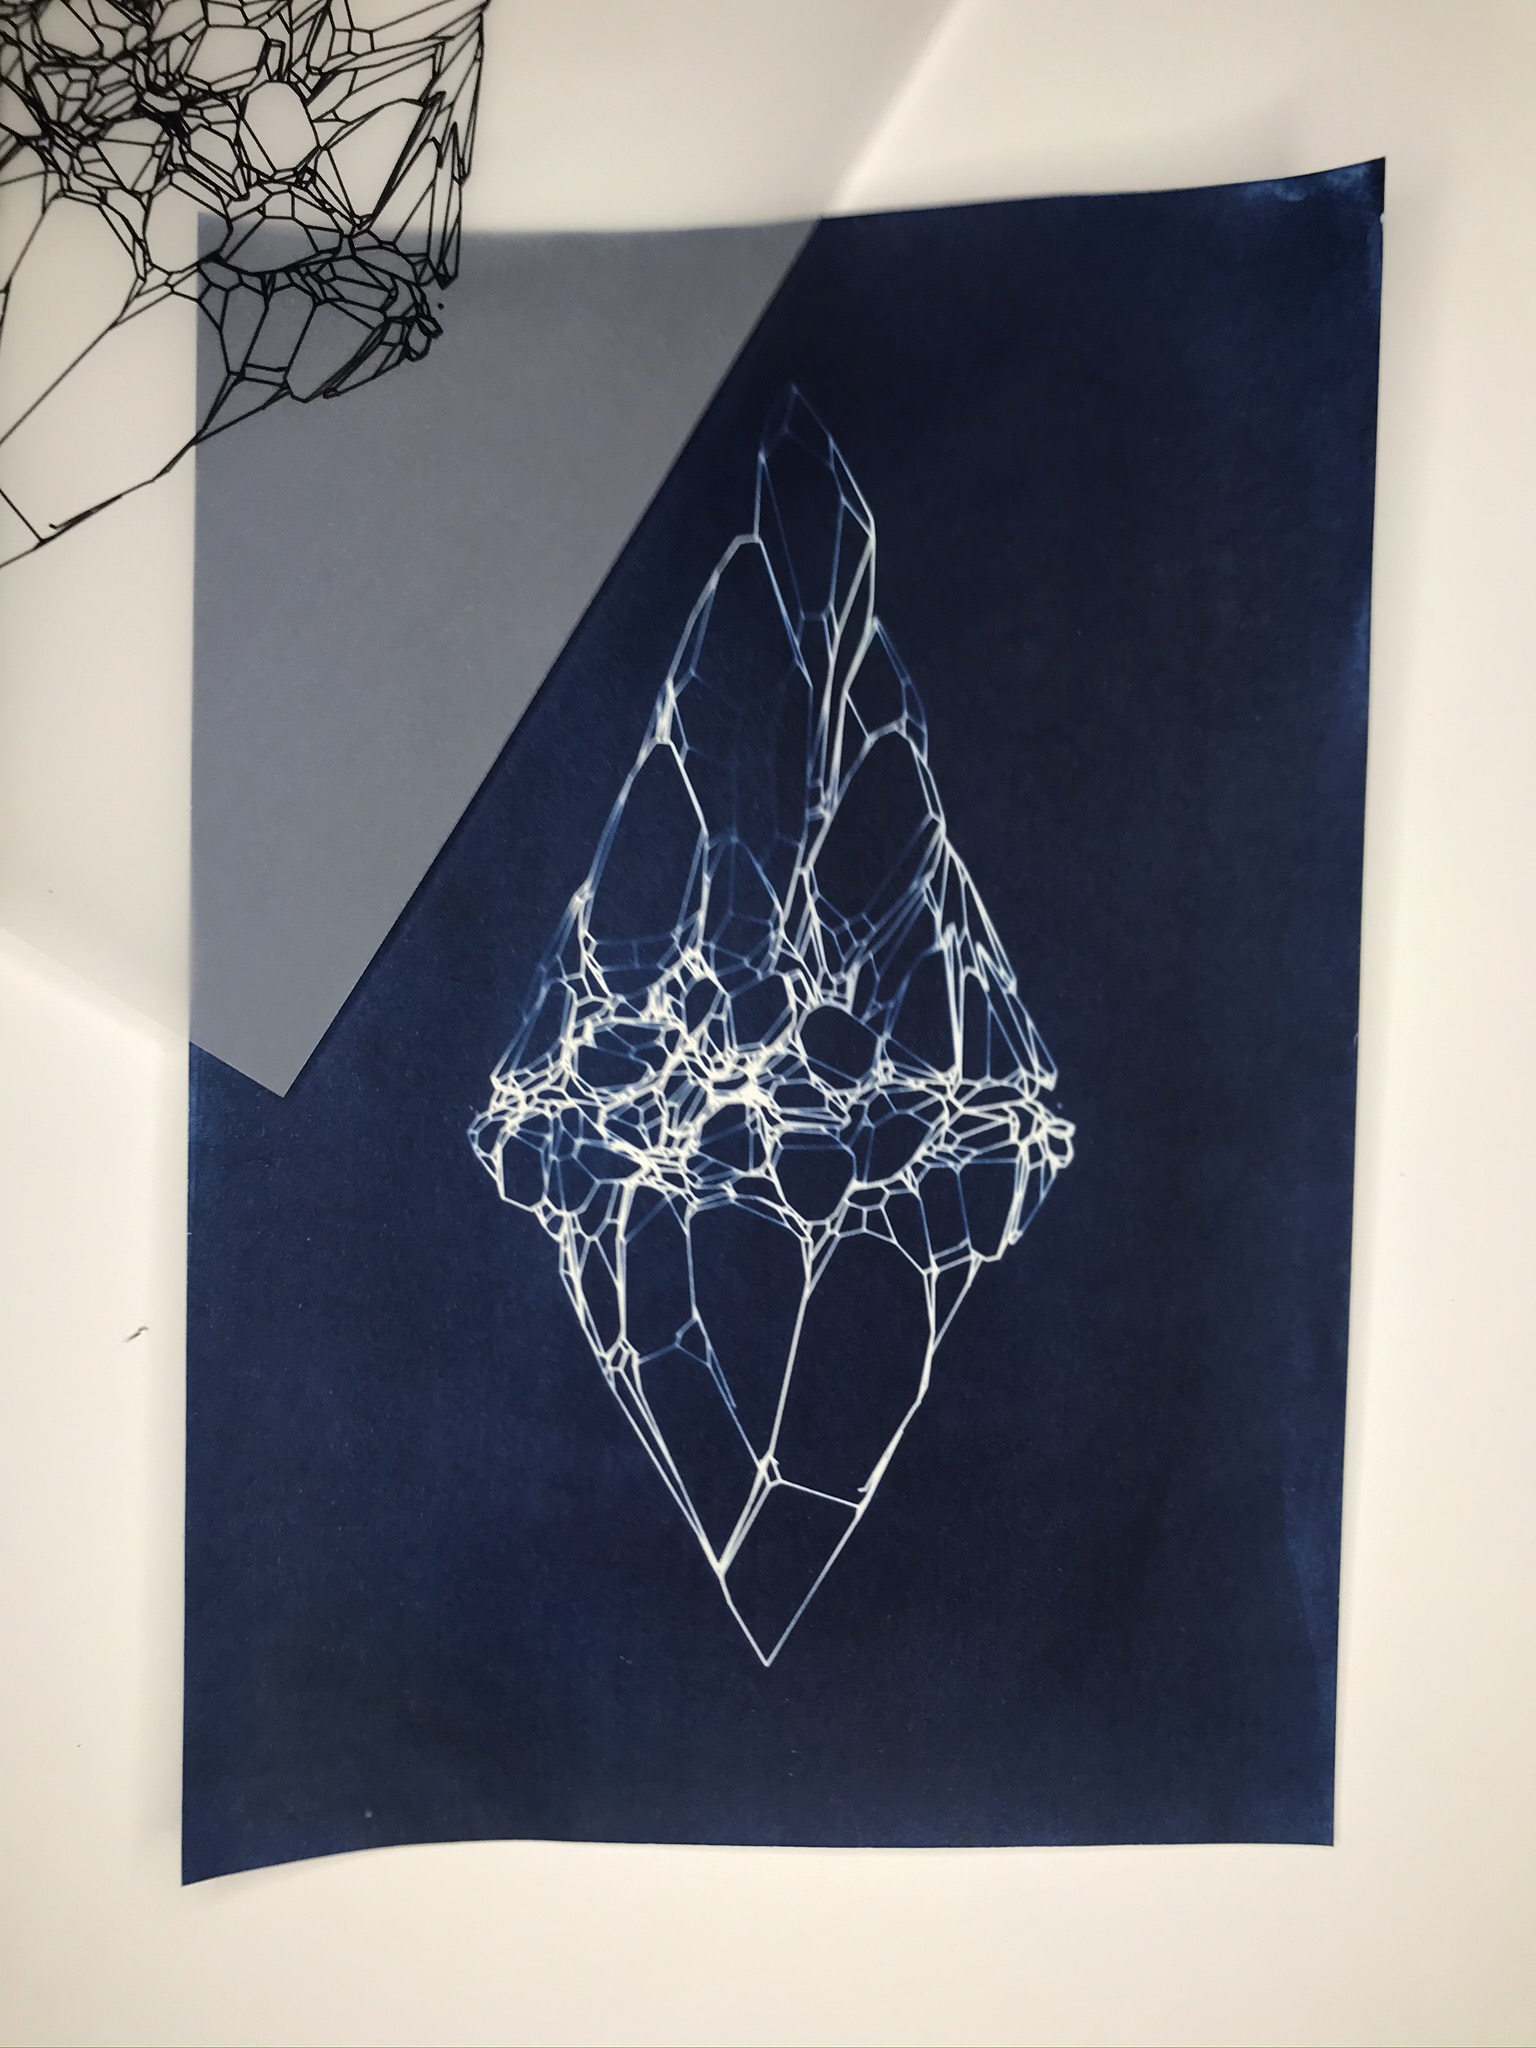
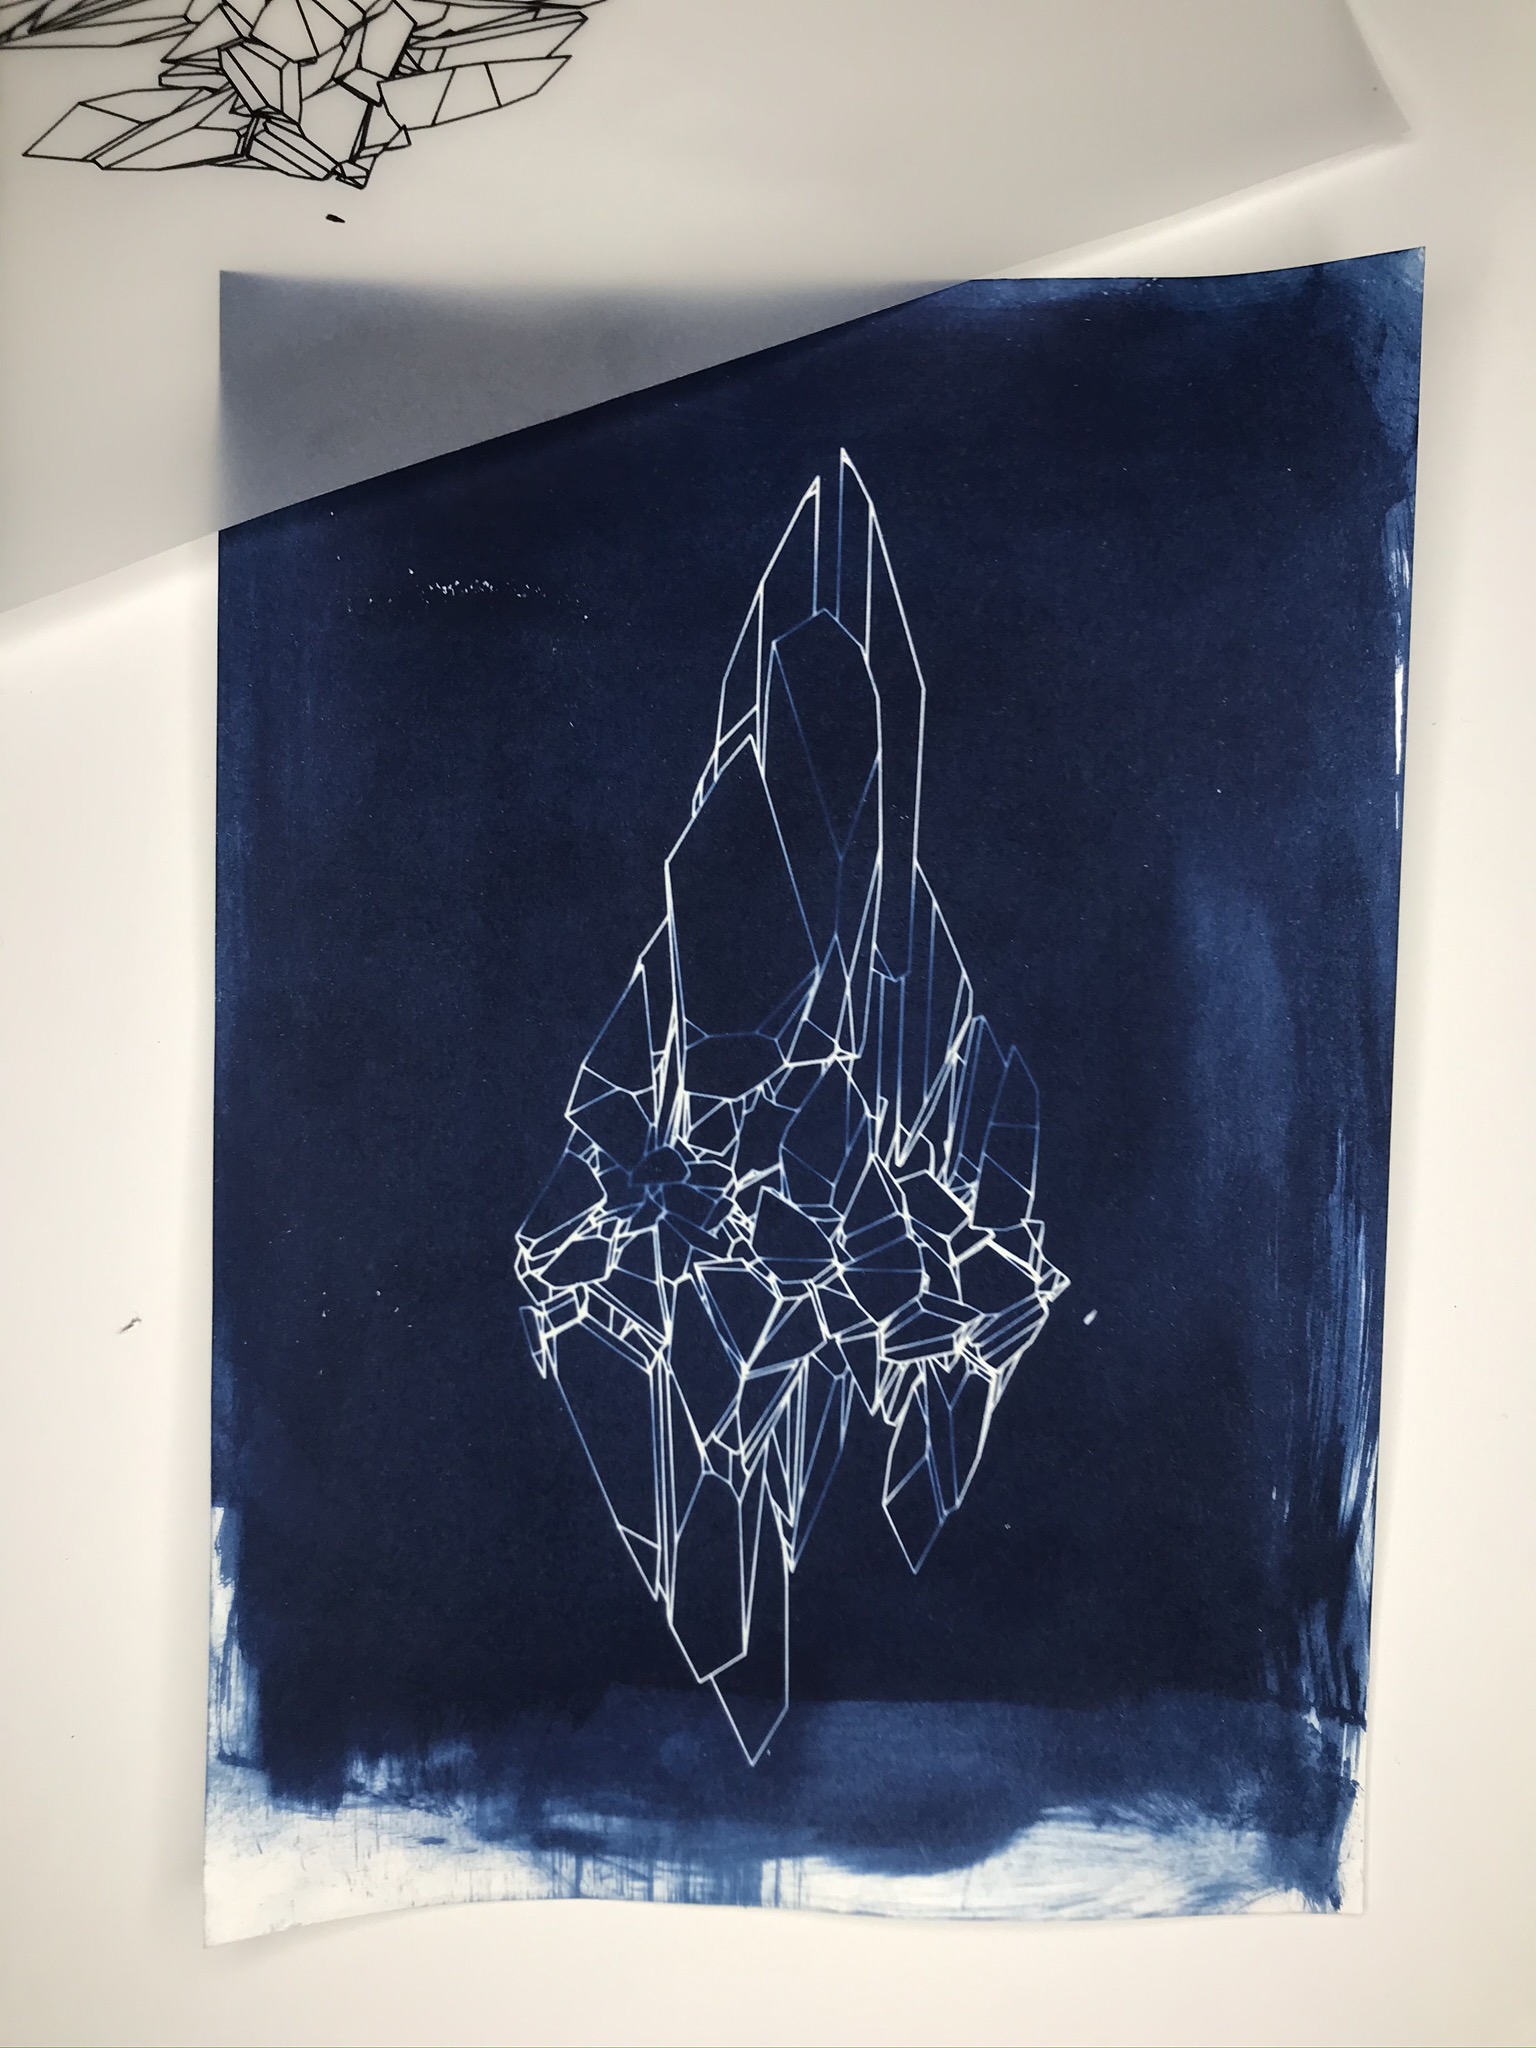
Broken
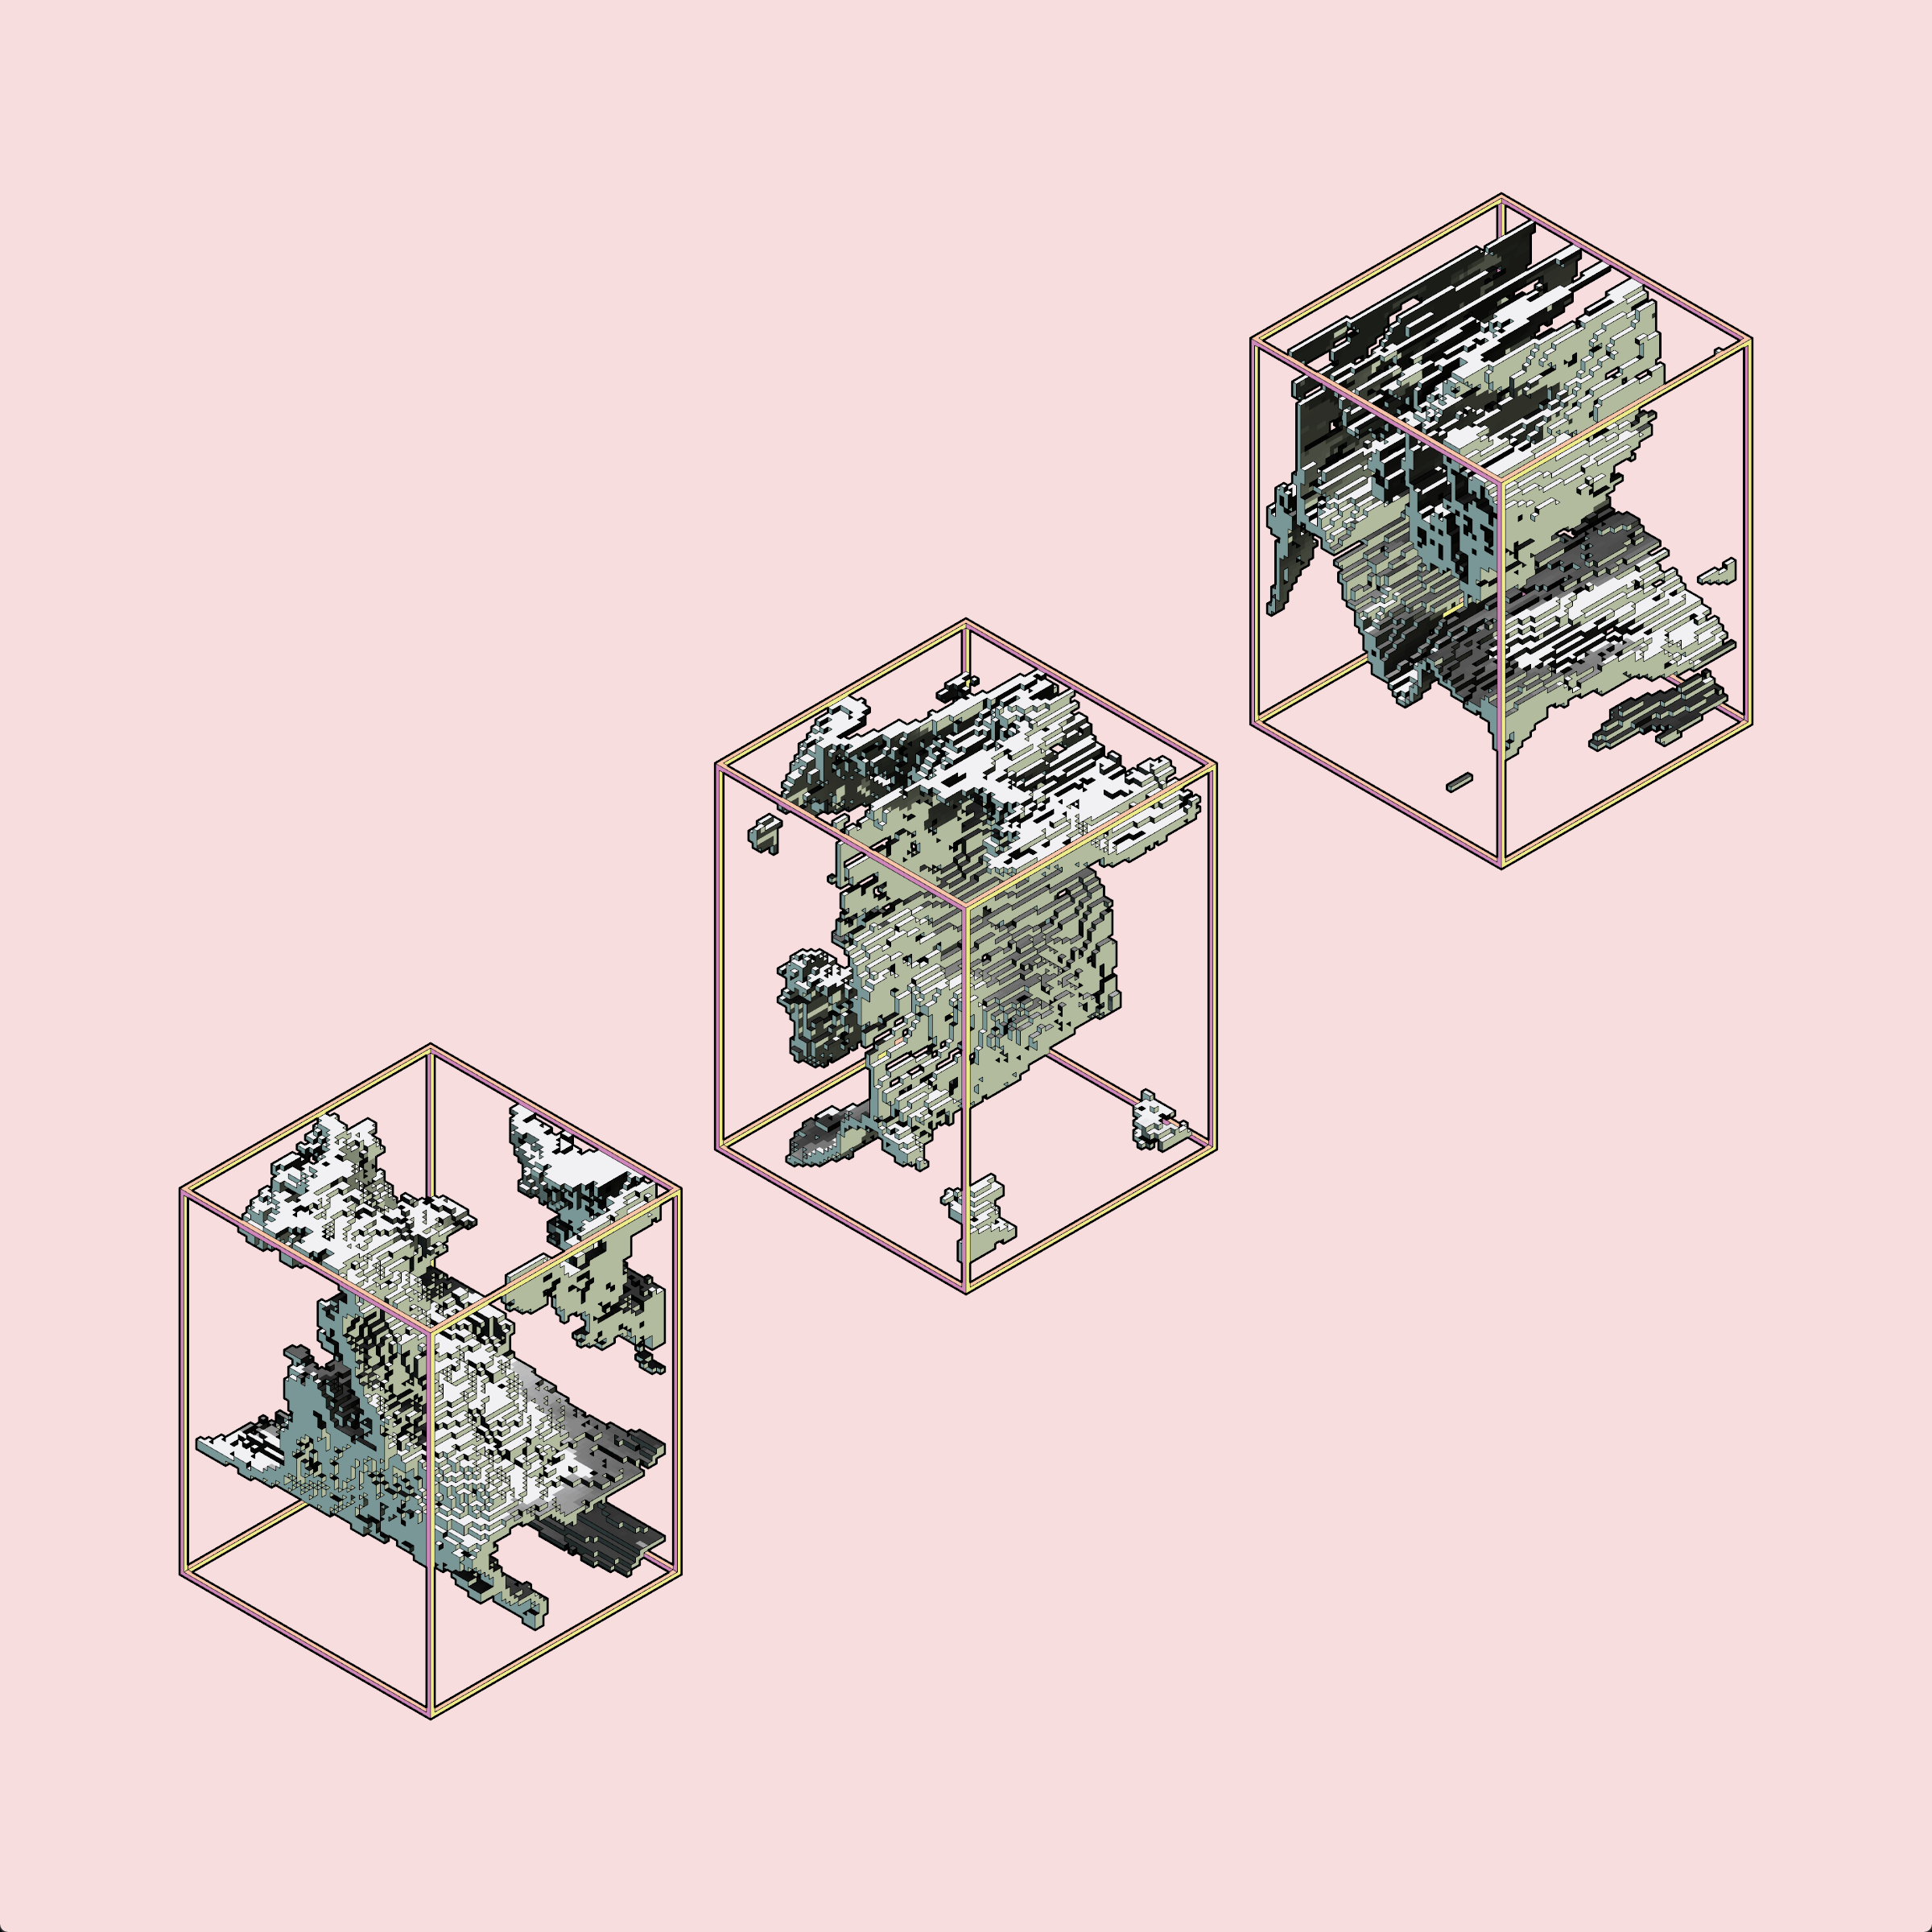
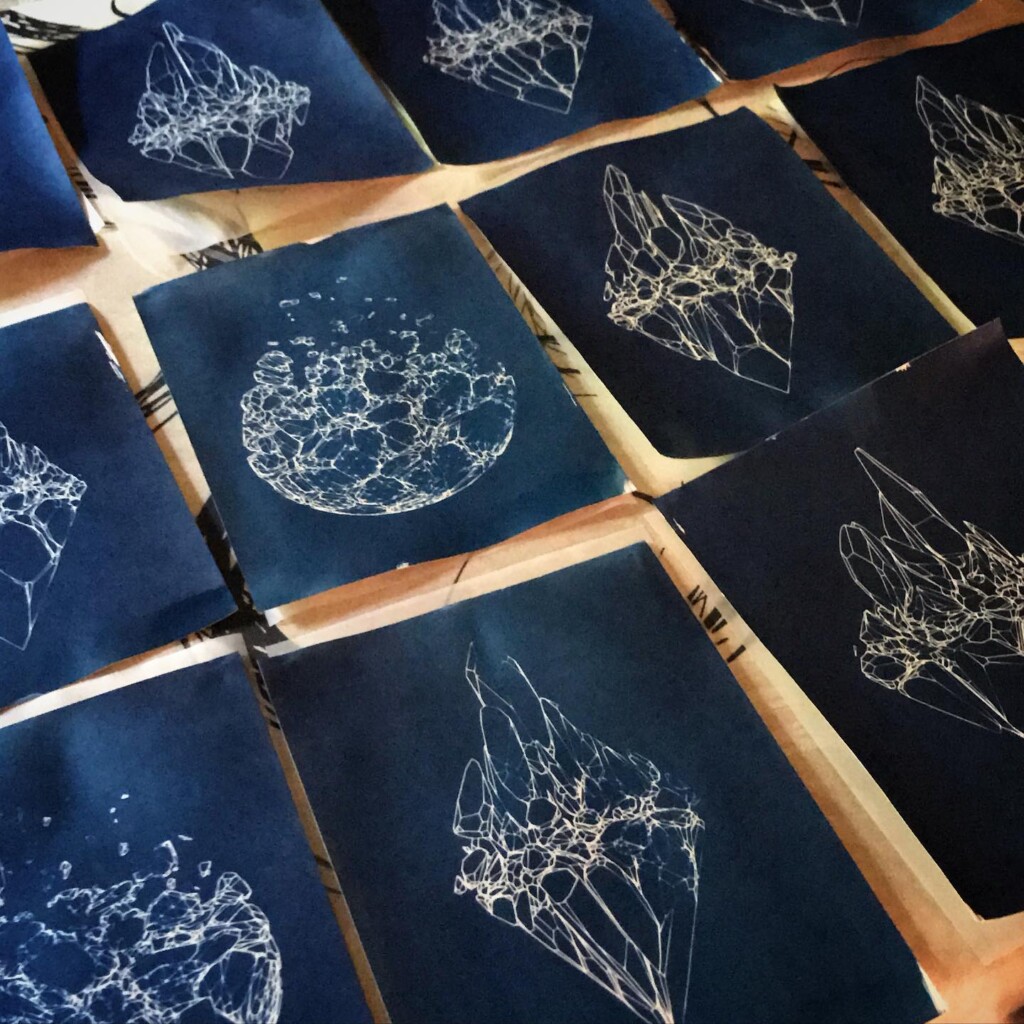
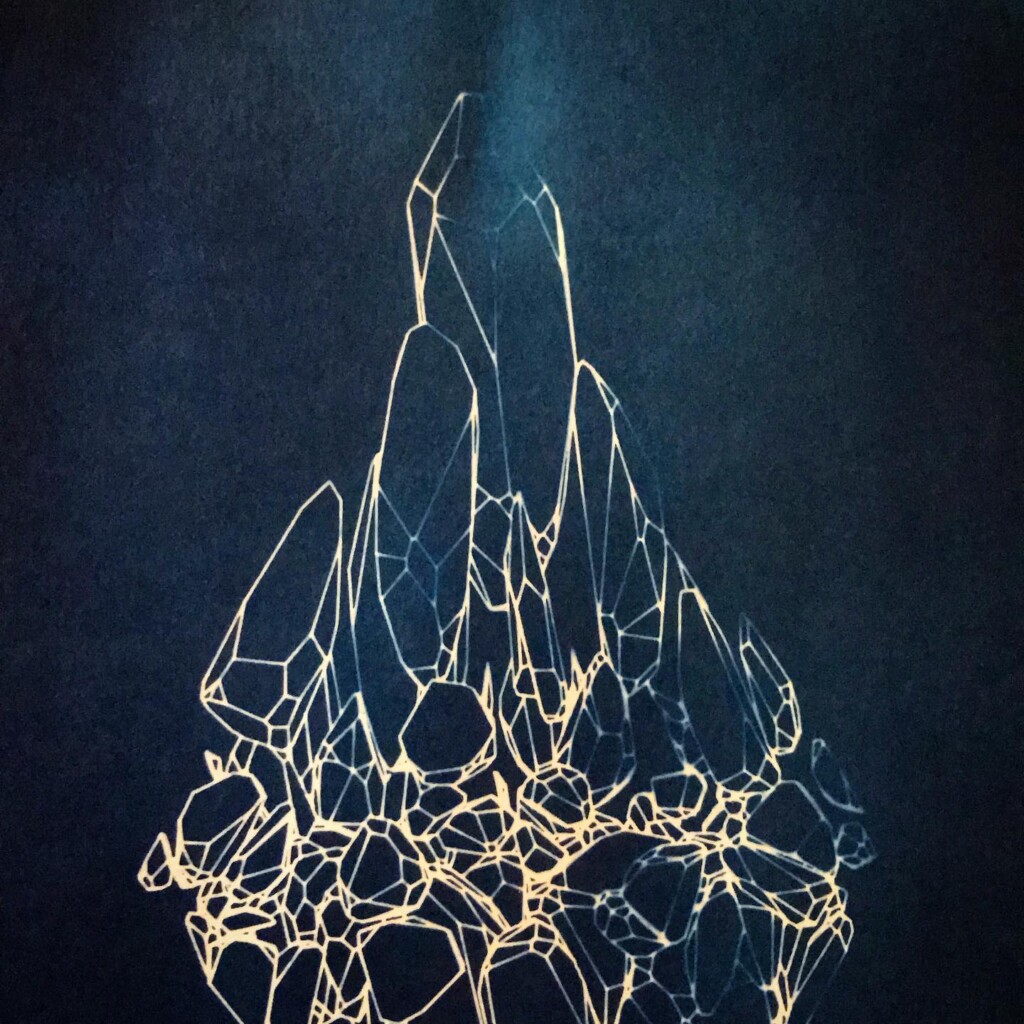
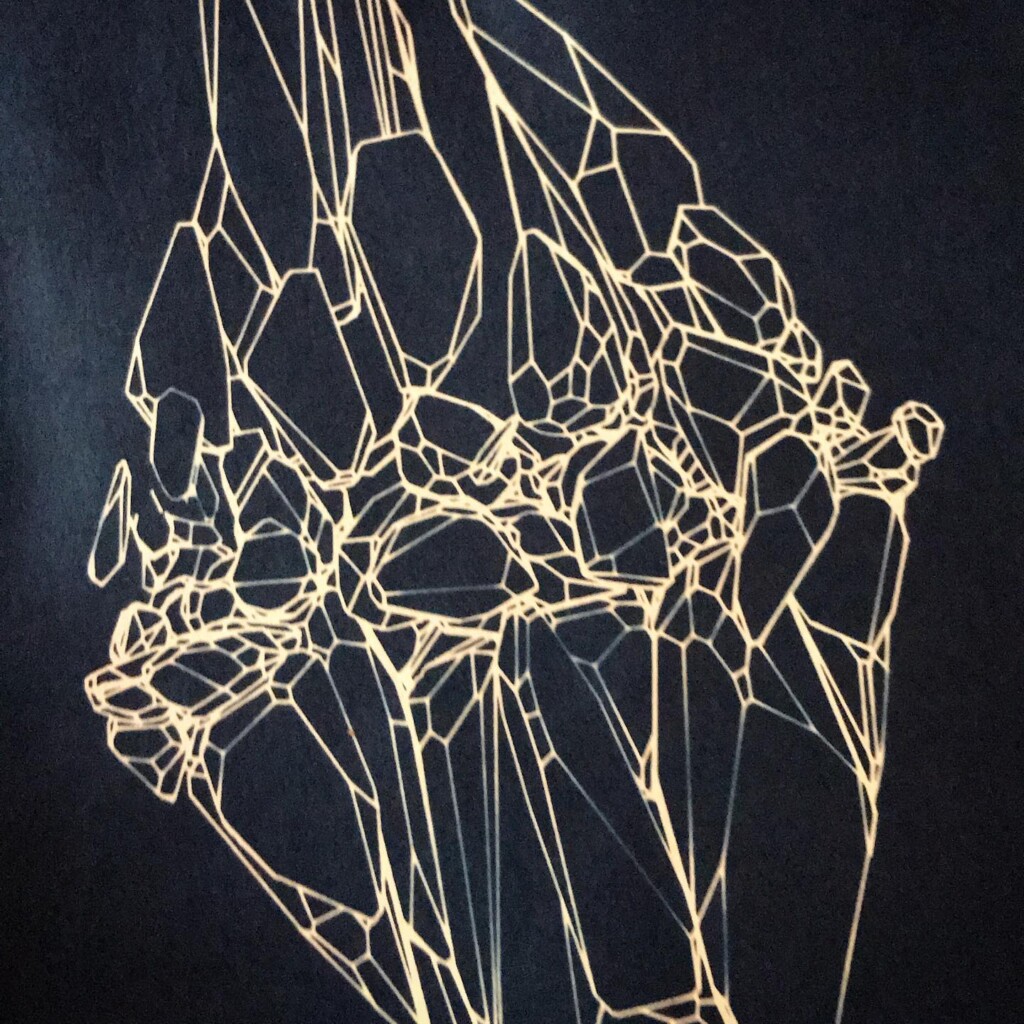
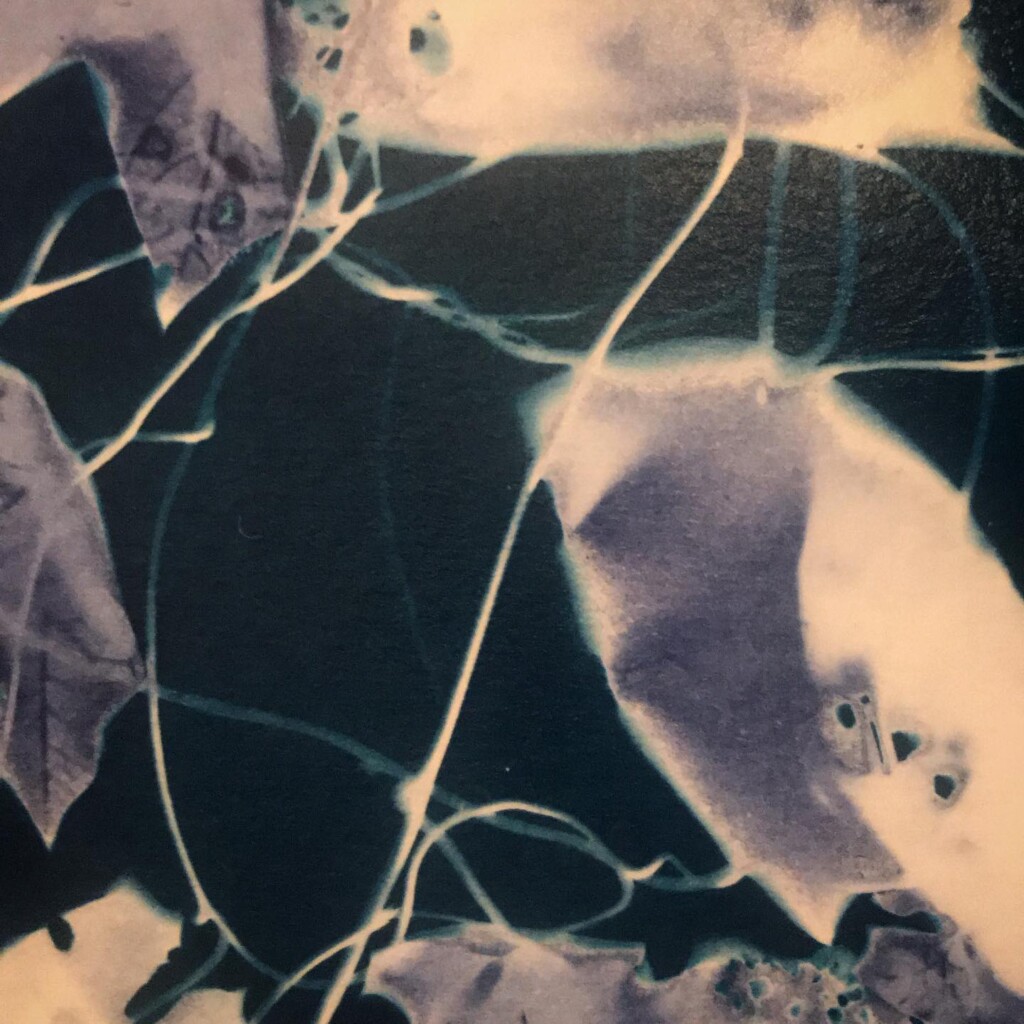
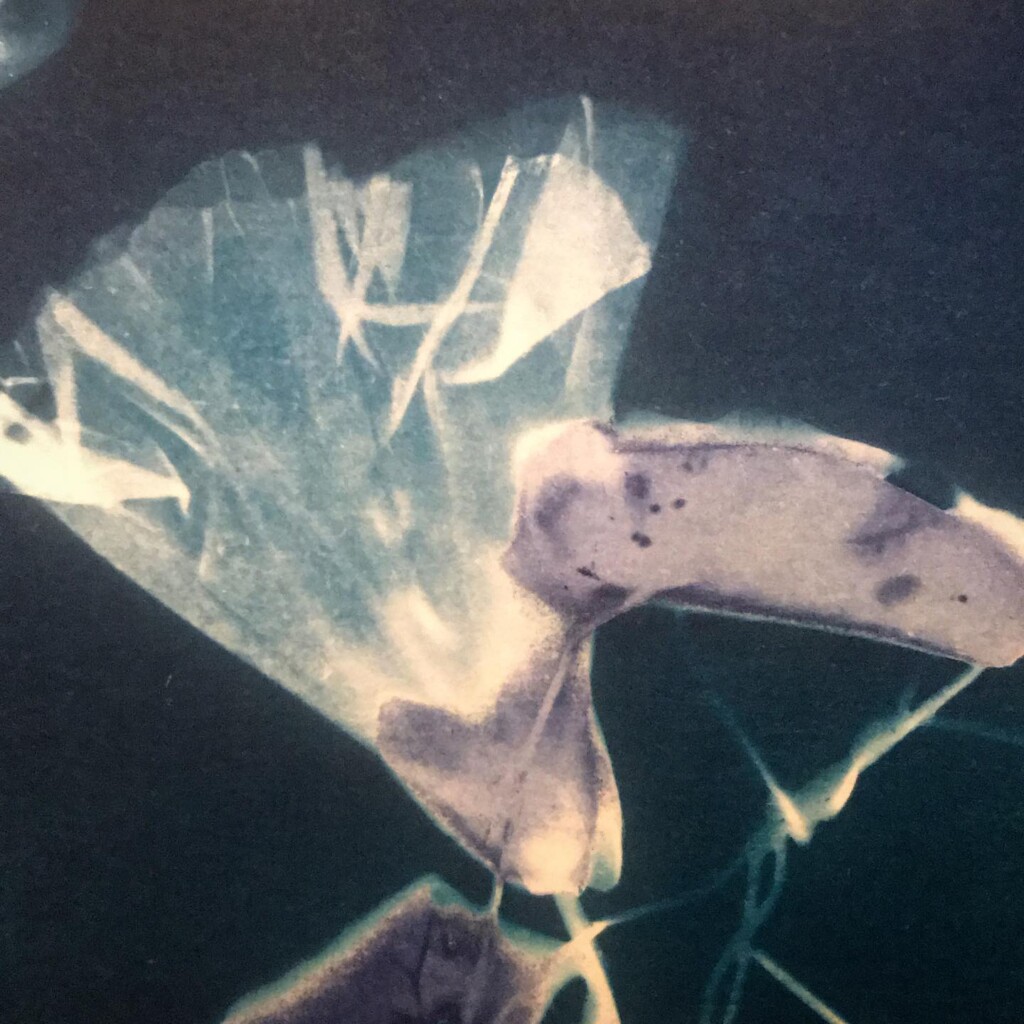
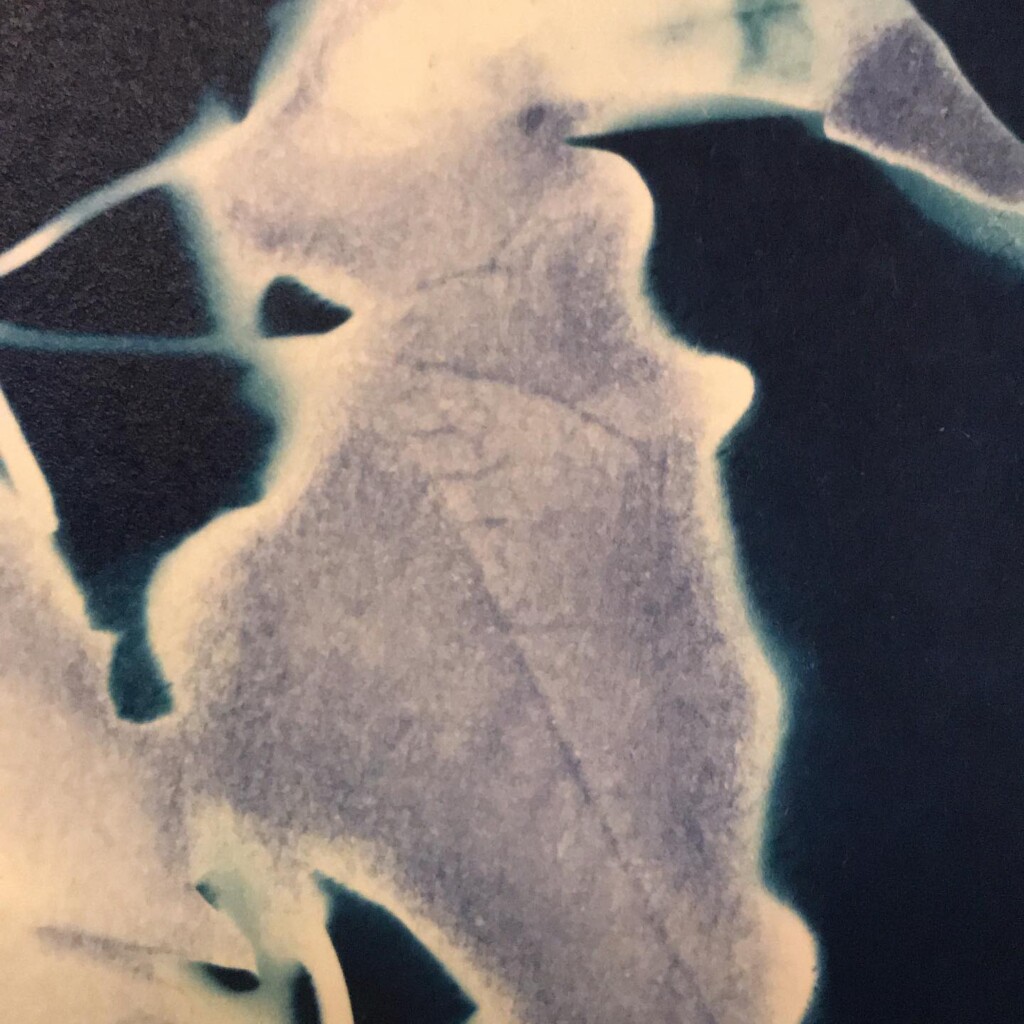
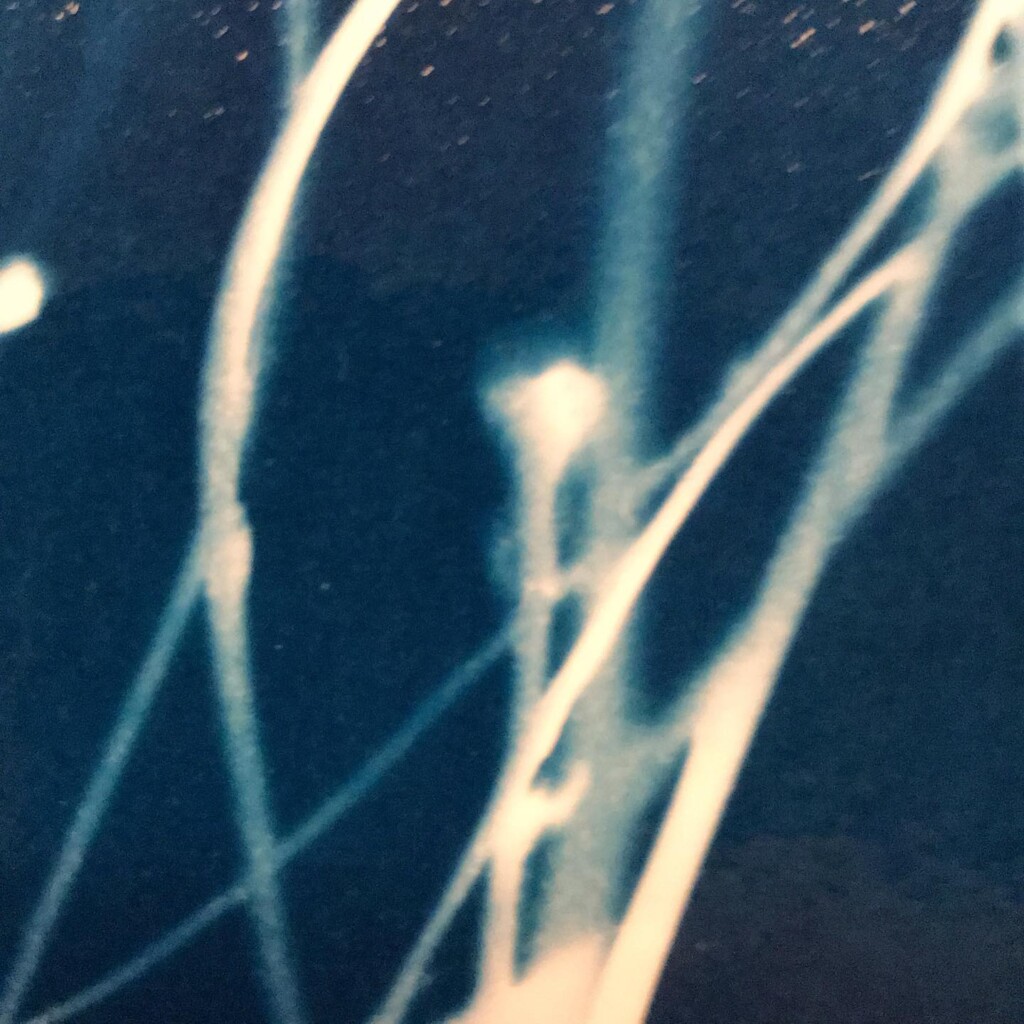
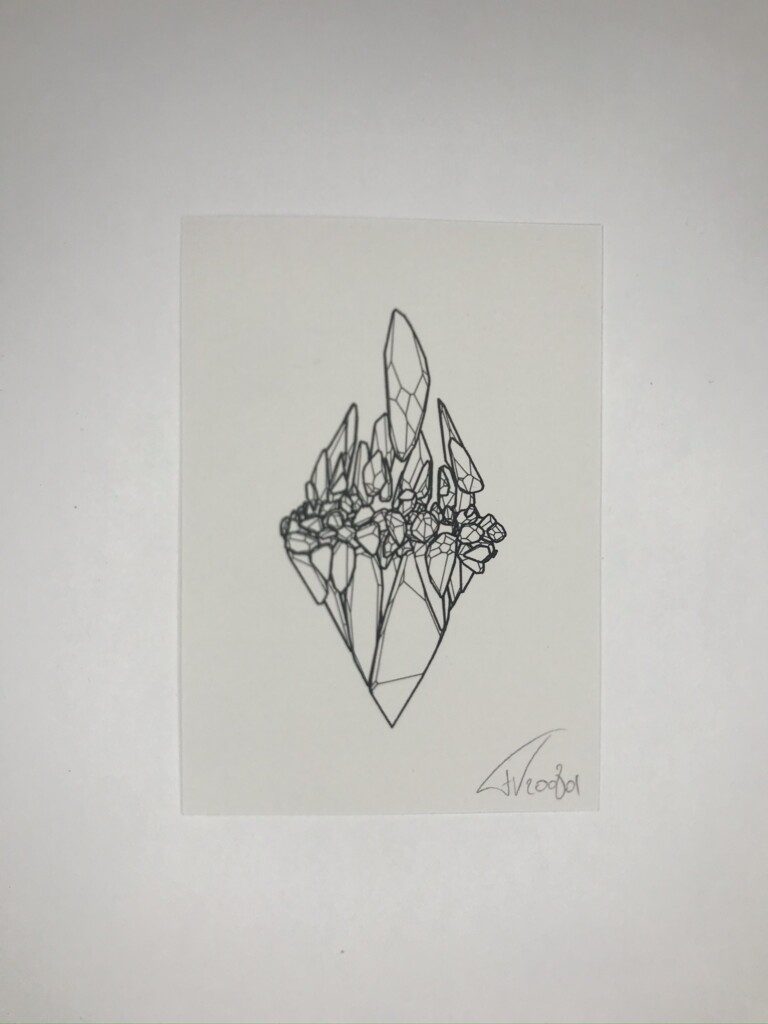
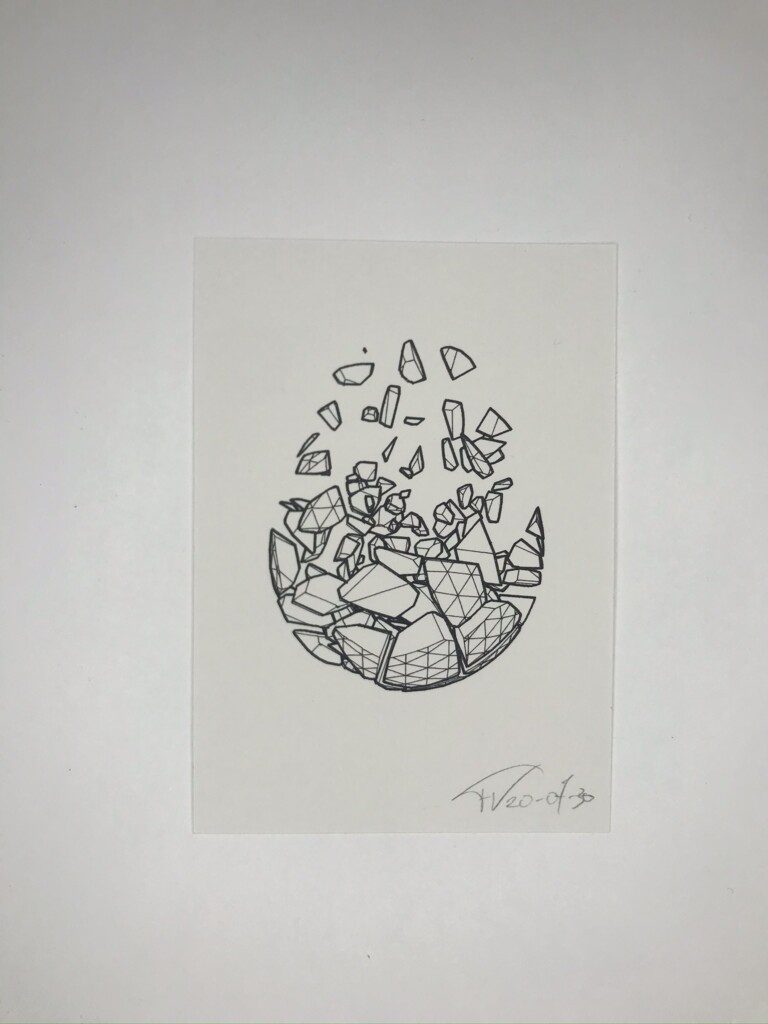
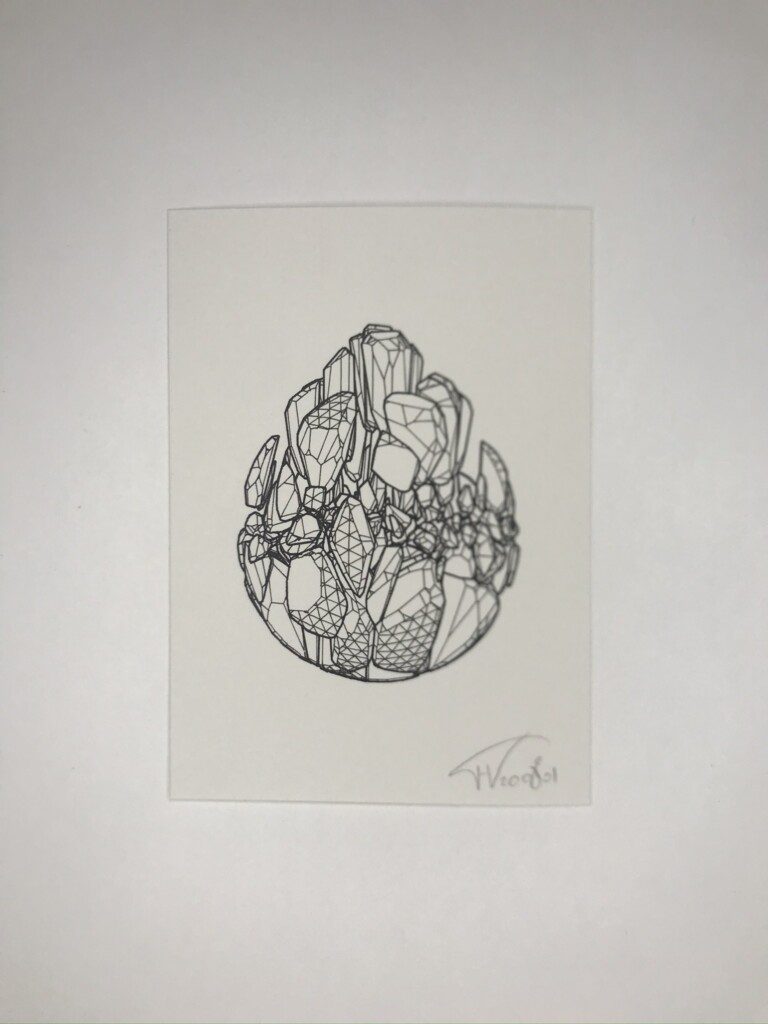
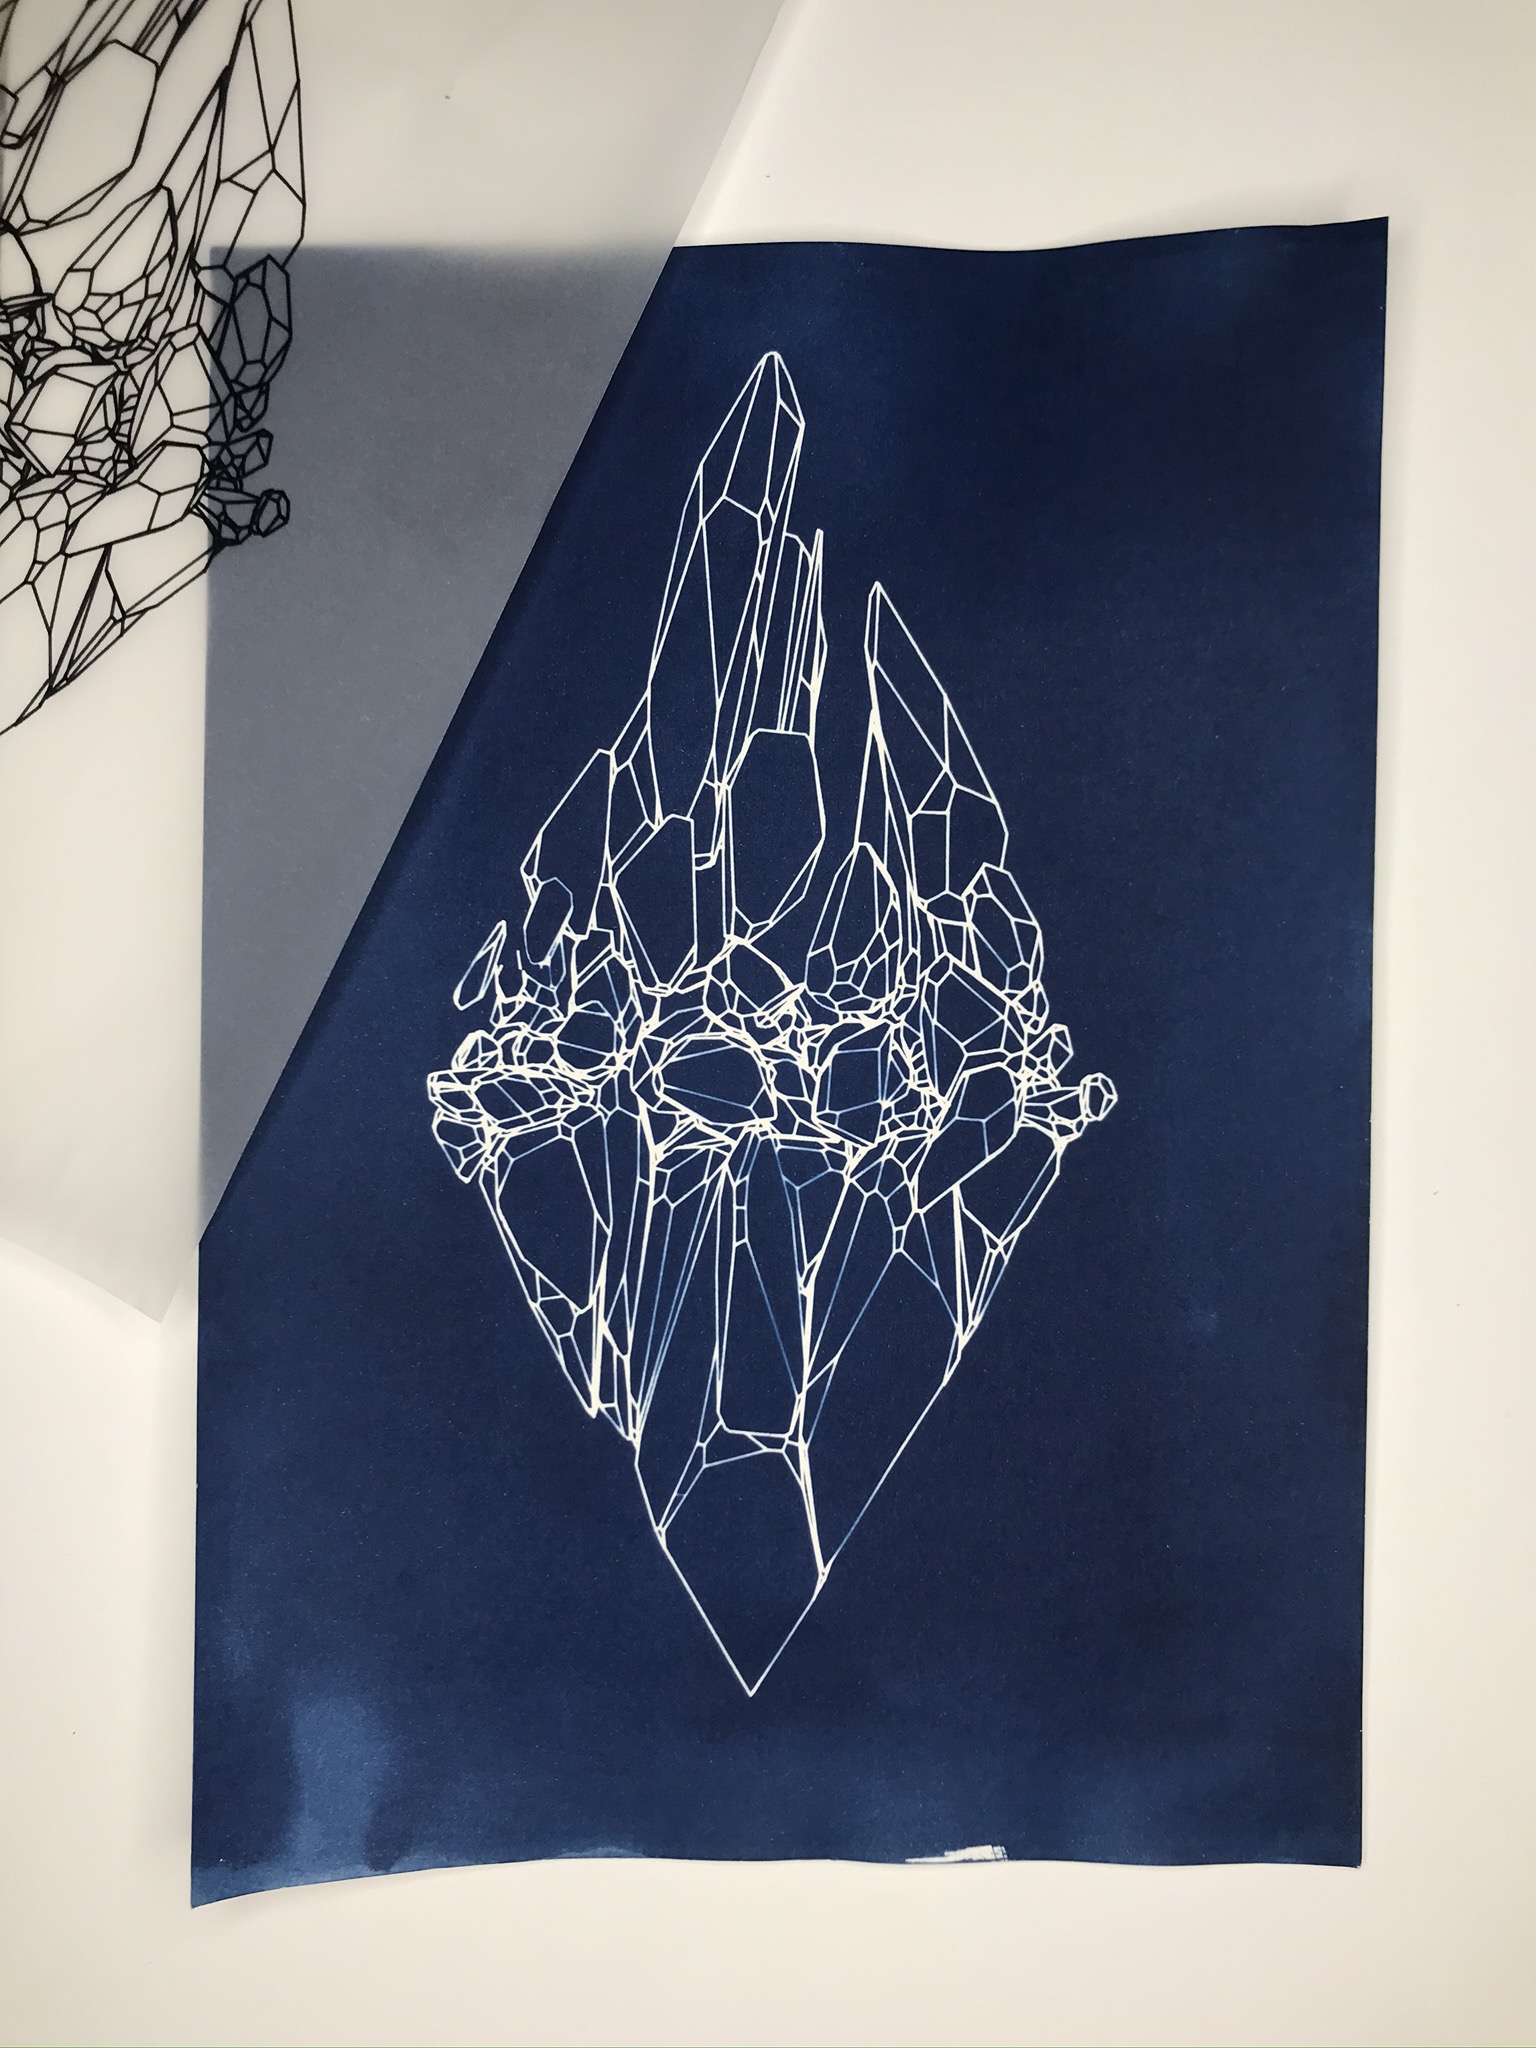
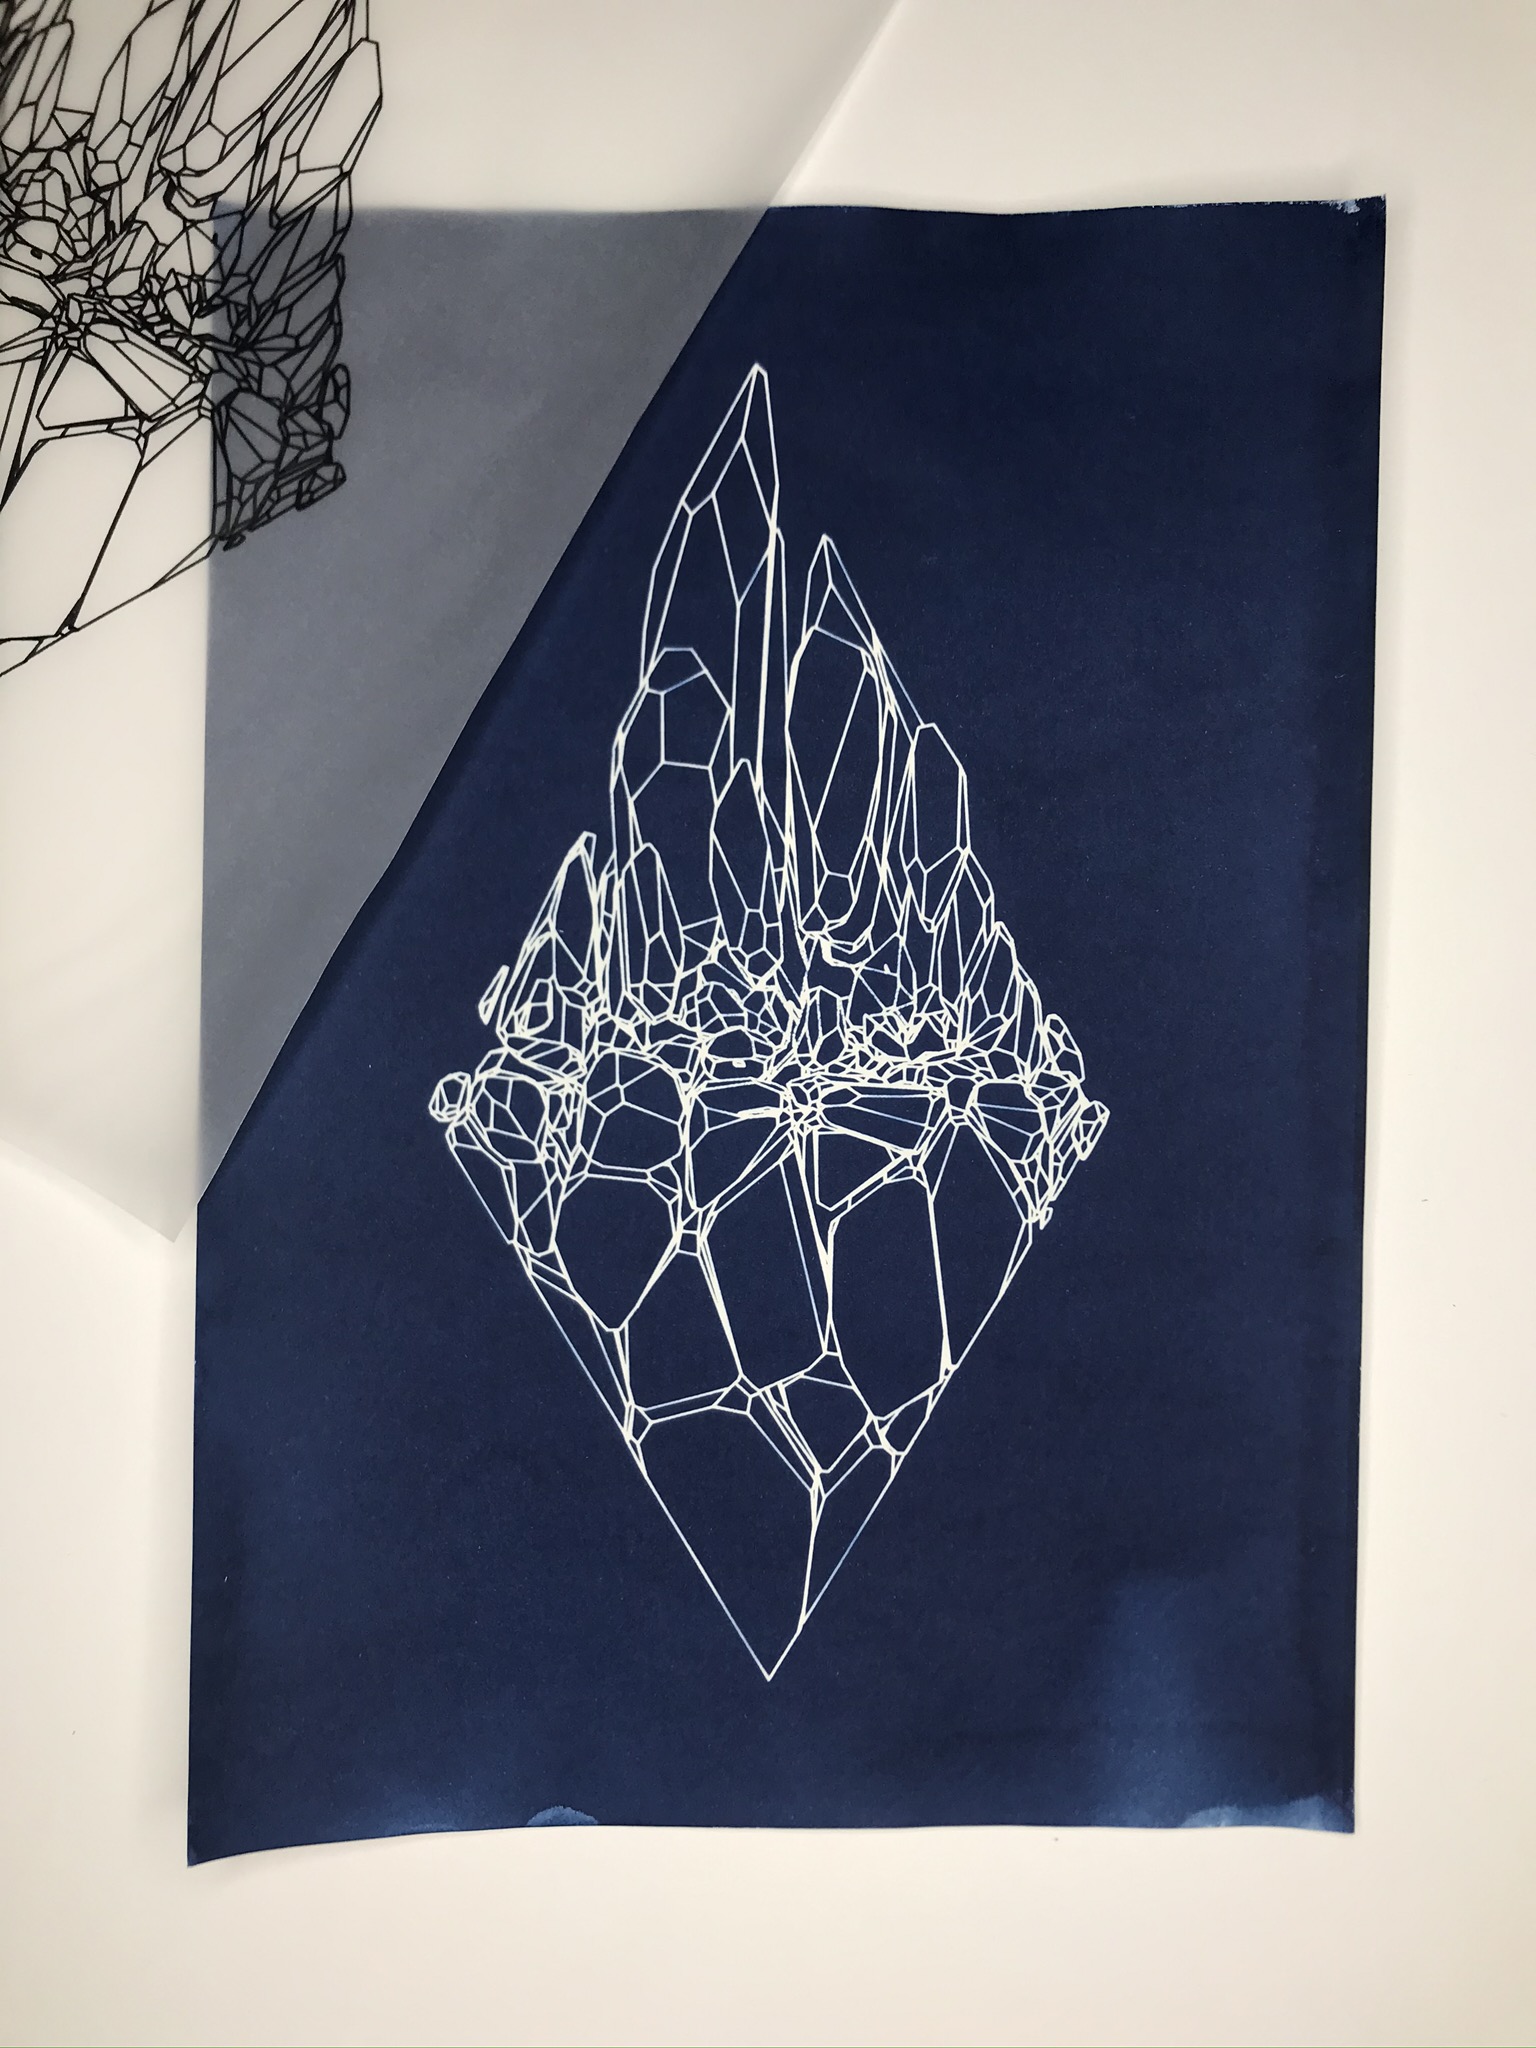
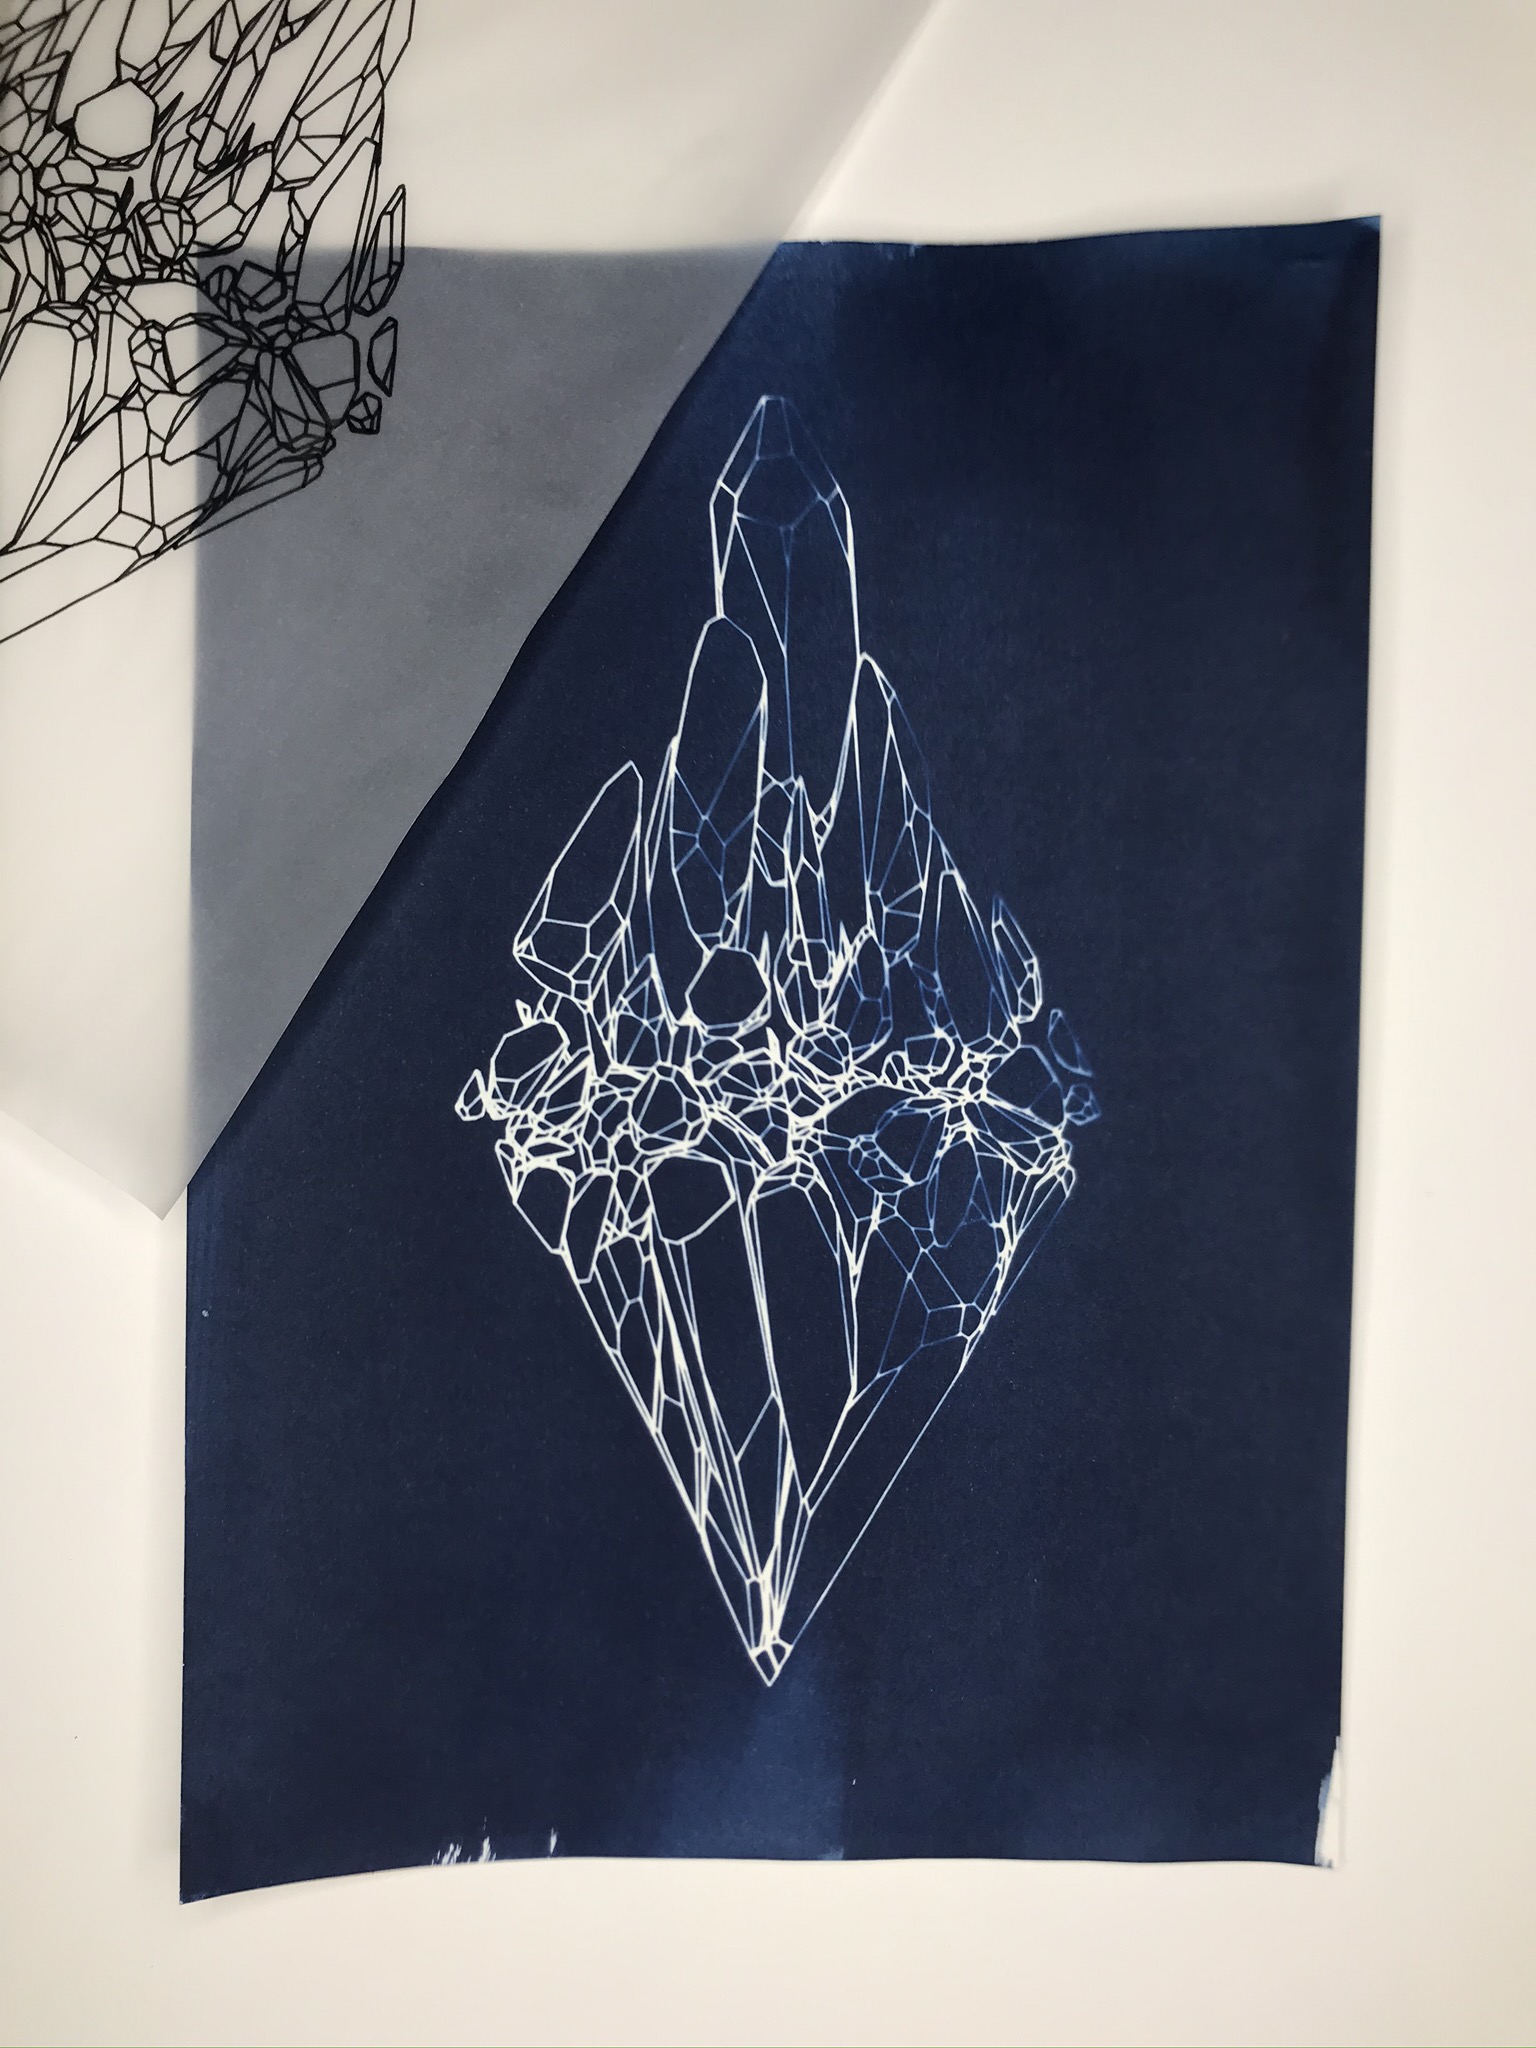
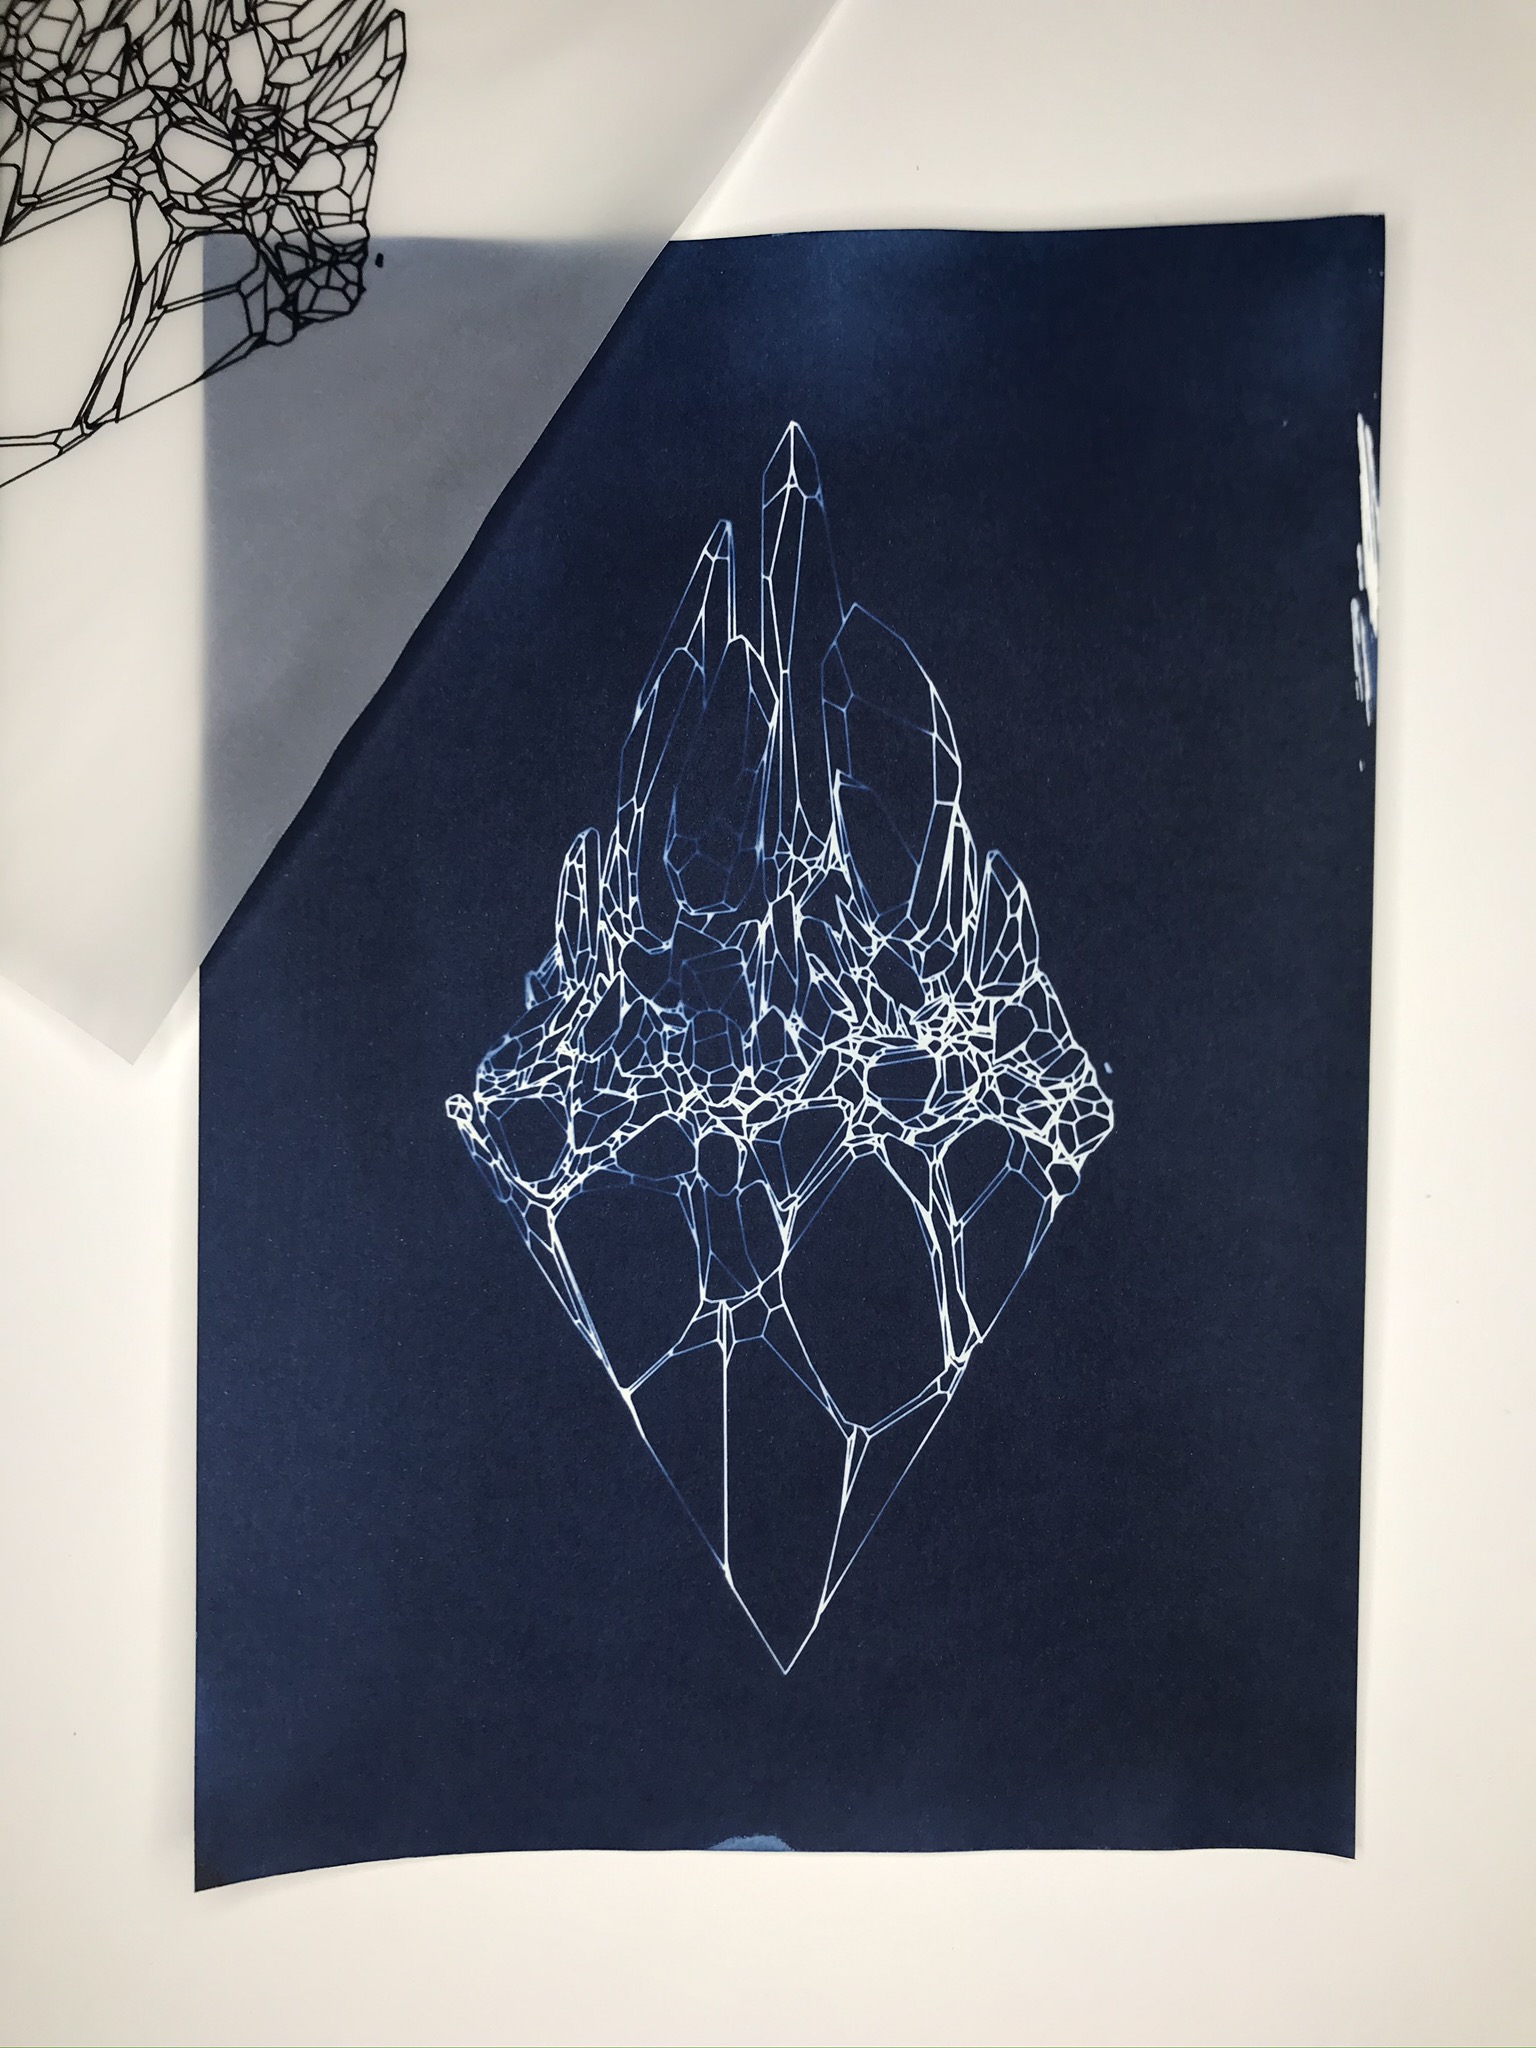
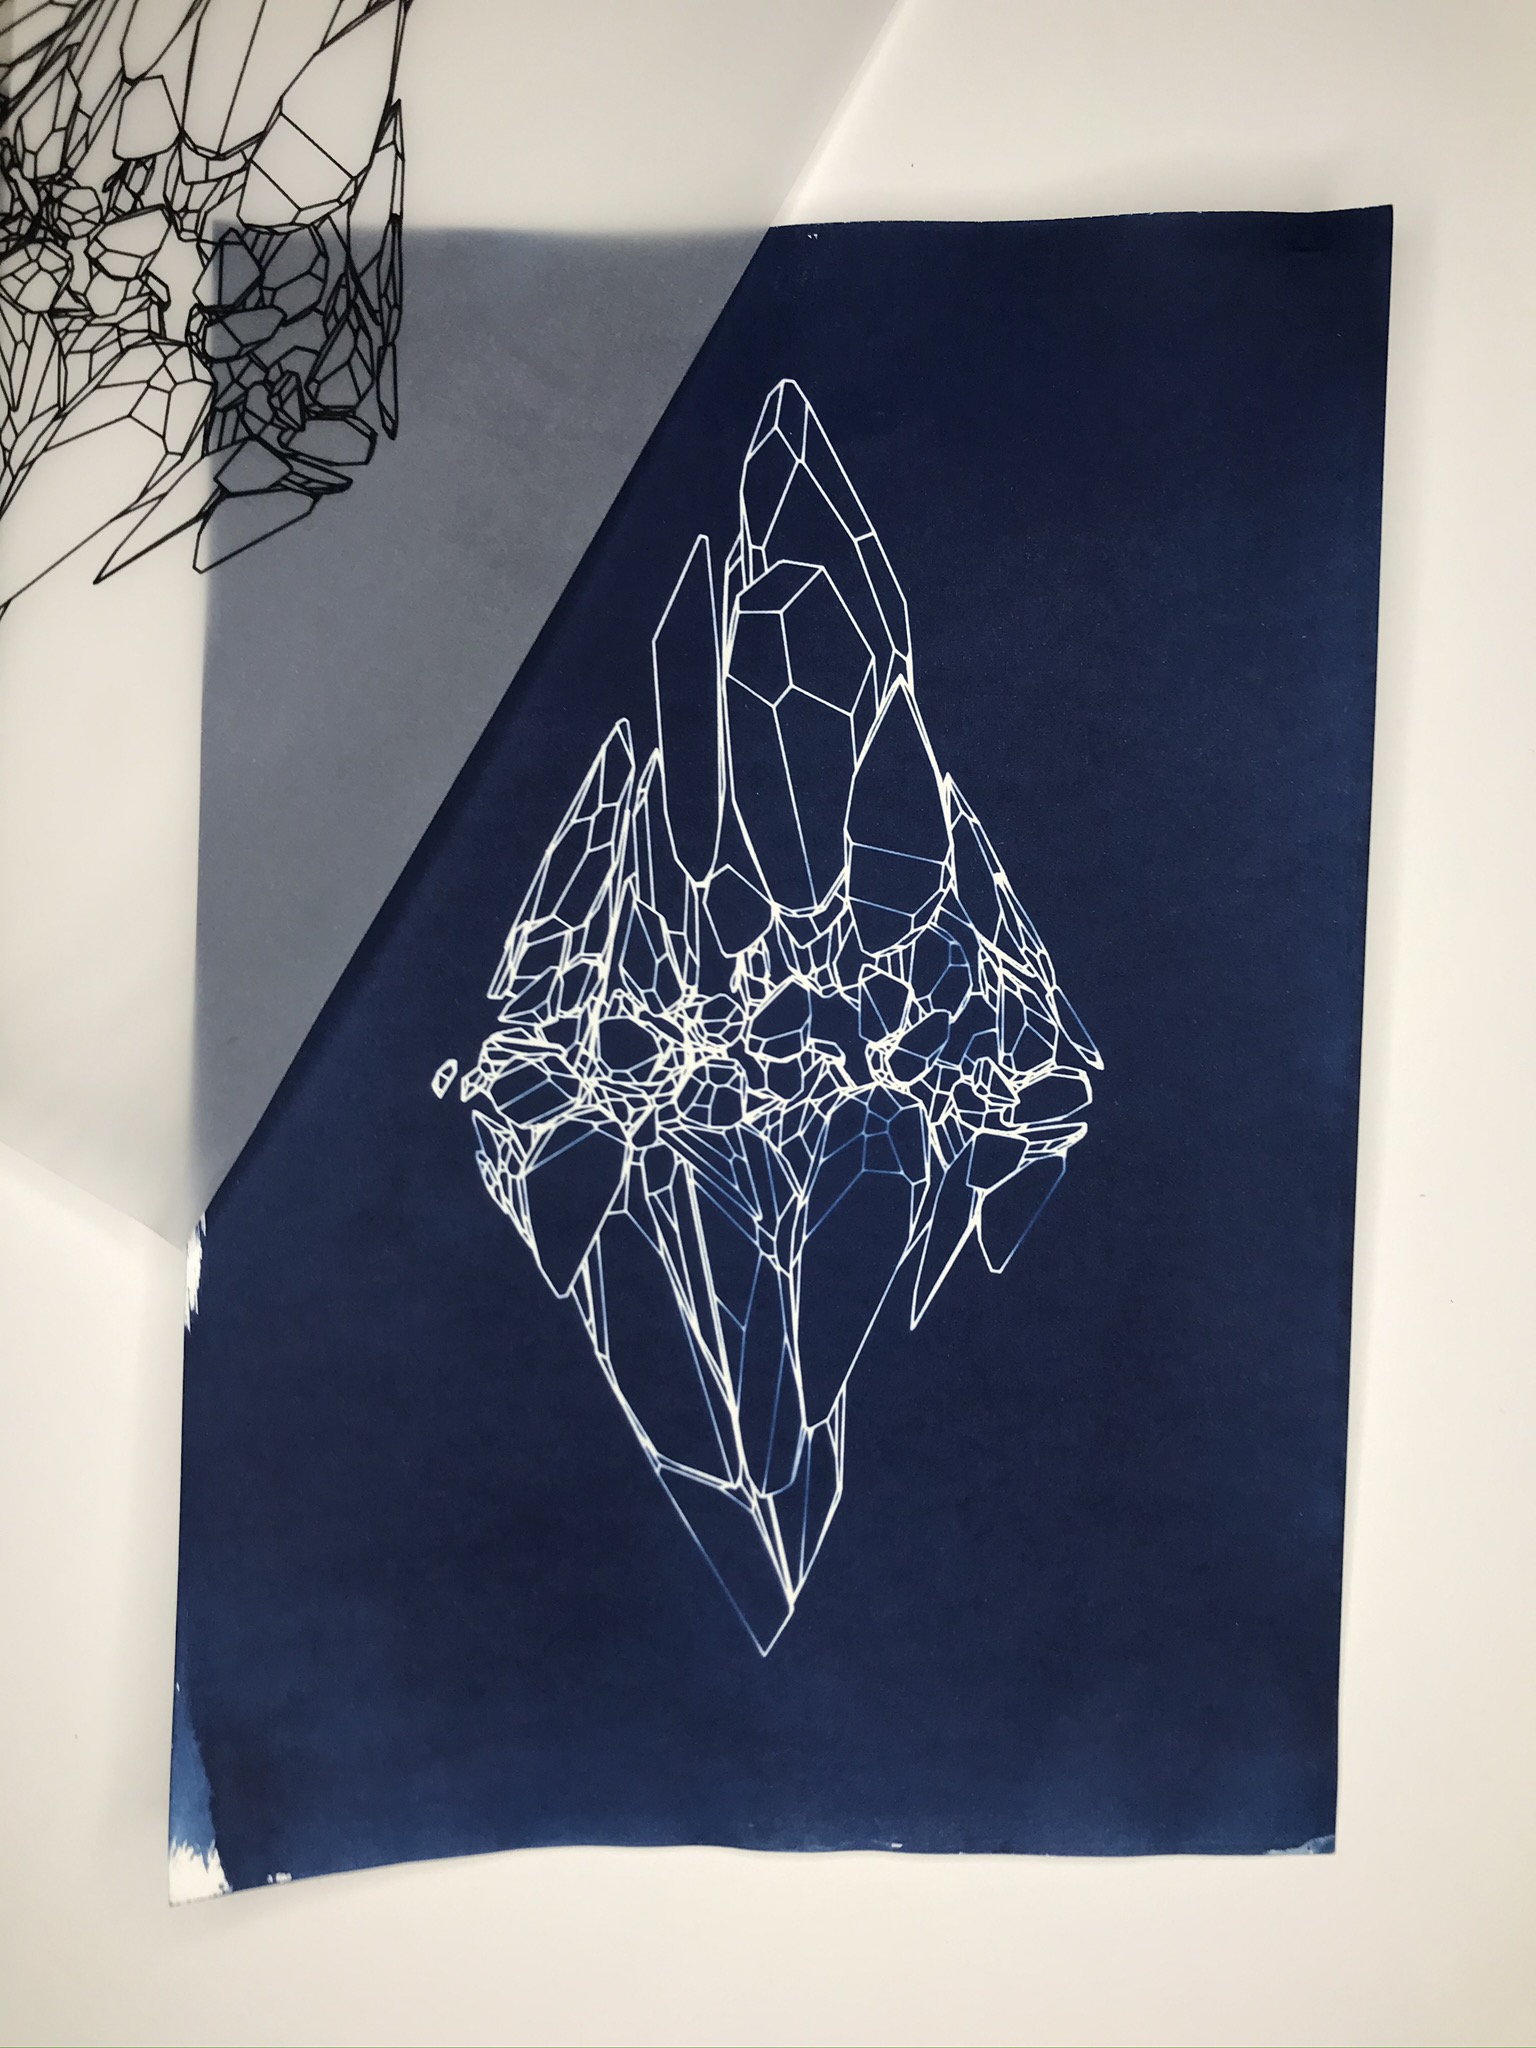
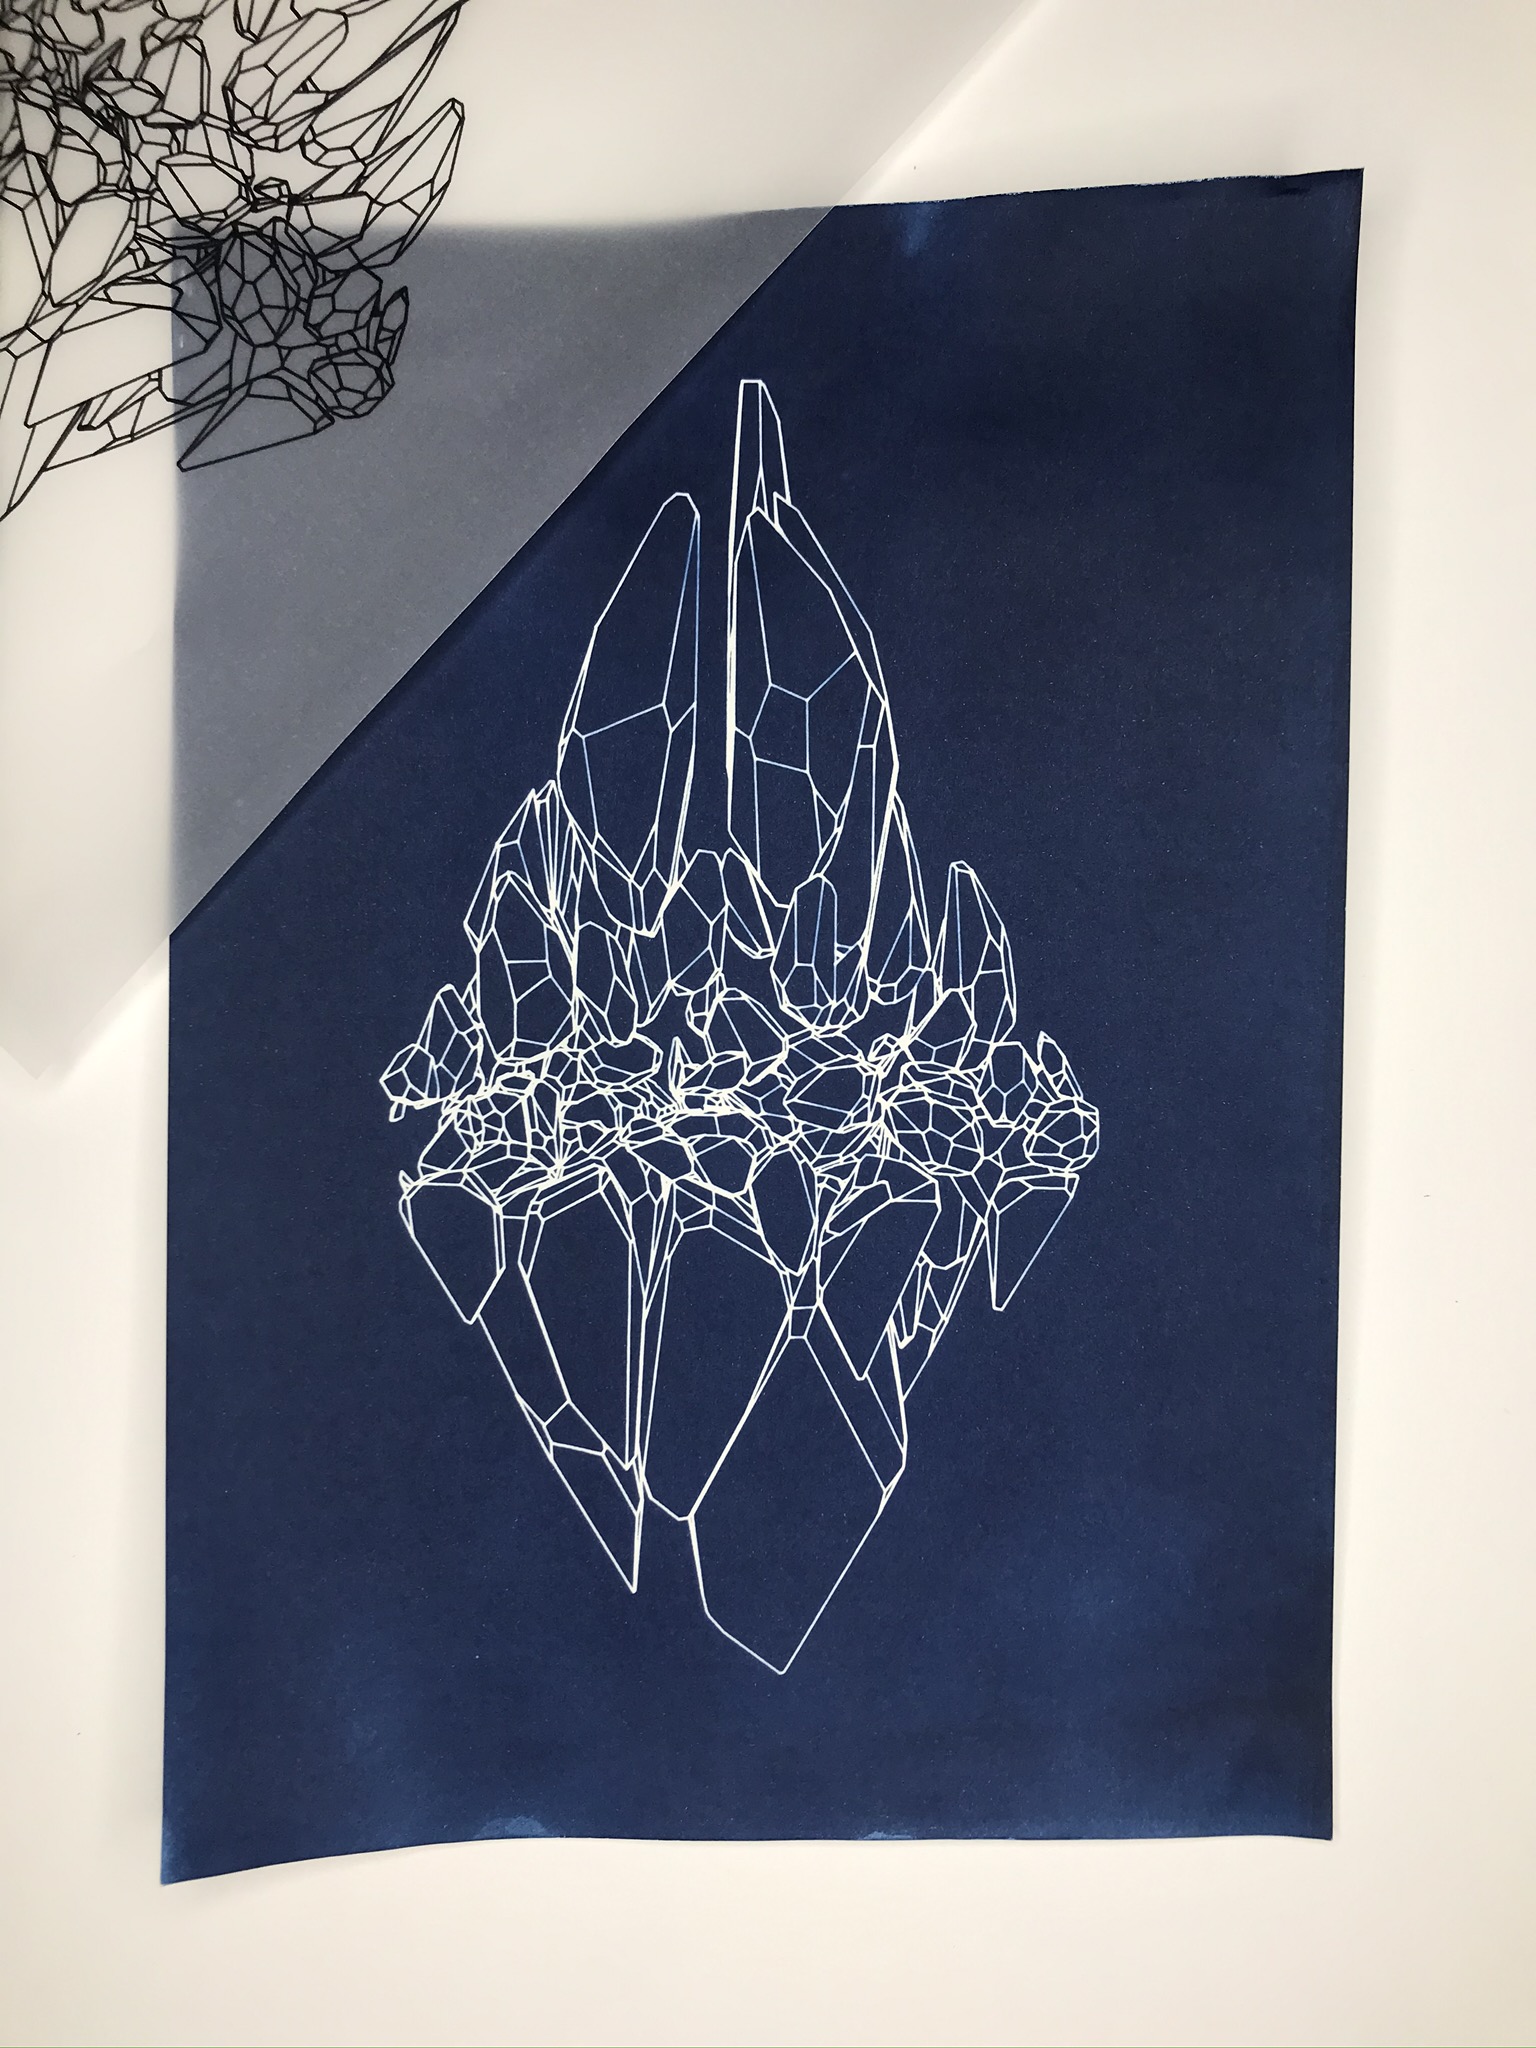
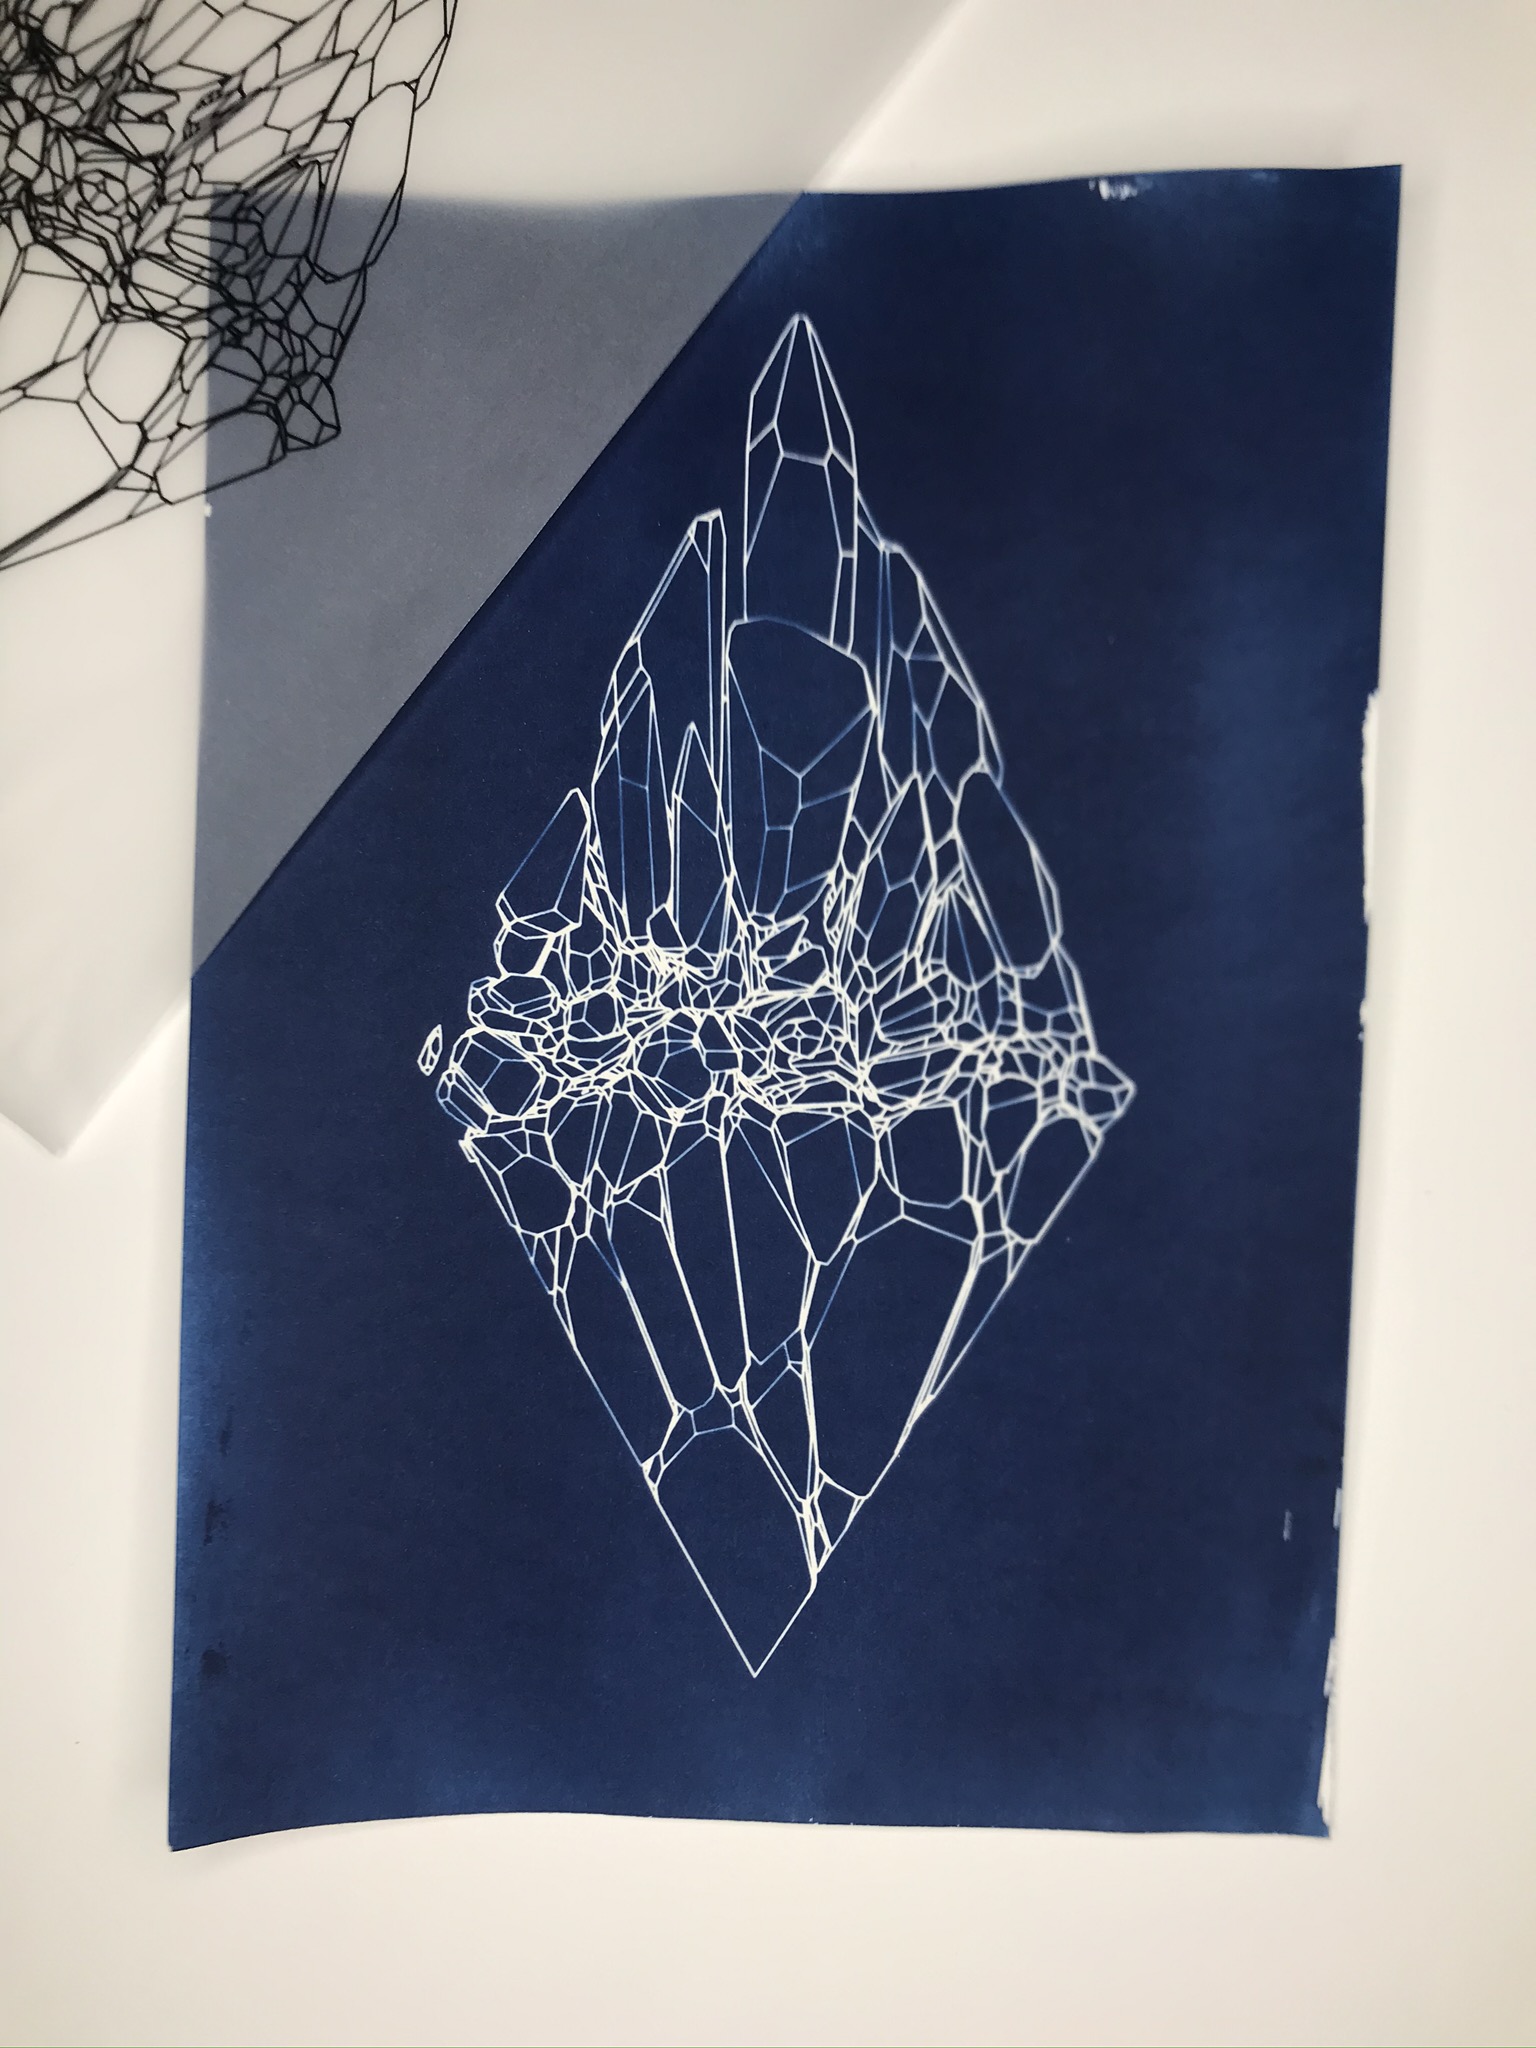
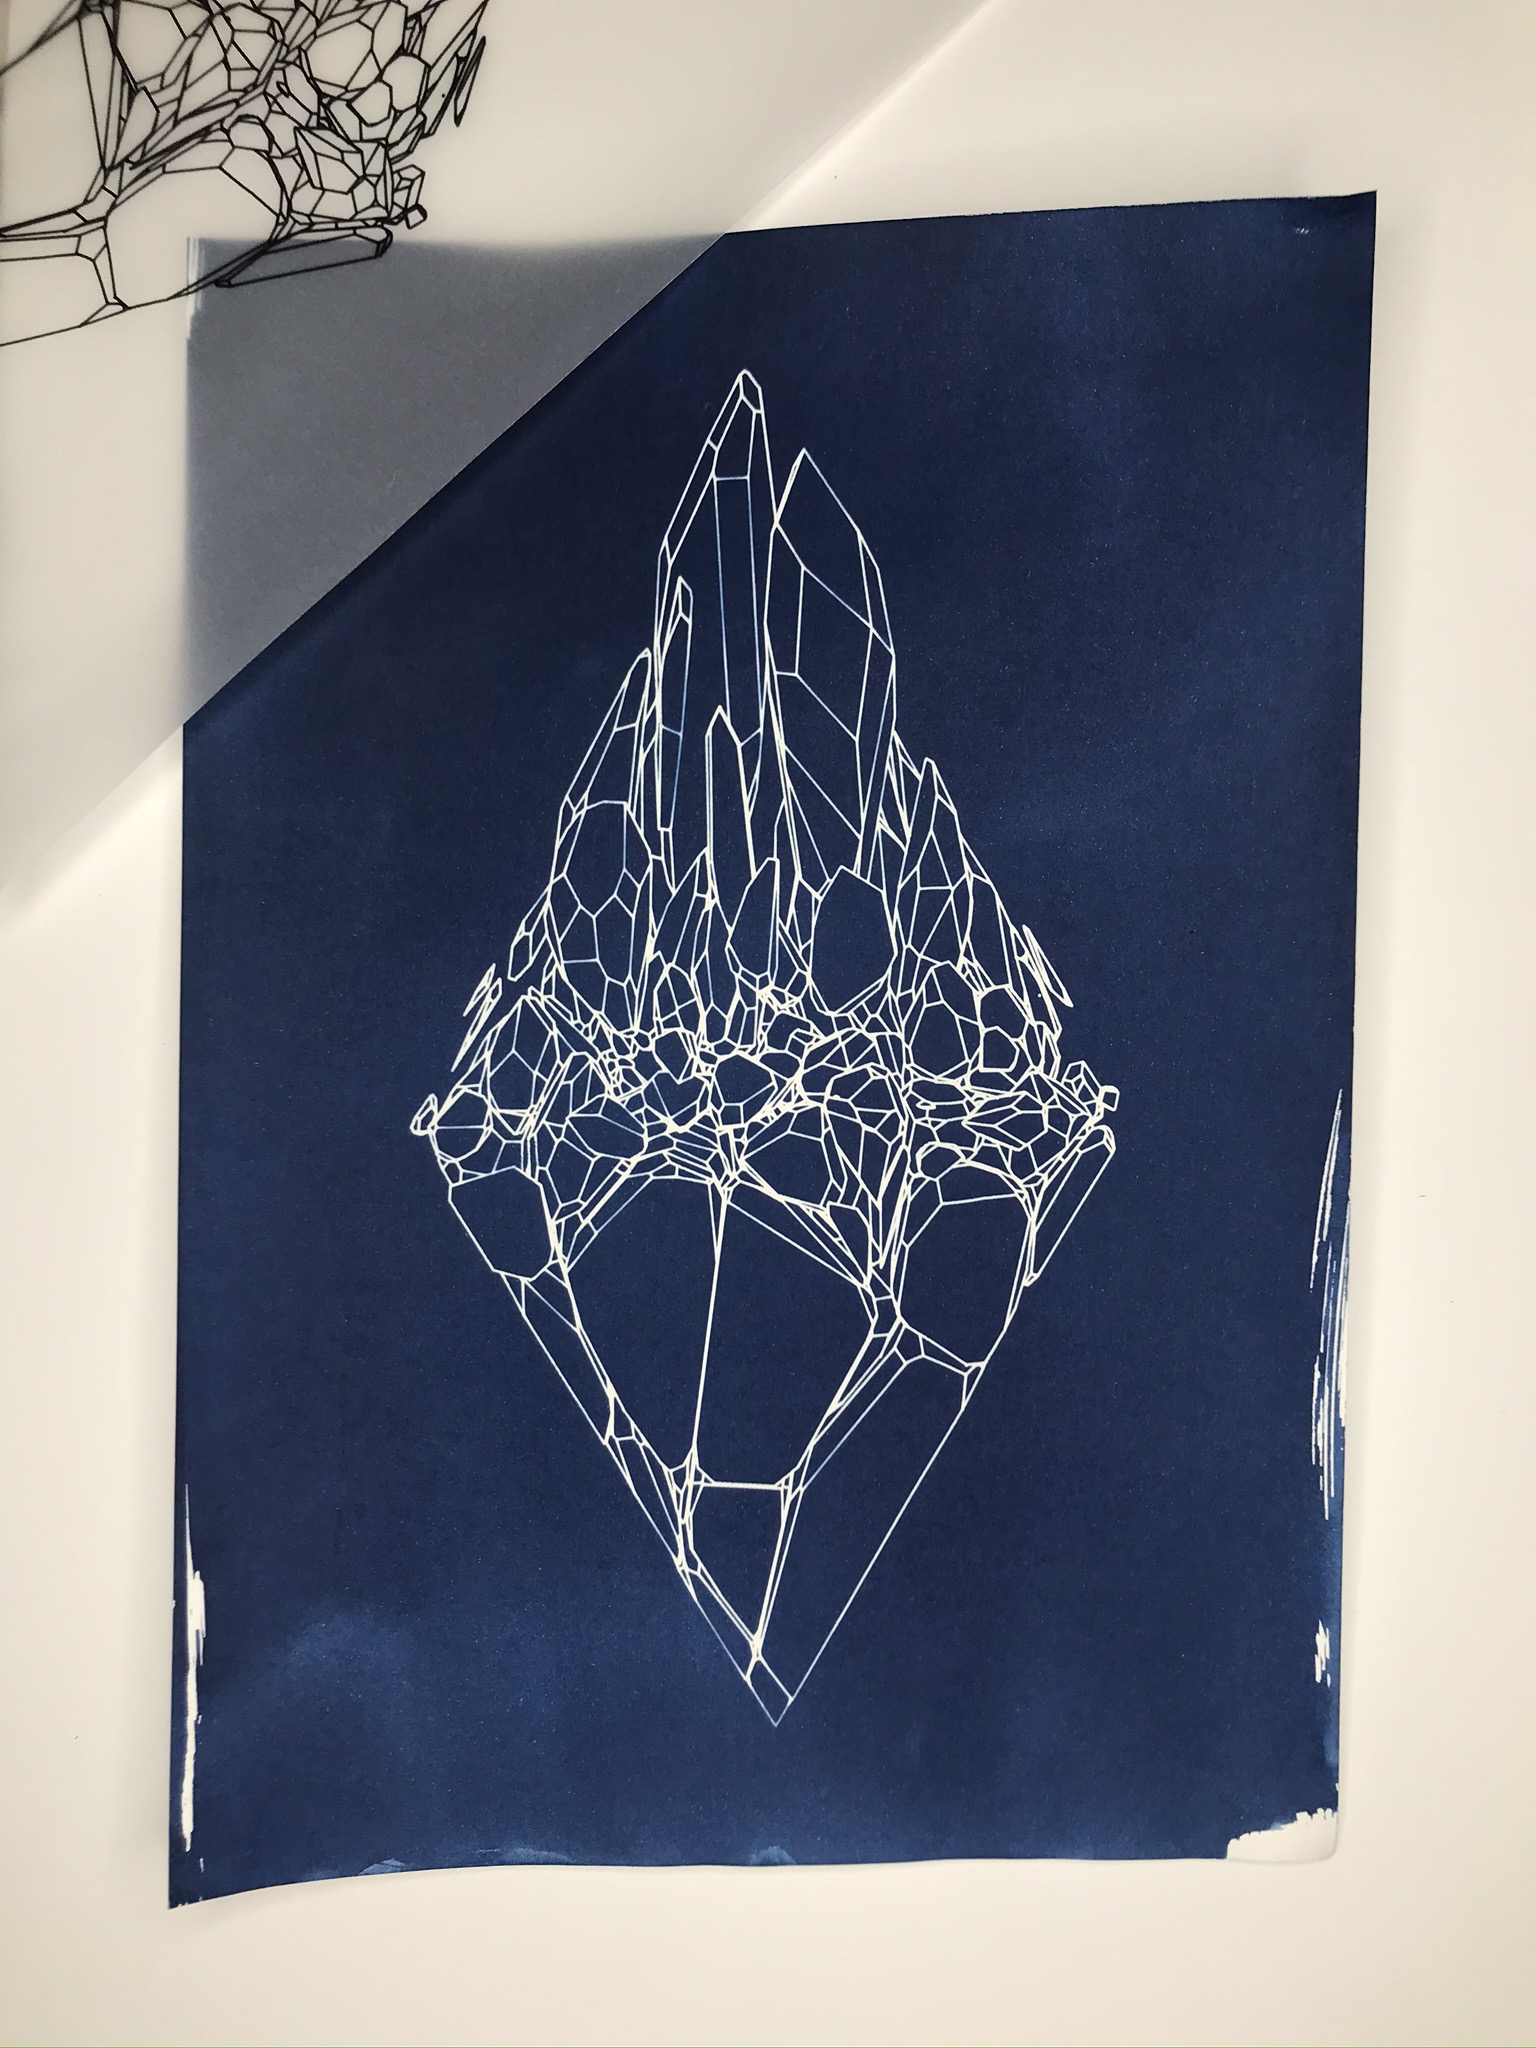
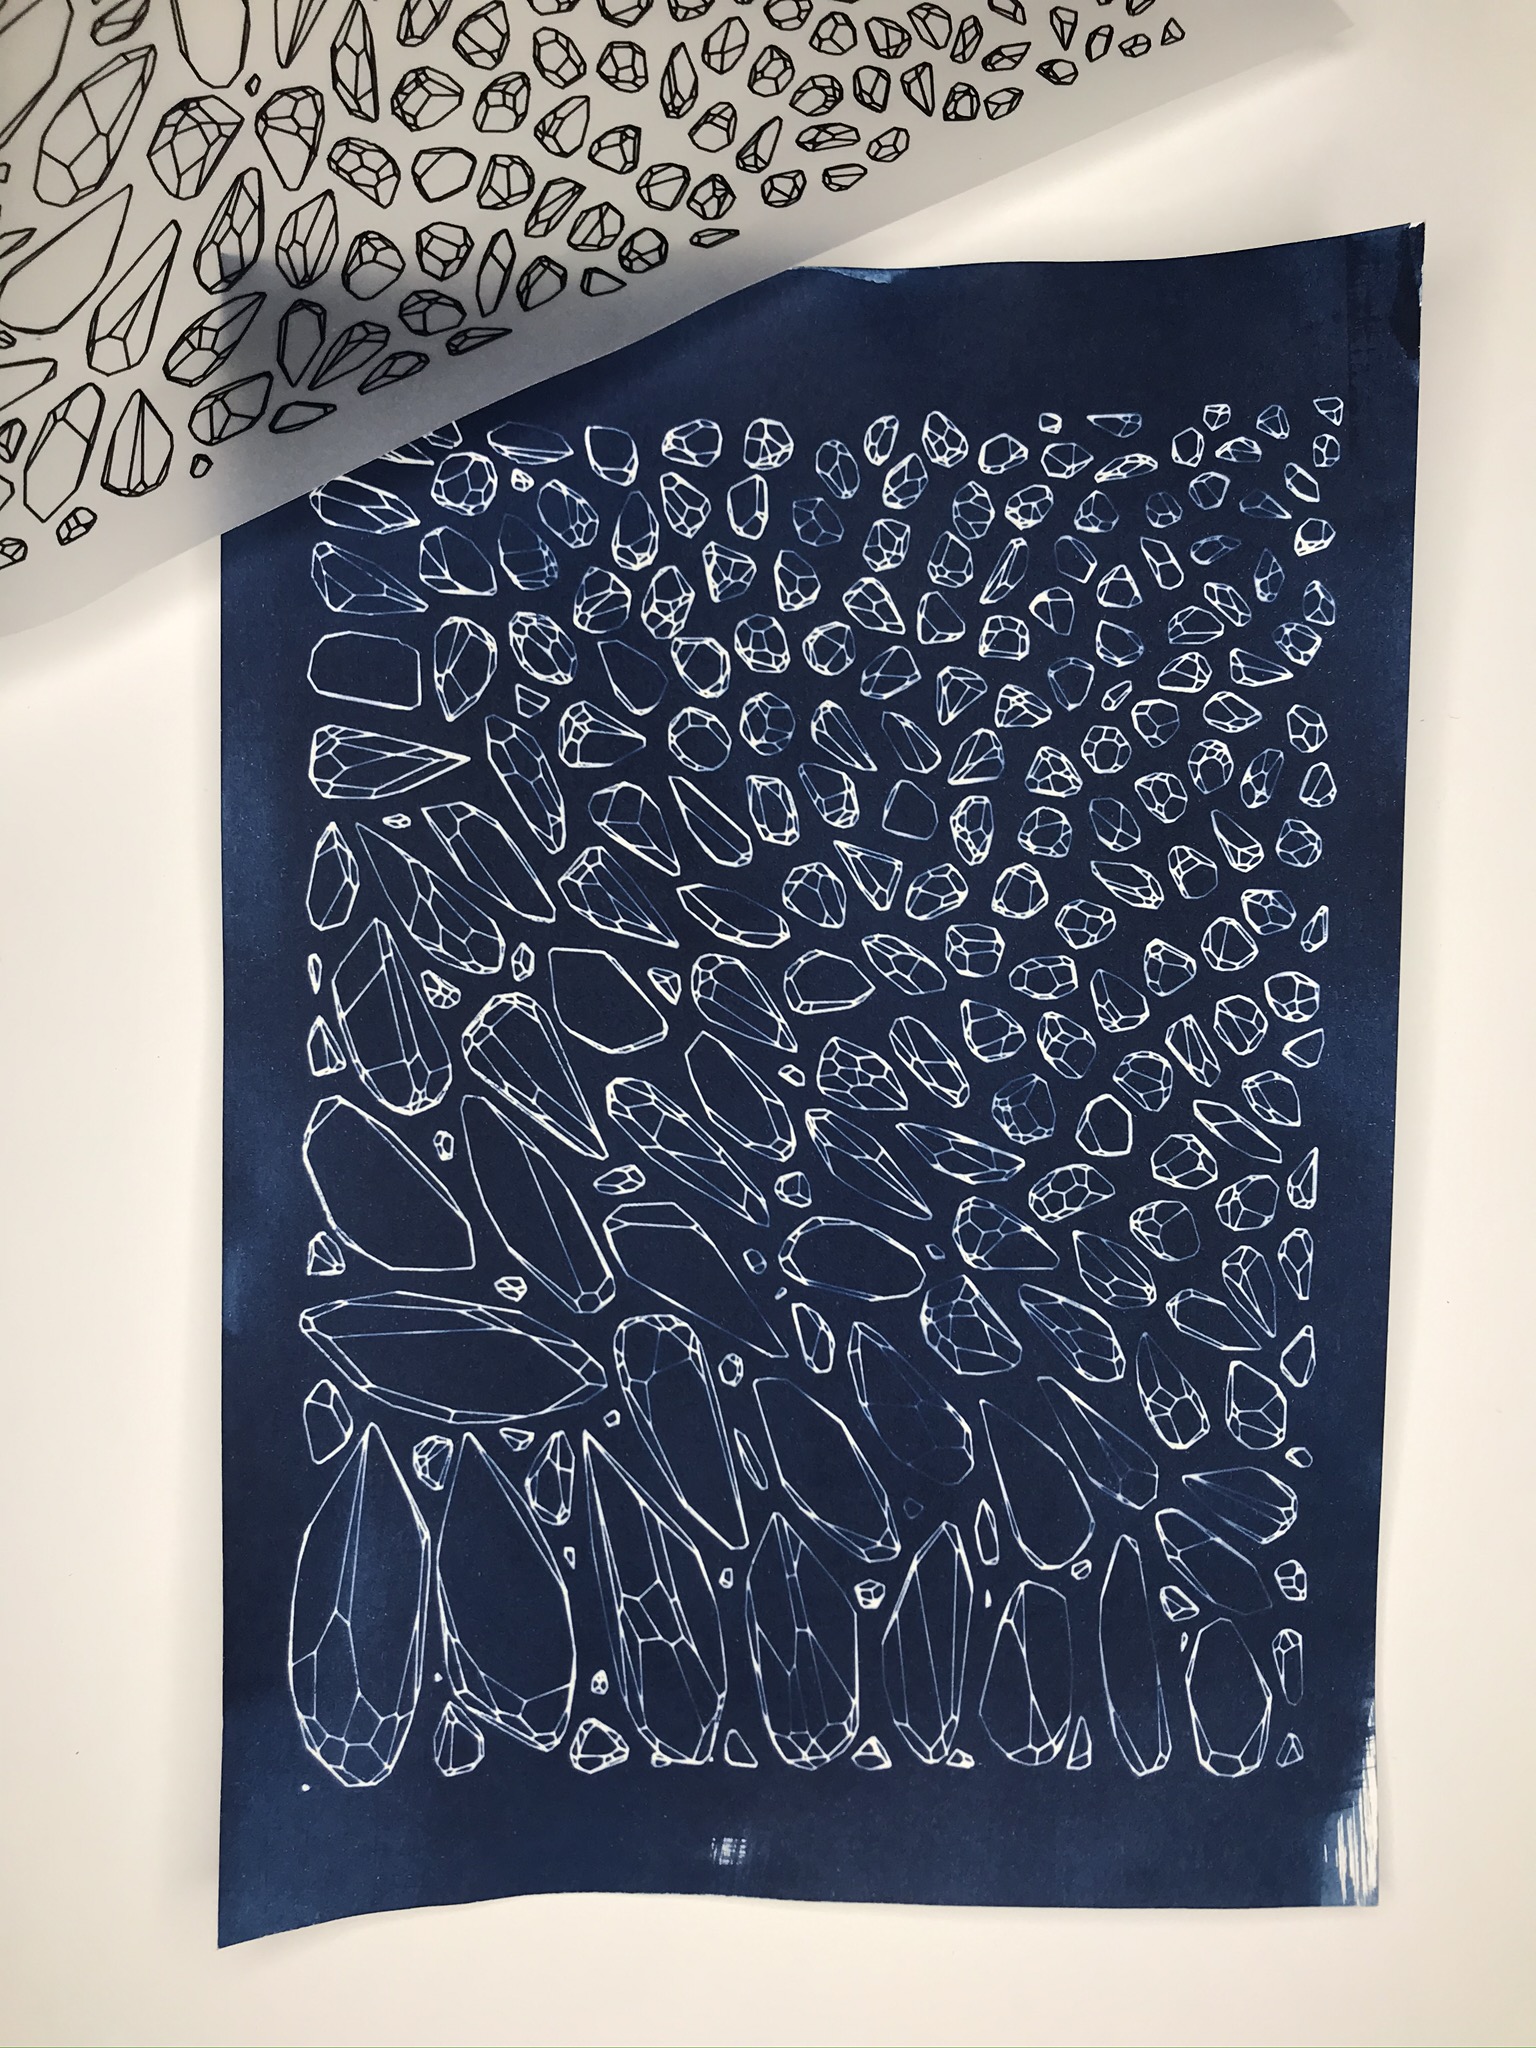
Plants are lovely and it is a nice callback to pioneer Anna Atkins, but my journey started with blueprints. And the story it’s tied to is essentially one of loss. The broken series tries to capture some of that.
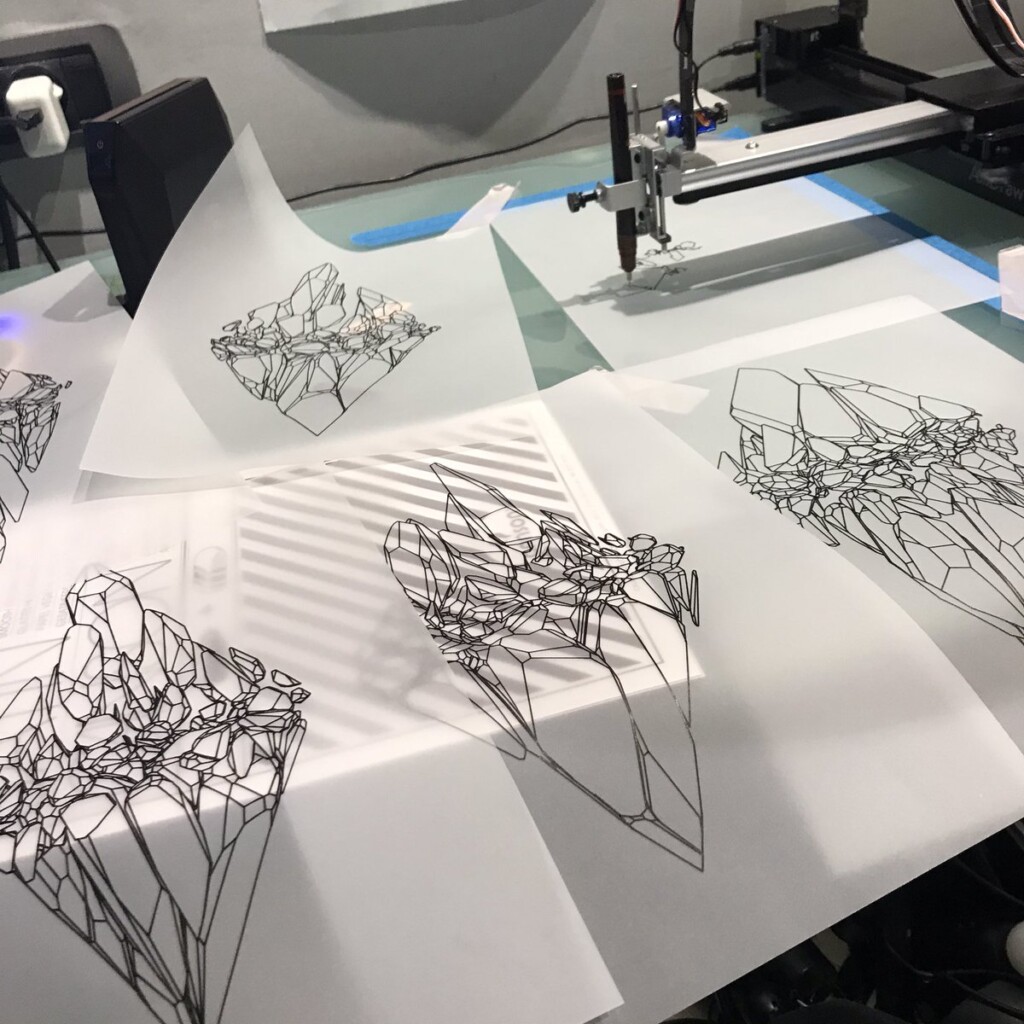
Randomly fragmented geometry is generated, full of angles, little details, interesting features, but ultimately something broken. What follows is a visual recipe for one of the subsets, shard.

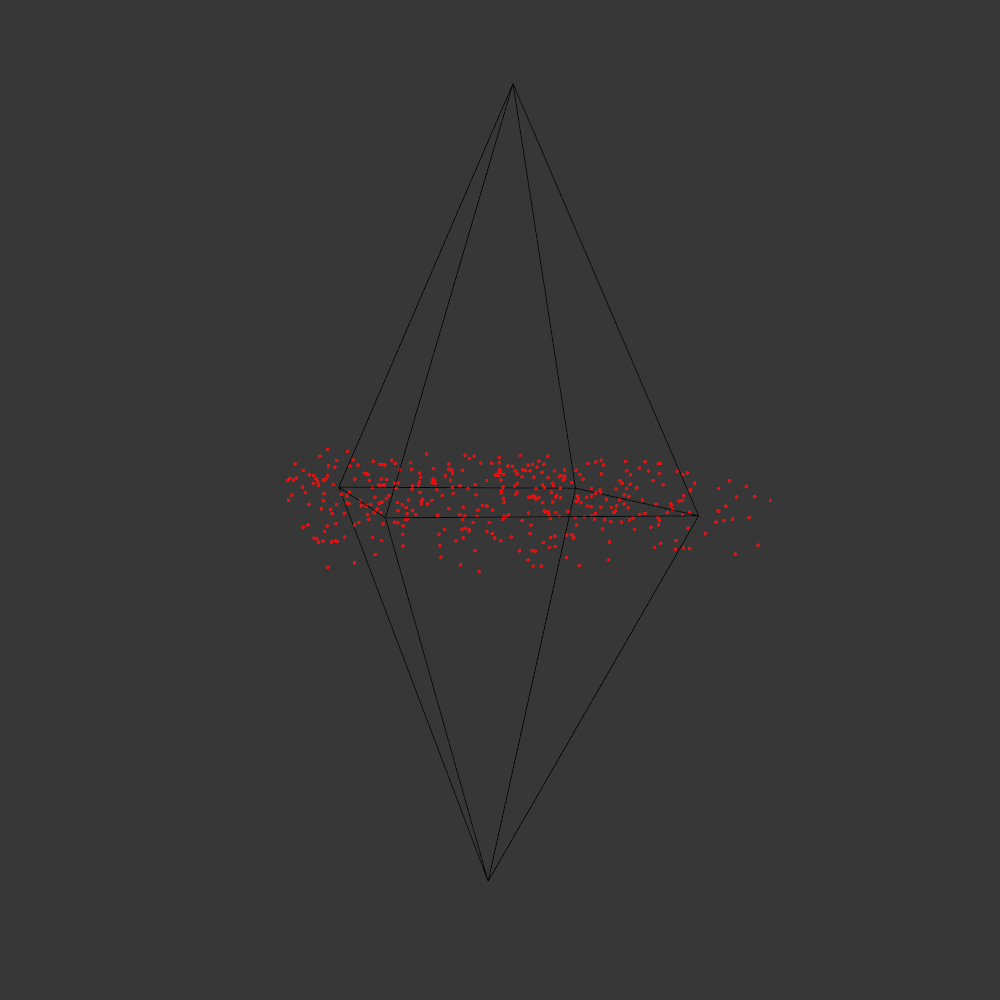
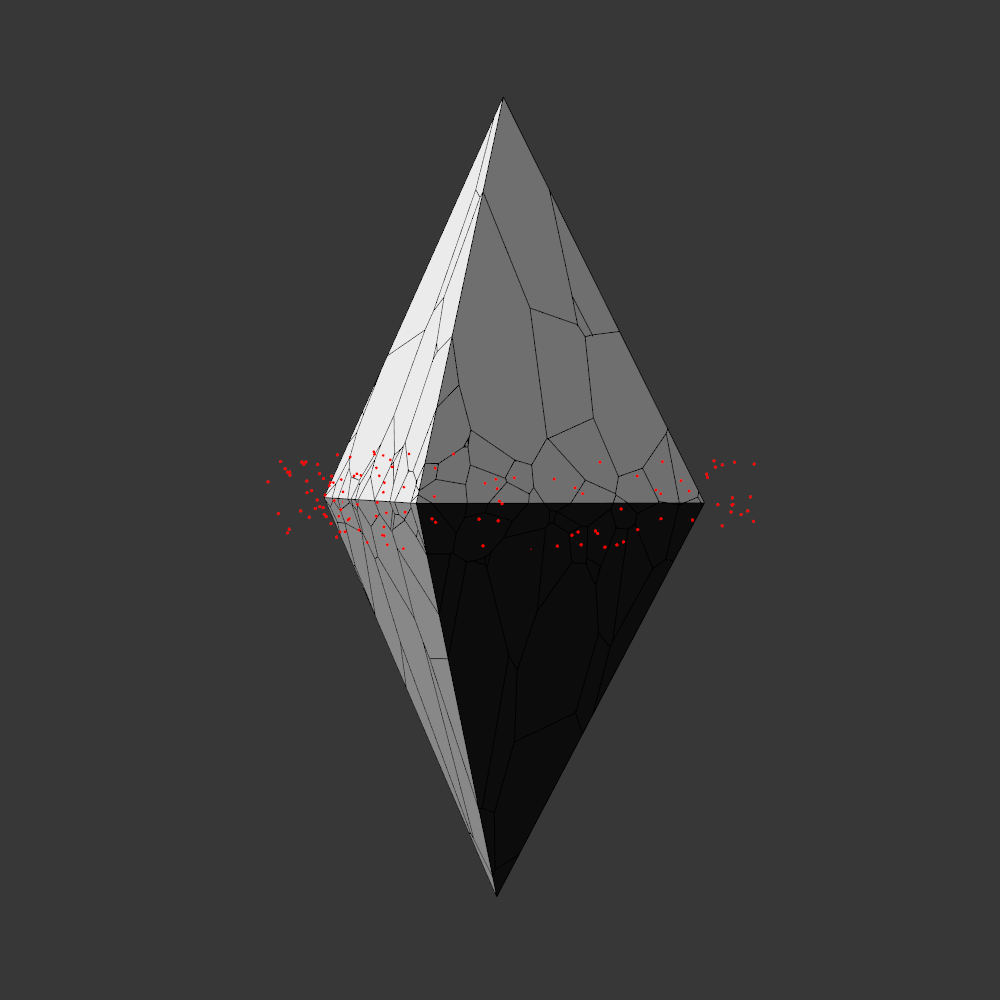

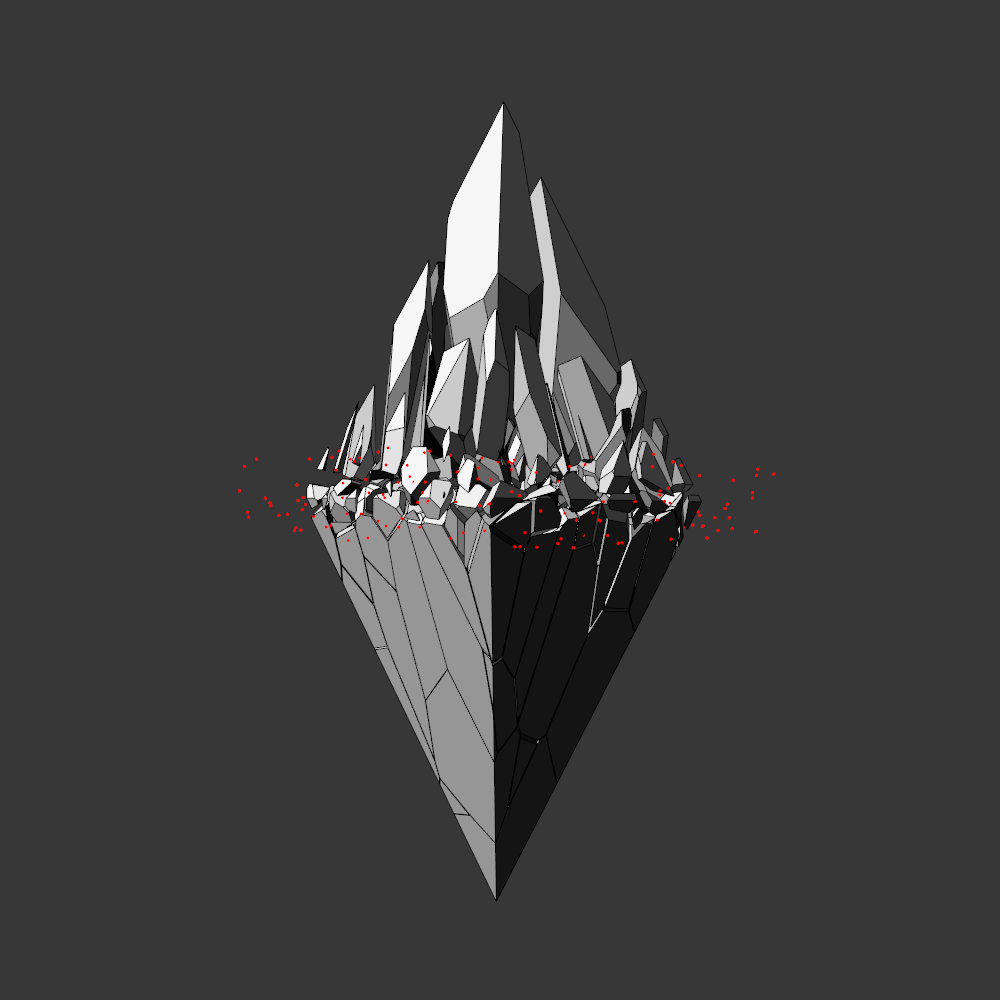

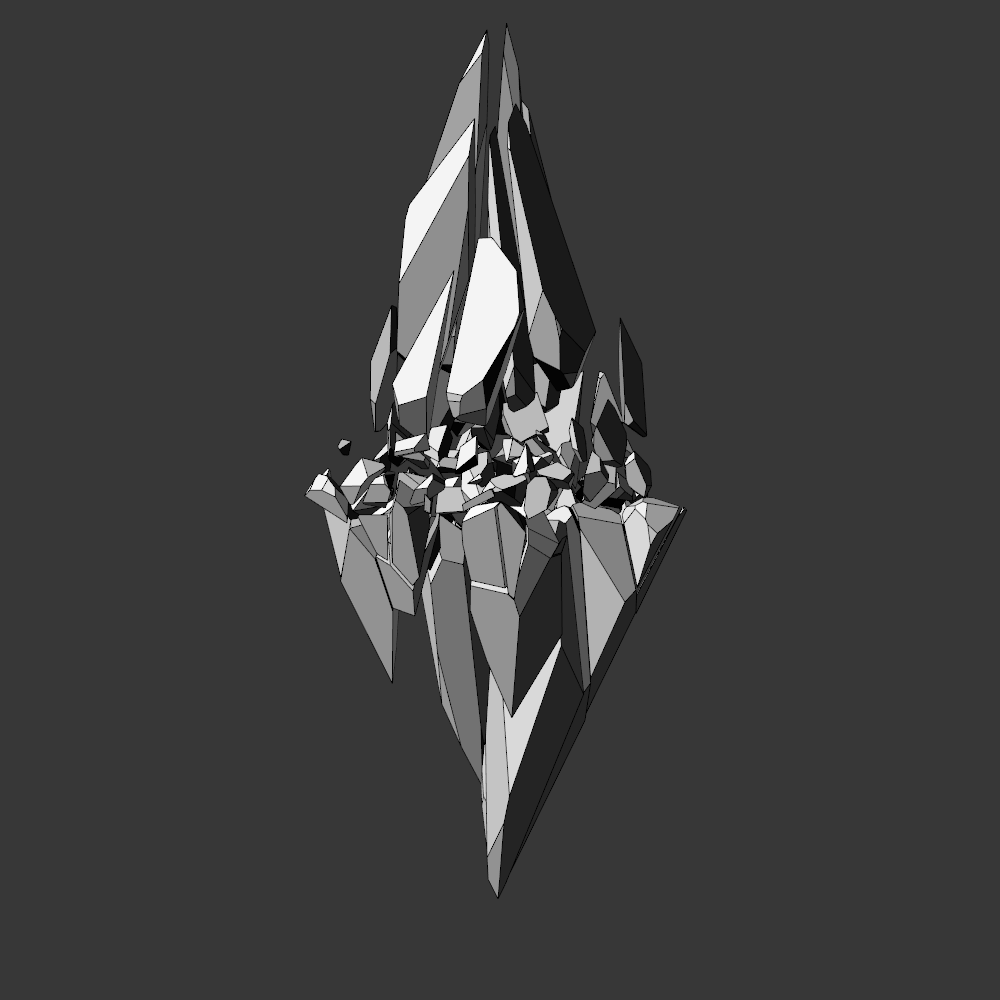
Although the “real” code builds on my HE_Mesh library and is less shareable, a library-less Processing prototype can be found here: link.
Next the broken geometry is converted in a flat hidden line plot. To extract the visible edges a brute force algorithm is used: rays are scanned from the camera to densely sampled points along all edges. Each ray is intersected with the mesh to check if the points are visible or not. The visible segments are exported to SVG and the file is optimized for plotting with vpype.

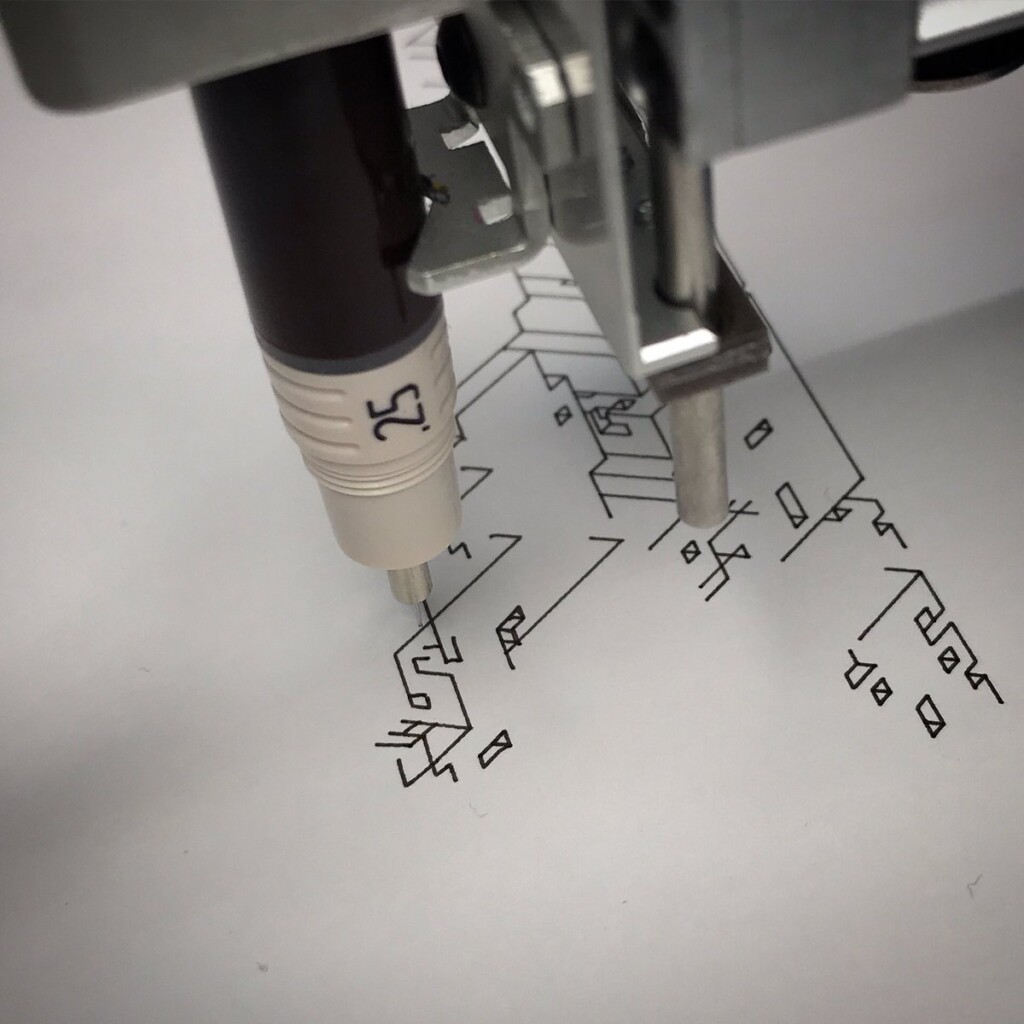
To stay true to the blueprint concept, these plots are made with a Rotring 0.50 rapidograph technical pen on tracing paper.
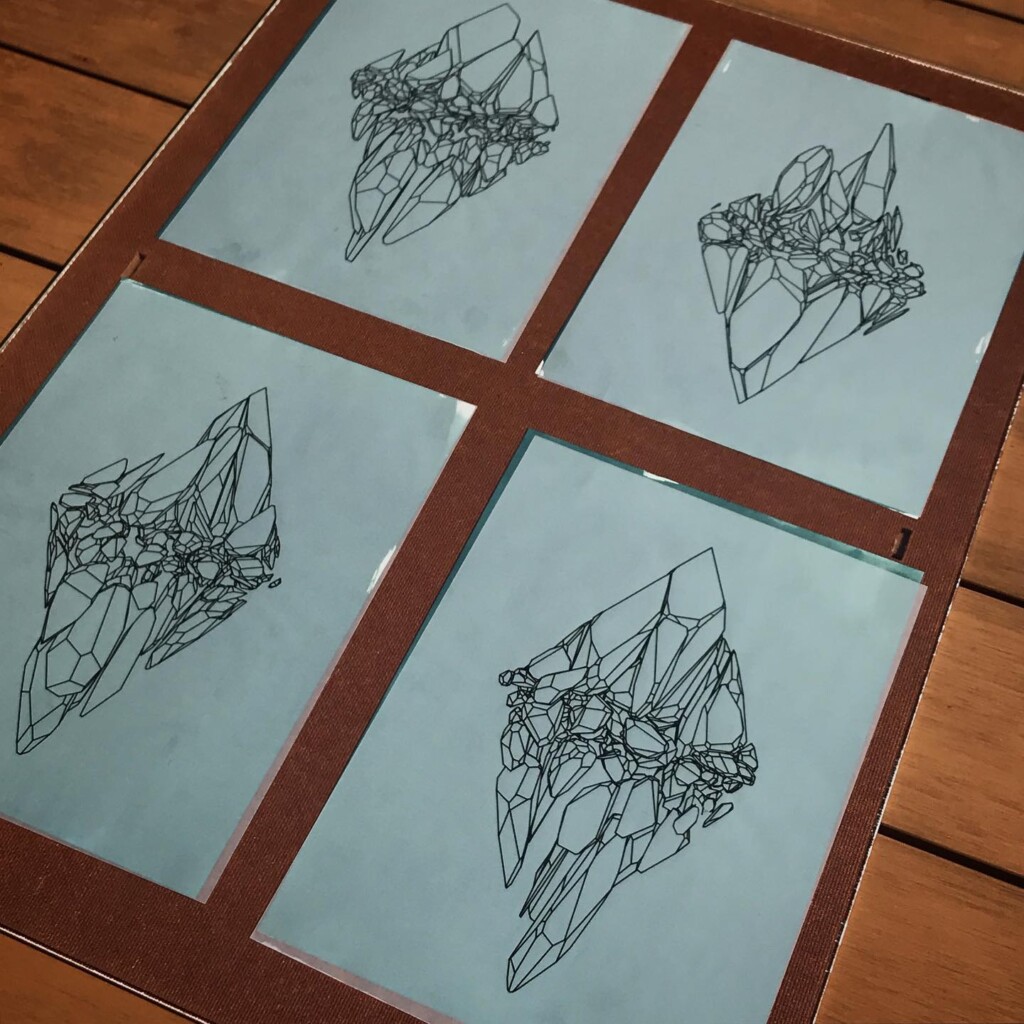
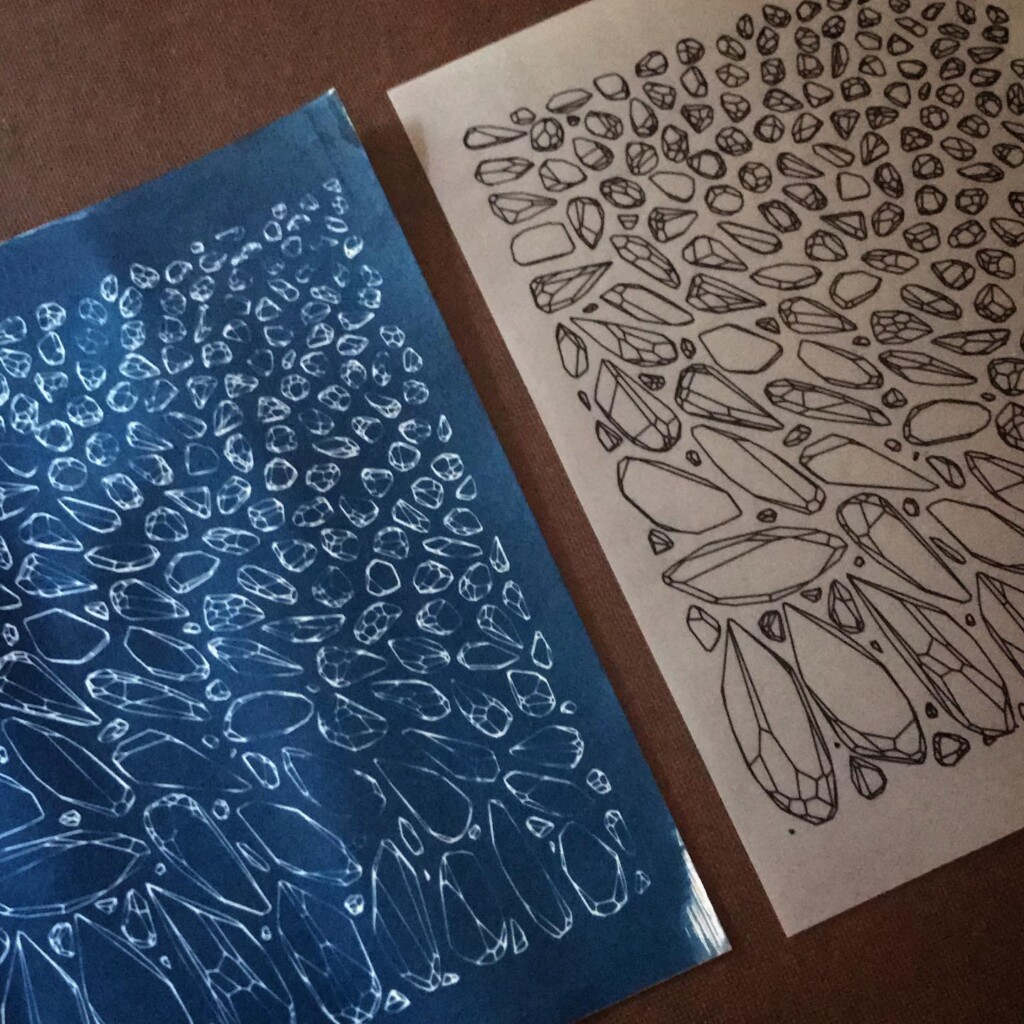
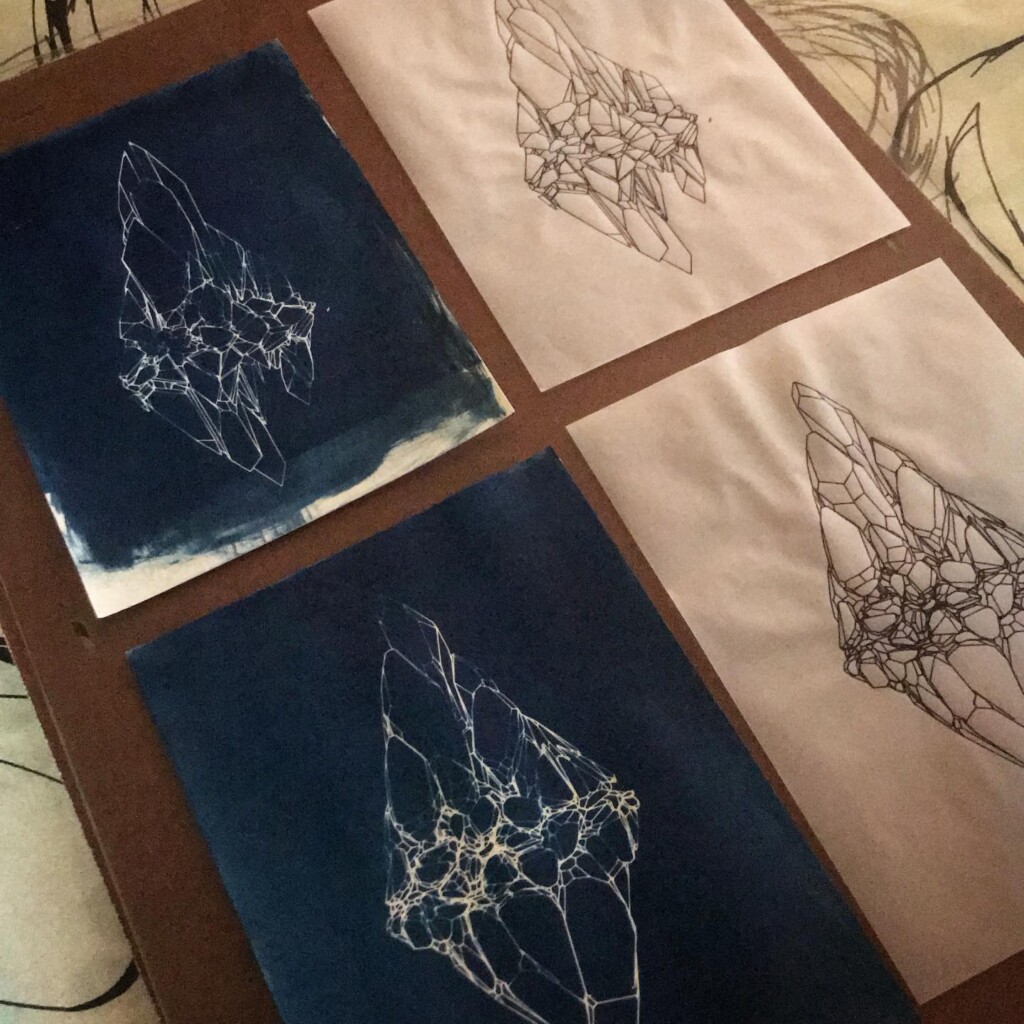
Tracing paper lends itself well to the cyanotype process, it’s flat and lets through most of the light. Exposure times need to be longer to account for the added absorption but I found 10 minutes in bright sun suffices.
One thing I did have to adjust a bit was the concentration of ferric ammonium citrate. I found that if I halved it from the classical formula, to about 10 grams per 100 ml, the fine lines were better preserved. Sampling size of my experiments is too low to offer this as a definite conclusion though, I might just as well have fumbled some part of the process.
Broken, blueprint
The result can be seen as a nice analog exploration of a digital construct, with the added advantage of introducing daylight into the life of a creative coder.
I think it is clear to whom these pieces are dedicated. He is no longer here to see me mess with technical pens and tracing paper – and shake his head at the frivolity of it all.
I really wish he was…